


5
6. Connecting the System
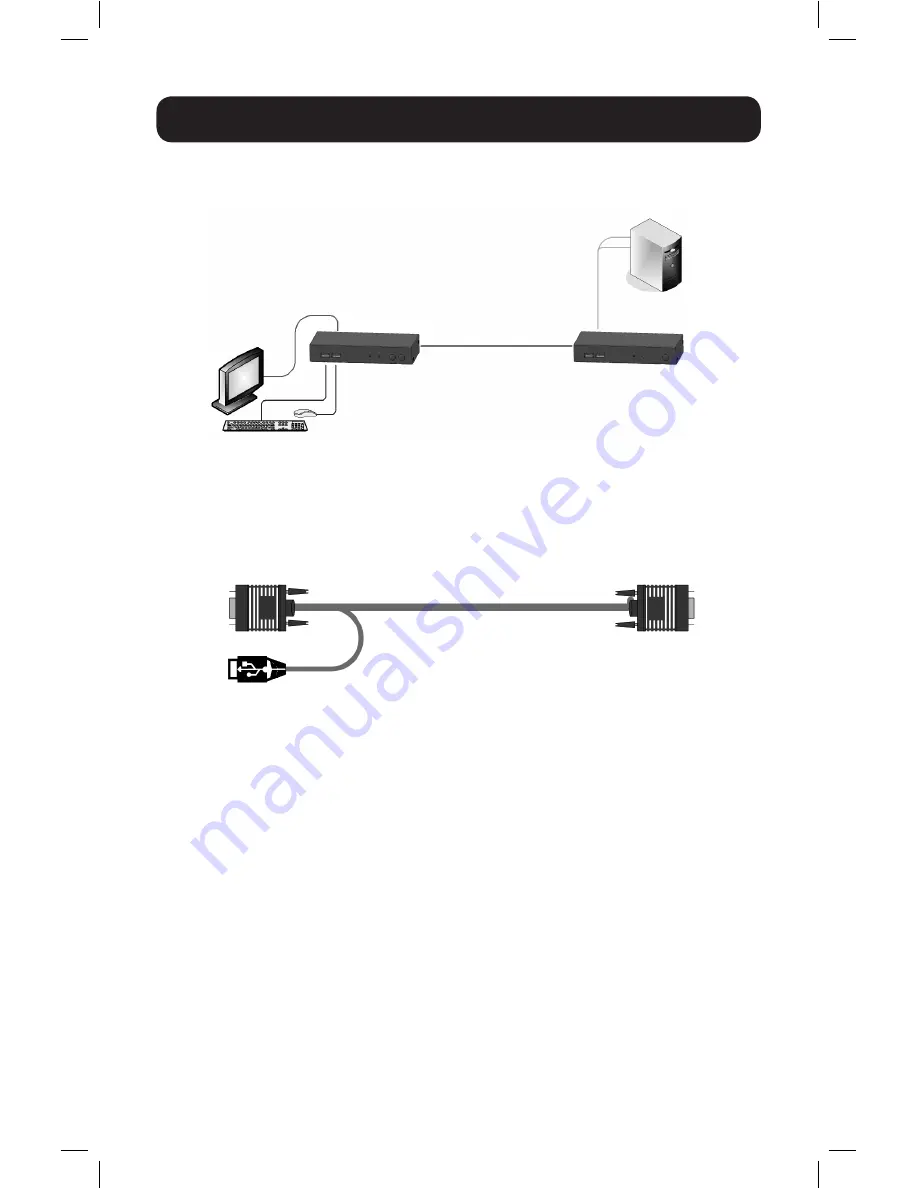
Figure 6-1: KVM Extender USB as an extender
Figure 6-2: VGA + USB cable
When using the system as an extender, connect the system as shown in Figure 6-1.
The connections are explained below.
Transmitter
Receiver
Cat5 Cable -
500 ft. (150 m)
Extended User
Position
VGA + USB
Cable
6.1 Connecting the Transmitter
Connect a VGA + USB cable (Figure 6-2) to the Transmitter and a computer. Connect
the HD15 connector to the Transmitter Computer port and connect the VGA and USB
connectors to the local computer Monitor and USB ports.
6.2 Connecting a KVM Workstation to the Receiver
Connect a KVM workstation to the Receiver. Connect a keyboard and mouse to the
Receiver Keyboard and Mouse USB ports. Connect a monitor to the Receiver Monitor
port.
6.3 Connecting the System Cable
Connect the System cable CAT5/6/7 FTP cable to the System ports of the Transmitter
and Receiver.
6.4 Connecting to the Power Supply
The Transmitter receives its power from the connected computer and does not
generally need an external power supply. However, when the Transmitter is connected
to a KVM switch, it may need an external power supply. If additional power is needed,
use a 0DT60001-AC-INT (not included, purchase separately).
Connect the Receiver to utility power with the external power supply provided.
17-04-194-9336F4.indb 5
5/1/2017 3:05:26 PM


