


Not for
Reproduction
26
Installation
B
A
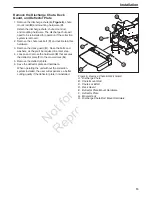
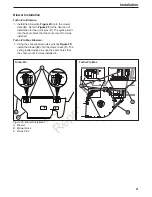
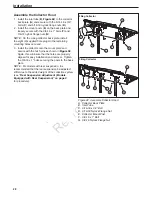
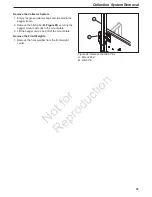
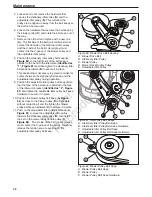
Figure 39. Install Mount Posts & Hitch Pins
A. Mount Post
B. Hitch Pin
C. Top 3/8-16 Mounting Hardware
C
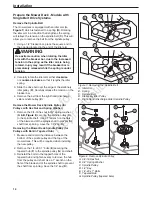
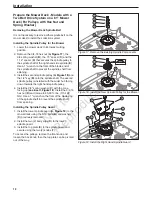
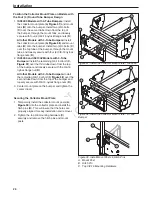
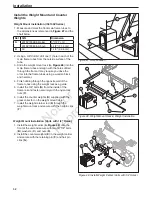
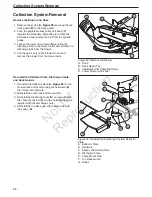
Position the Collector Mount Plate on Models with
the Four (4) Round Tube Bumper Design
1.
ISX3300 Models with 4-Tube Bumpers:
Install
the collector mount plate (
A,
Figure 37
) and mount
tabs (
B
) onto the bumper. Install two (2) U-bolts
(
C
) over the second tube down from the top of
the bumper, through the mount tabs, and loosely
secure with four (4) 3/8-16 nylock flange nuts (
D
).
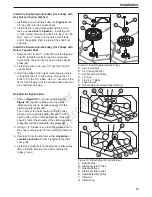
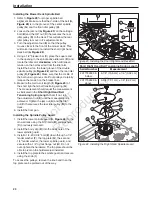
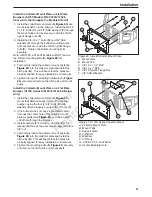
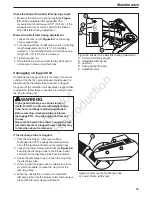
All other Models with 4-Tube Bumpers:
Install
the collector mount plate (
A,
Figure 38
) and mount
tabs (
B
) onto the bumper. Install two (2) U-bolts (
C
)
over the top tube of the bumper, through the mount
tabs, and loosely secure with four (4) 3/8-19 nylock
flange nuts (
D
).
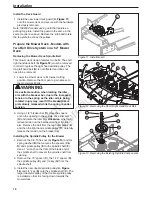
2.
ISX3300 and IS3100Z Models with 4-Tube
Bumpers:
Install the remaining 3/8-16 U-bolt (
C,
Figure 37
) over the third tube down from the top
of the bumper and loosely secure with the 3/8-16
nylock flange nut (
D
).
All other Models with 4-Tube Bumpers:
Install
the remaining 3/8-16 U-bolt (
C,
Figure 38
) over the
second tube down from the top of the bumper and
loosely secure with 3/8-16 nylock flange nuts (
D
).
3. Center mount plate on the bumper and tighten the
center U-bolt.
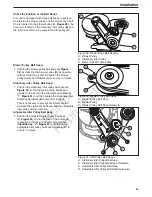
Securing the Collector Mount Plate
1. Temporarily install the collector mount posts (
A,
Figure 39
) into the collector plate and install the
hitch pins (
B
). This will insure that the holes are
properly aligned for easy installation and removal.
2. Tighten the top 3/8 mounting hardware (
C
)
securely and remove the hitch pins and mount
posts.
B
A
D
C
Figure 37. Install the Collector Mount Plate - ISX3300
B
A
D
C
Figure 38. Install the Collector Mount Plate - 4-Tube
Bumper


