


Not for
Reproduction
22
Installation
A
E
B
C
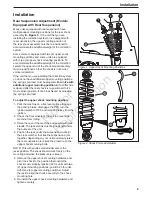
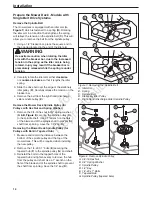
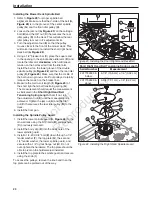
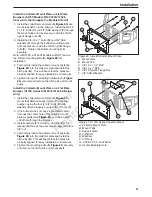
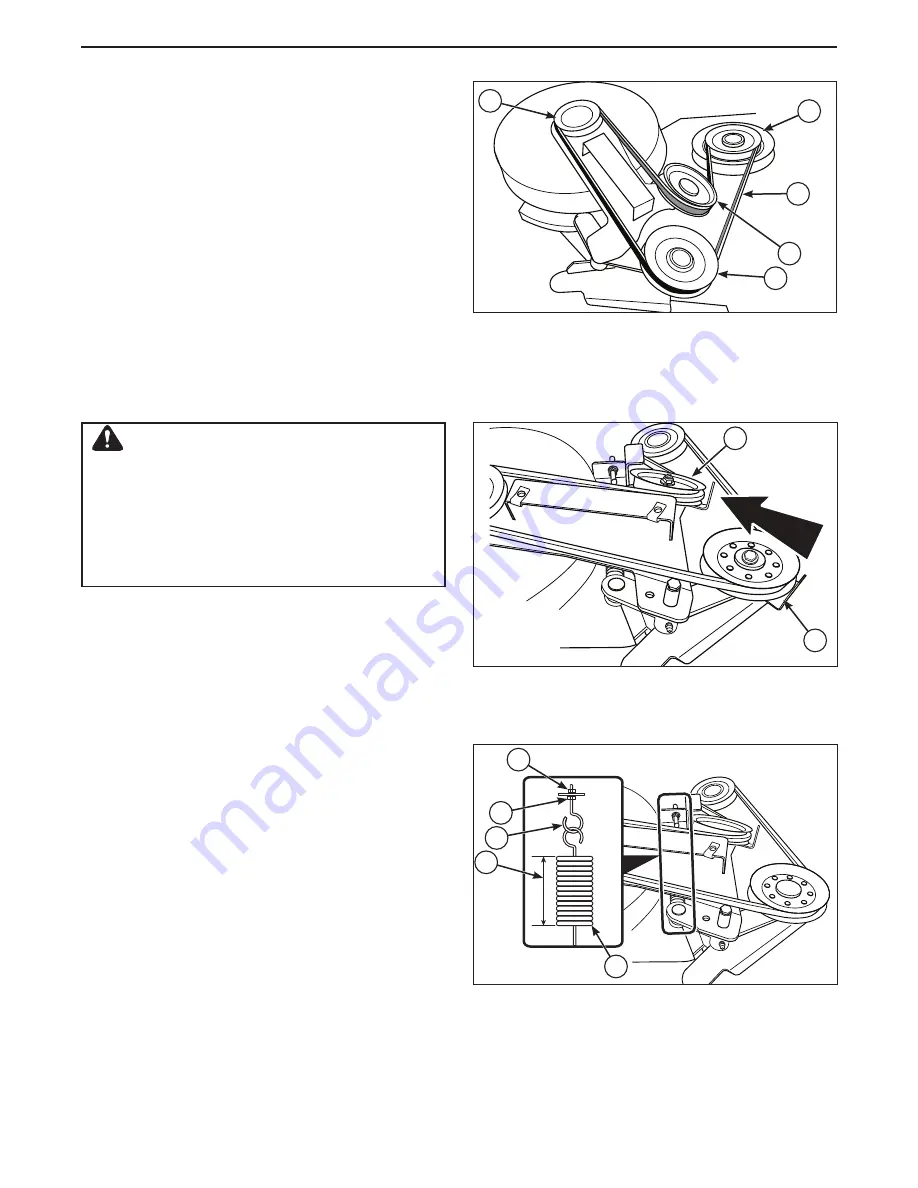
Figure 26. Blower Drive Belt Routing
A. Blower Drive Belt
B. Stationary Idler Pulley
C. Blower Pulley
D. Mower Deck Double Pulley
E. Adjustable Idler Pulley
D
2. Install the blower drive belt (
A,
Figure 26
). The
flat side of the belt (colored black) must contact
the flat side of the stationary idler pulley (
B
) and
the V-side of the belt (colored gray) must contact
the the V-goove of the blower pulley (
C
), and the
adjustable idler pulley (
E
).
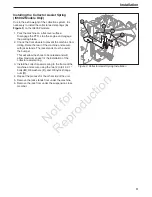
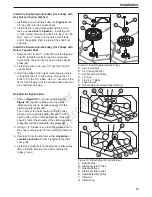
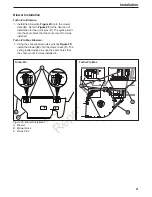
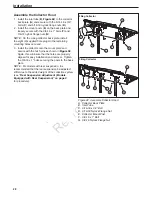
Figure 27. Installing the Belt
A. Adjustable Idler Pulley Belt Keep
B. Stationary Idler Pulley
A
B
B
A
D
E
C
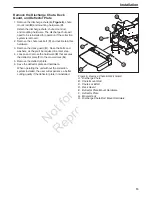
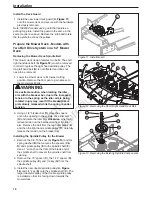
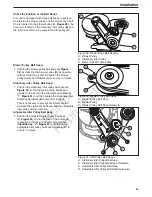
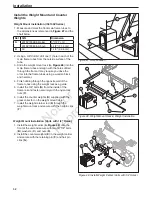
Figure 28. Blower Drive Belt Idler Spring Adjustment
A. Coil-to-Coil Spring Length
B. Adjustable Idler Spring
C. Jam Nut
D. Spring Anchor Eyebolt
E. Adjustment Nut
WARNING
Use extreme caution when pushing on the
adjustable idler pulley belt keep, due to
the increased tension in the spring as the
adjustable idler pulley belt keep is being
moved. Injury may result if the adjustable idler
pulley belt keep is prematurely released while
the spring is under tension.
3. Push on the adjustabler idler pulley belt keep (
A,
Figure 27
) to move the adjustable idler pulley
towards the stationary idler pulley (
B
). Install the
belt on the mower deck double pulley (
D,
Figure
26
). The V-side of the belt (colored gray) must
contact the V-groove of the pulley. Carefully
release the tension you are exerting on the
adjustable idler pulley belt keep.
Check the Blower Drive Belt Idler Spring Length
1. Measure the coil-to-coil spring length (
A,
Figure
28
) of the adjustable idler spring (
B
). The
measurement should equal 6-1/2” (16,5 cm). If the
measurement is not correct, perform the
Blower
Drive Belt Idler Spring Adjustment
.
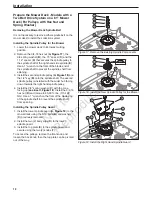
Blower Drive Belt Idler Spring Adjustment
1. Loosen the jam nut (
C
) on the spring anchor
eyebolt (
D
).
2. Turn the adjustment nut (
E
) until a coil-to-coil spring
length measurement of 6-1/2” (16,5 cm)(
A
) is
achieved.
3. Tighten the jam nut.


