


5
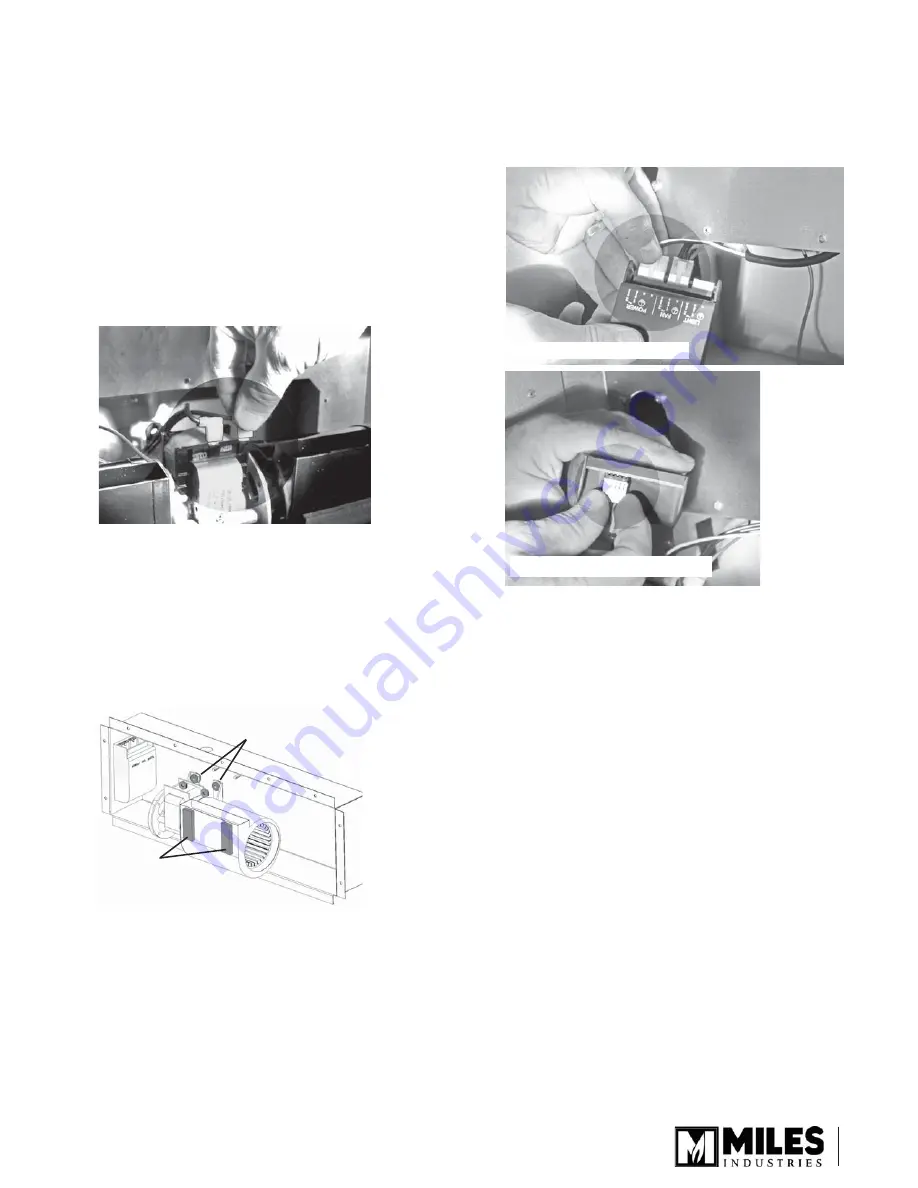
Fan module to receiver connector
Fan module to fan connectors
Rubber grommets and
threaded nuts (4)
Foam pads (2)
Removing the fan or control module
If you need to replace the fan or the control module
from their enclosure, proceed as follows.
1.
Removing the fan. The fan is fi xed to its enclosure
via 4 threaded studs.
a) Undo the 4 threaded nuts then grab the fan and
pull it out carefully as it is still connected to the
control module.
b) To disconnect the fan, remove the two “L”
shaped connectors on top of the fan motor
and the ground wire.
Note: Grab the whole connector when
disconnecting—DO NOT pull on the wires!
c) Disconnect the green ground wire from the fan
itself using a 9 mm wrench.
NOTE: If the fan needs to be replaced, make
sure the replacement is fi tted with foam pads
and rubber grommets and secure using 4
threaded nuts as this allows the fan to be tight
within the enclosure to avoid any vibration when
functioning.
2.
Removing the fan control module. The module is
held in place by a piece of
Velcro
.
Disconnect the power, the fan, and the receiver
connectors to release the module.
Note: Grab the whole connector when
disconnecting—DO NOT pull on the wires!
3.
Reconnect and reinstall the module and the fan
after servicing if disconnected.
4.
Refi t the fan enclosure to the back of the appliance
(9 screws).
5.
Rethread the wire from the fan control module to
the receiver and plug it to the receiver as indicated
on page 3 of this manual.
6.
Plug the fan in its electrical outlet.
7.
Test the fan function as indicated on page 3 of this
manual to ensure all the connections are working.
8.
Refi t the left side access panel to the appliance (5
screws).
9.
Refi t the appliance in the cavity.
10.
Refi t the vent plate on top of the appliance and fi x it
in place (2 screws).
11.
Refi t the front and trim which were previously
removed to access the fan.