MiLAN Raven MIL-RCS10A Скачать руководство пользователя страница 3


Compare the contents of your Raven Converter Chassis package with the standard checklist 
above. If any item is missing or appears damaged, please keep the carton and original 
packaging materials if possible in case you need to return the switch for repair. 

2. Hardware Description 


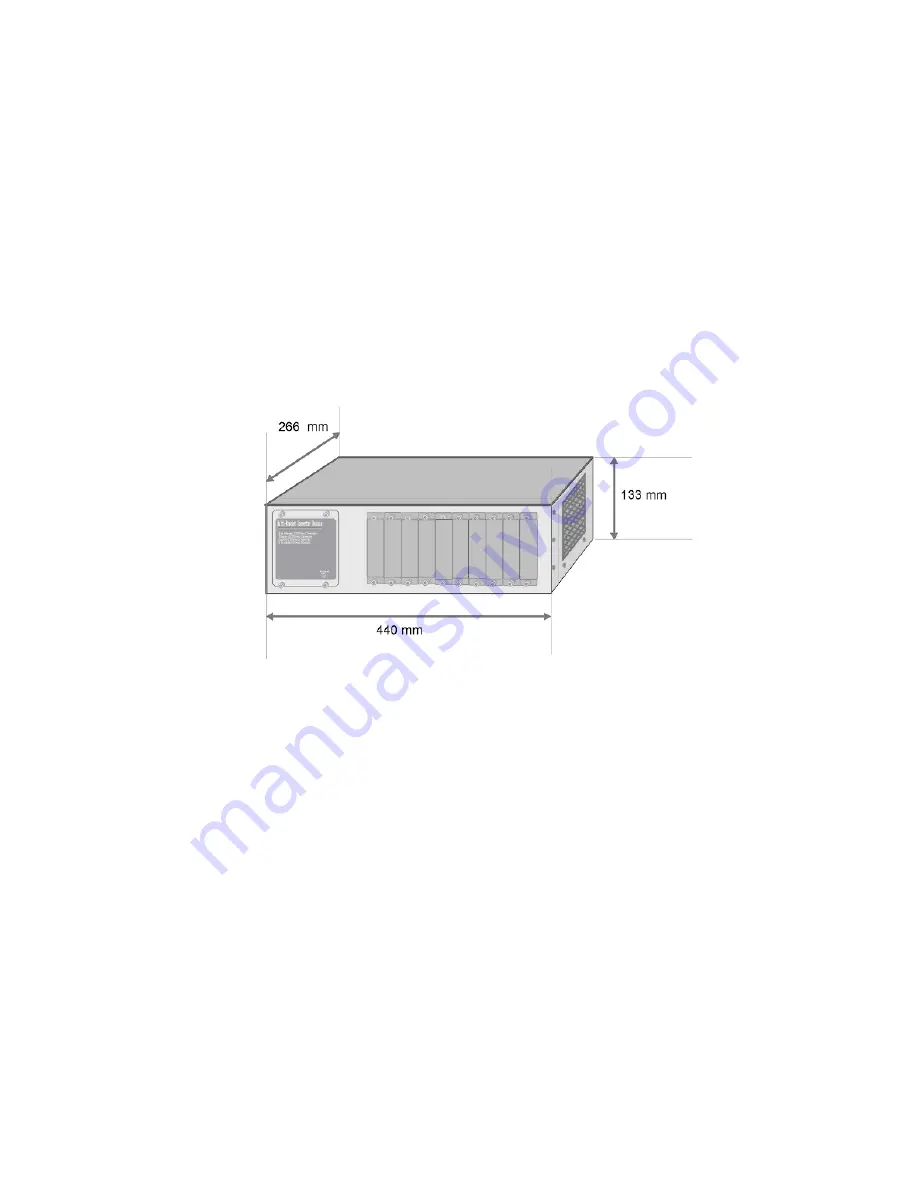
The Raven Converter Chassis is a bracket unit, and its chassis contains 10 slots for optional 
bracket converters. The Physical Dimensions of the Raven Converter Chassis are 440mmX 
266mmX 133mm.   


Figure 2-1. Physical Dimensions of the Raven Converter Chassis     


Front Panel 


The Front Panel of the Raven Converter Chassis contains 10 slots for optional bracket 
converters and LED to indicate power supply status.   


P/N 90000413 Rev A        

Содержание Raven MIL-RCS10A

Страница 1: ...The Raven Media Converter Chassis Installation MIL RCS10A 10 Slot chassis for Raven Converters AC power Guide MIL RCS10D 10 Slot chassis for Raven Converters DC power P N 90000413 Rev A...

Страница 2: ...connectivity to be more flexible All converter units in the Chassis are also hot swappable units Package Contents Raven Converter Chassis Rack mount kit Power cord for AC unit 4 rubber feet Warranty...

Страница 3: ...pair 2 Hardware Description The Raven Converter Chassis is a bracket unit and its chassis contains 10 slots for optional bracket converters The Physical Dimensions of the Raven Converter Chassis are 4...

Страница 4: ...Chassis The LED is to indicate power supply status Real Panel The 3 pronged power plug On off switch and ventilation fan are located at the Rear Panel of the Raven Converter Chassis displayed in Figur...

Страница 5: ...Attach rack mount ear on both sides of the modular converter by using a screwdriver to secure the rack mount ears See Figure 3 11 Figure 3 11 Attach rack mount ears on both sides of the modular conve...

Страница 6: ...er footpads to each corner on the bottom of the Chassis These pads cushion the switch against shock vibration 3 Connect the power cord The power supply is self adjusting for AC input power between 110...

Страница 7: ...ching Mounting Brackets 2 After attached both mounting brackets position the switch in the rack by lining up the holes in the brackets with the appropriate holes on the rack Secure the switch to the r...

Страница 8: ...rial and or workmanship for a period of five years from the original factory shipment date Any warranty hereunder is extended to the original consumer or purchaser and is not assignable MiLAN Technolo...

Отзывы: