Cordless Drill
3/16” Drill Bit
9/64” Drill Bit
Magnetic Apex Driver Bit - 5/16”
3/8” Open-End Wrench
5/16” Socket – 1/4” drive
Ratchet - 1/4” drive
Scratch Awl
Sharpie Pen
Rust Preventative Spray Paint
Loctite (Optional)
Acetone (Optional)
1. Record
ESN and MSN-D from device label and customer’s defined
trailer number.
(Fig.1)
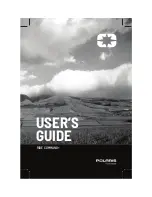
Install Method #1:
2. Select
a device mounting location on the trailer top rail.
(Fig.2)
Optional Tools:
Fig. 1
ESN & MSN-D
3. Place
the mounting flanges against the
trailer’s top rail so that round battery access
panel is on the left.
4.
Using the device mounting flanges as a
template,
mark
the location for each of the
mounting screws (4) onto the trailer’s top rail.
5.
At each marked location,
drill
a 9/64” hole.
6. Install
the four (4) mounting screws through the mounting flanges
and into the trailer’s top rail.
7. Tighten
the screws.
Fig. 2
IMPORTANT:
This device come pre-attached with a magnet taped on it to force power off of
device. Remove magnet when ready to start tracking. If magnet is not on device,
call MiFleet support at 1.866.5338 immediately for replacement device. Device
must be mounted facing up or down for optimum GPS reception and accuracy.
Installers must also check with the customer or third-party persons, who are in
charge of safety at the installation site, for any further requirements. Retain the
activation magnet - in order to disable reporting upon de-installation of device.
Before leaving or allowing the installer to leave, all vehicles should validate the
First Time Power Up Report Notification functionality on the MiFleet platform.
If the Platform does not report/show the Power Up Notification please have the
installer verify the removal of the Magnet and/or proceed to call MiFleet support
for questions and troubleshoot.