STEP 4
Now that the drive plate and wide drive rings have been removed, place a
3/16” collet into the collet holder. Insert the tip of the spindle, just above
the fork, into the collet. Once the collet is tightened, use a flat head
screwdriver to unscrew the spindle bolt. Then pull the various pieces
apart and place on your work surface.
STEP 5
You can now place the nose piece in a 13/32” collet. Unscrew the sheath
housing from it while simultaneously depressing the latch. This will
keep the flange on the nose piece from being caught up.
STEP 6
If you need to replace the latch on the sheath housing, place it over two
v-blocks. Hold a small punch or pin with a set of tweezers over one end
of the pin in the housing. Gently tap the pin out of the housing and
remove the latch and spring. The replacement latch kit is part# 40503.
STEP 7
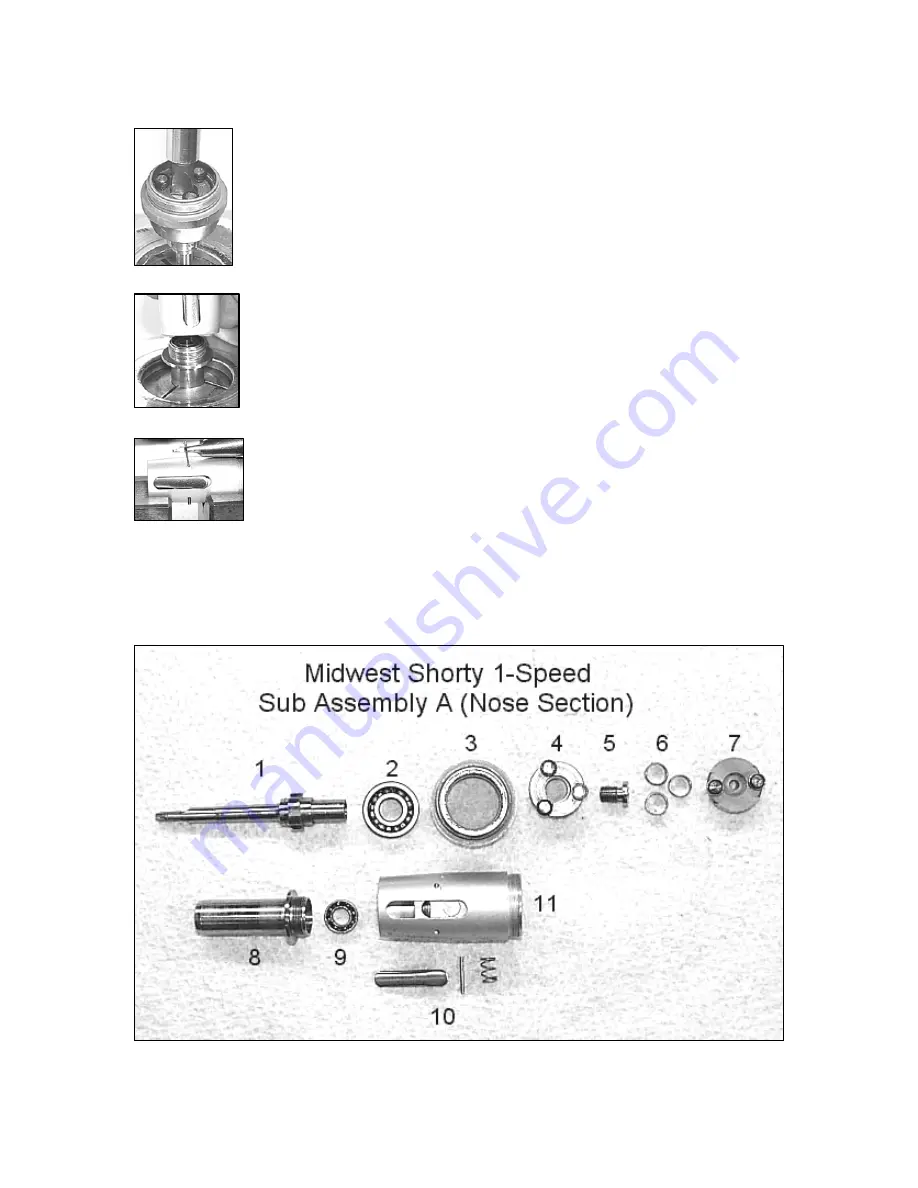
You can now place the component parts in your ultrasonic cleaner. After you clean the
parts, align them like the exploded view below and replace what is needed.


