MNBE-B, D, D3R, E Instructions
(continued)
Rev: A Page 2 of 10
IMPORTANT SAFETY INSTRUCTIONS
SAVE THESE INSTRUCTIONS
- These instructions contain important safety and operating
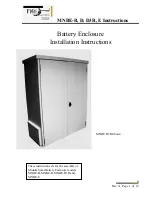
instructions for the MidNite Solar Battery Enclosure Size B, D, D3R and E for residential and
commercial applications.
If you do not fully understand any of the concepts, terminology, or hazards outlined in these
instructions, please refer installation to a qualified dealer, electrician or installer. These
instructions are not meant to be a complete explanation of a renewable energy system.
GENERAL PRECAUTIONS
WORKING WITH OR IN THE VICINITY OF A LEAD ACID BATTERY, SEALED OR
VENTED IS DANGEROUS. VENTED BATTERIES GENERATE EXPLOSIVE GASES
DURING NORMAL OPERATION. FOR THIS REASON, IT IS VERY IMPORTANT THAT
BEFORE SERVICING EQUIPMENT IN THE VICINITY OF LEAD-ACID BATTERIES,
YOU REVIEW AND FOLLOW THESE INSTRUCTIONS CAREFULLY.
If service or repair should become necessary, contact MidNite solar Inc. Improper servicing may
result in a risk of shock, fire or explosion. To reduce these risks, disconnect all wiring before
attempting any maintenance or cleaning. Turning off the inverter will not reduce these risks.
Solar modules produce power when exposed to light. When it is not possible to disconnect the
power coming from the Photovoltaics by an external means such as a combiner, cover the
modules with an opaque material before servicing any connected equipment.
Never attempt to charge a frozen battery.
When it is necessary to remove a battery, make sure that the battery bank disconnect breaker is in
the off position and that the PV breakers, grid breakers and any other sources of power to the
inverter are in the off position. Then remove the negative terminal from the battery first.
To reduce risk of battery explosion follow these instructions and those published by the battery
manufacturer as well as the manufacturer of any additional equipment used in the vicinity of the
batteries. Before installing the battery enclosure, read all instructions and cautionary markings in
or on any connected electrical equipment.
Avoid producing sparks in the vicinity of the batteries when using vented batteries. Provide
ventilation to clear the area of explosive gases. Sealed AGM and Gel batteries do not under
normal conditions create explosive gases. Be especially cautious when using metal tools.
Dropping a metal tool onto batteries can short circuit them. The resulting spark can lead to
personal injury or damage to the equipment. Provide ventilation to outdoors from the battery
compartment when installing vented batteries such as golf cart T-105 batteries. The addition of a
spill tray is also a good idea.
Clean all battery terminals. Very high currents are drawn from the batteries; even a small amount
of electrical resistance can result in overheating, poor performance, premature failure or even
fire.

