


The following work should be completed in the office before you go to the future location of the device:
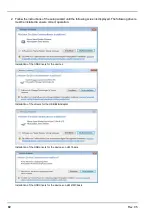
1. If necessary, create a customer on the myDatanet server (see "myDatanet Server Manual " 805002).
2. Within the selected customer, create a site/application for operation on the myDatanet server (see
"Creating the site" on page 107).
Note:
A "rapidM2M " type site or a site based on an IoT application that is compatible with the
"rapidM2M " site type must be created to operate the myDatalogEASY V3 .
3. Configure the created site/application according to your requirements (see "Site configuration" on page
82). If the site was not created based on an IoT application, you must determine the Data Descriptor
and Device Logic via the "Control" configuration section (see "Control" on page 83).
4. Connect the antenna (see "Connecting the GSM antenna" on page 64). The antenna is not included in
the scope of delivery and must be ordered separately.
5. Establish a connection so that the configuration of site is transferred to the myDatalogEASY V3 . If no
script has been loaded in the device yet, this can be achieved by inserting the power supply unit as
described in the chapter "Assembling the myDatalogEASY V3 " on page 47. If a Device Logic has
already been loaded in the device, execute the operations provided in the Device Logic to trigger the
establishment of a connection.
Note:
Note that all power supply units with an integrated and rechargeable energy store are delivered
with a maximum charge of 30% in accordance with applicable transport regulations and must therefore
be fully charged before being used for the first time (see "Charging the power supply unit" on page 249).
Note:
If you are using a power supply unit without an integrated energy store, the external supply or
charging voltage must be connected before inserting the power supply unit. Details on this are provided
in the chapter "Connecting the sensors, actuators and power supply" on page 60.
Note:
You can also skip this step, as a connection must also be initiated during the installation on site,
which transfers the configuration to the myDatalogEASY V3 at the same time.
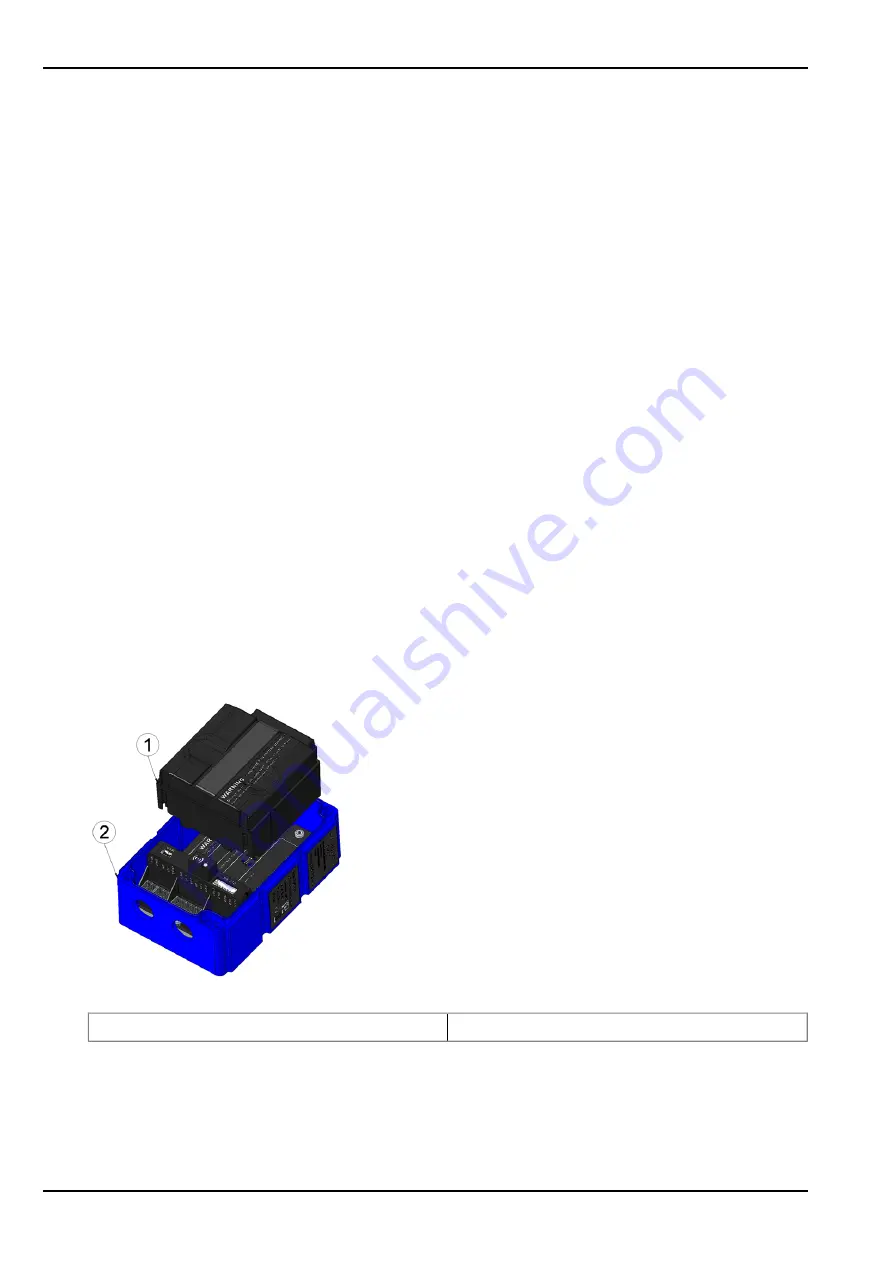
Inserting the power supply unit
1
Power supply unit
2
Base unit
6. Use the corresponding strap to remove the power supply unit from the myDatalogEASY V3 and then, if
used, disconnect the cabling for the supply or charging voltage from the device when in a de-energised
state, if possible.
78
Rev. 05
Содержание myDatalogEASY V3
Страница 2: ......
Страница 13: ...Chapter 2 Declaration of conformity Chapter 2 Declaration of conformity Rev 05 13 ...
Страница 14: ......
Страница 42: ......
Страница 76: ......
Страница 88: ......
Страница 102: ......
Страница 110: ......
Страница 116: ......
Страница 234: ......
Страница 244: ......
Страница 252: ......
Страница 254: ......
Страница 266: ......
Страница 276: ......


