background image

     9

Problems?

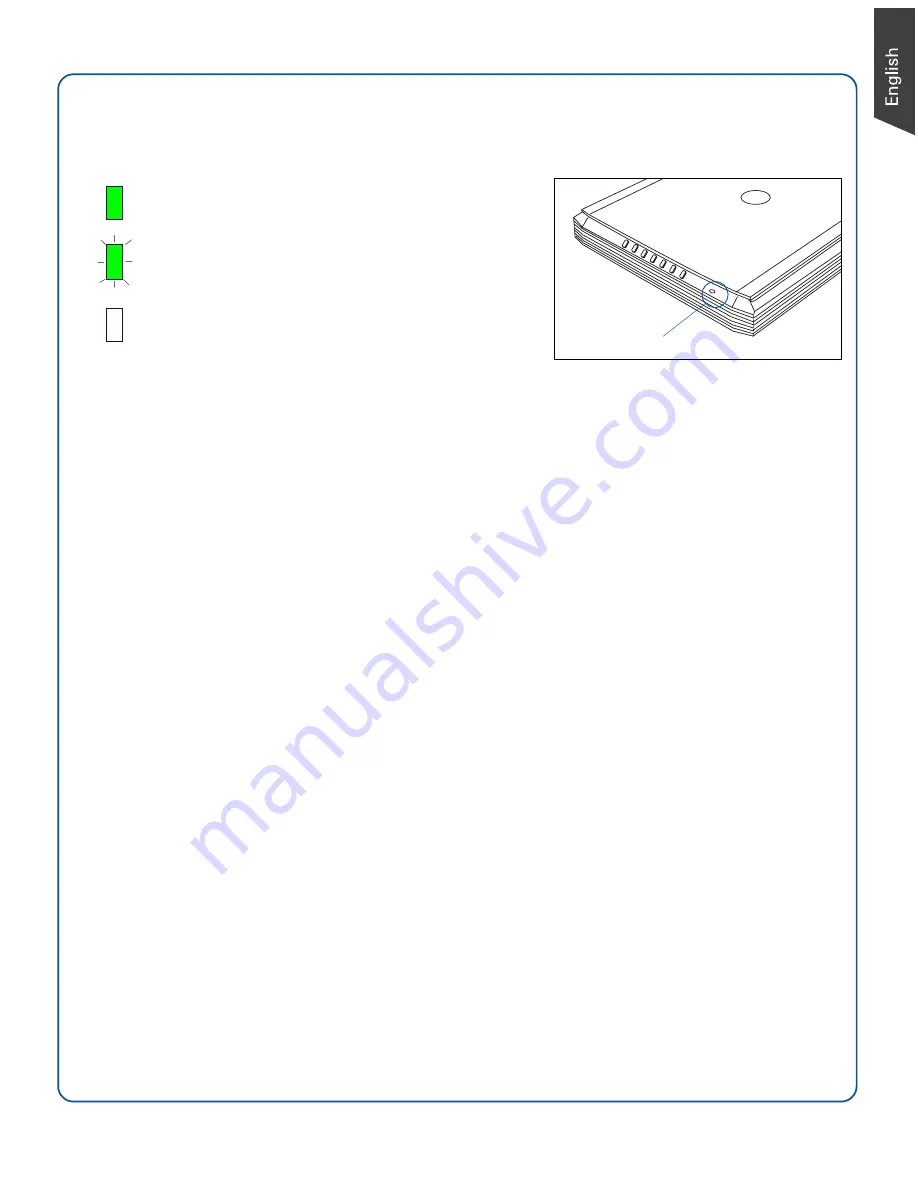
The LED on the button panel indicate the status of the scanner.

If you encounter any problems, check the section below and follow the suggested solution if your

problem is listed.  You may also want to go over installation steps 1 to 4 of this “Start Here”

document to make sure that you have followed all procedures properly.

1. No light comes on when the scanner is turned on.

Make sure your scanner is connected to your computer and plugged into a power source.

Make sure your scanner is detected by your computer.

2. Add/Remove Hardware Wizard appears on your screen.

Click the “Cancel” button and close the control panel. Disconnect the USB cable from the back of

your computer, and refer to the installation instructions in this guide.

3. When trying to scan, an error message appears on your screen that reads, “Can’t Find Scanners”.

Make sure your scanner is unlocked (see Step 3).

Make sure your scanner is connected to your computer and plugged in to a power source

(see Step 4).

Uninstall and reinstall the ScanWizard EZ or ScanPotter software.

4. After clicking scan, a blank screen appears.

Make sure your scanner is unlocked (see Step 3).

Uninstall and reinstall the ScanWizard EZ or ScanPotter software.

5. Having trouble scanning negatives or slides?

Make sure the LightLid 35 III is properly installed, with its connector securely connected to the

scanner’s 9-pin accessory port.

Make sure you place the LightLid 35 III with the film loaded properly on the scan bed. Do not block
the calibration area (as indicated in the “Using the LightLid 35 III” section).

From the 

ScanWizard EZ - Professional Mode

, go to the Preview window, then click the 

Scan

Material

 button to select either the 

Positive Film

 or 

Negative Film

 option.

From the 

ScanPotter

, go to the 

Scanner Settings 

column, then click the 

Scan Source 

drop-down

menu to select either the 

Positive Film 

or 

Negative Film 

option.

Uninstall and reinstall the ScanWizard EZ or ScanPotter software.

LED (green)

On

 - Ready to scan

Flashing

 - Scanning

Off

 - Scanner is off

Содержание ScanMaker i280

Страница 1: ...follow the on screen instructions to install the scanner driver and software B Restart your computer at the end of all software installation NOTE If the Microtek Software Installer screen does not com...

Страница 2: ...emove the yellow Step 3 sticker from your scanner B With the scanner power off tilt the back left corner of the scanner to see the locking switch at the bottom C Push the locking switch to the positio...

Страница 3: ...when the scanner is not scanning Scan Captures images that can be saved as files or sent to an image editing application Copy Scans the image and sends it to your printer E mail Scans the image and d...

Страница 4: ...onnect the LightLid 35 III 1 Remove the scanner lid 2 Ensure that the scanner is powered off then plug the connector of the LightLid into the scanner s 9 pin accessory port To load film A To load film...

Страница 5: ...finally perform the image scan with factory settings When done the scanned image can be saved in a file and delivered to the specified location Select preferences if necessary Before you start scannin...

Страница 6: ...ending on the film type you are using 5 Select the Scan Frame tool and choose the area to be scanned by sizing the marquee around the targeted area 6 Click the Overview button to perform a preliminary...

Страница 7: ...the image in grayscale Select Black White to scan the image in black and white b Select a desired resolution in the Resolution for your image output resolution c Select Automatic Detection or a desire...

Страница 8: ...fects Filter column and additional image correction tools Additional Adjustment column for your scanned image Click the Scan Settings button to switch back to the default control panel of ScanPotter S...

Страница 9: ...nner is connected to your computer and plugged in to a power source see Step 4 Uninstall and reinstall the ScanWizard EZ or ScanPotter software 4 After clicking scan a blank screen appears Make sure y...

Страница 10: ...please go to the Microtek Download Service site at ww7 microtek com tw service php to download and install any updates you may require For additional information about Microtek products please visit...

Отзывы: