24 XT5750 HS Scanner User's Manual
Scanning Documents Automatically
This scanning scenario guides users to perform an automatic scan by using the
Auto Cover Detection function. It works only when the scanner is equipped with
a lid closing detection sensor
1. Place the document to be scanned facing down on the scanner's glass
surface.
2. Launch ScanWizard DI as a stand-alone program by clicking on the
ScanWizard DI
icon on the desktop.
3. Click the
Scan Setup
button in the interface to activate the Scan Setup
interface.
a) Follow the procedure (steps 4 through 8) for “Scanning Documents”
section to specify your scanning requirements in the interface.
b) Click the OK button to close the Scan Setup interface and return to the
Main interface of ScanWizard DI.
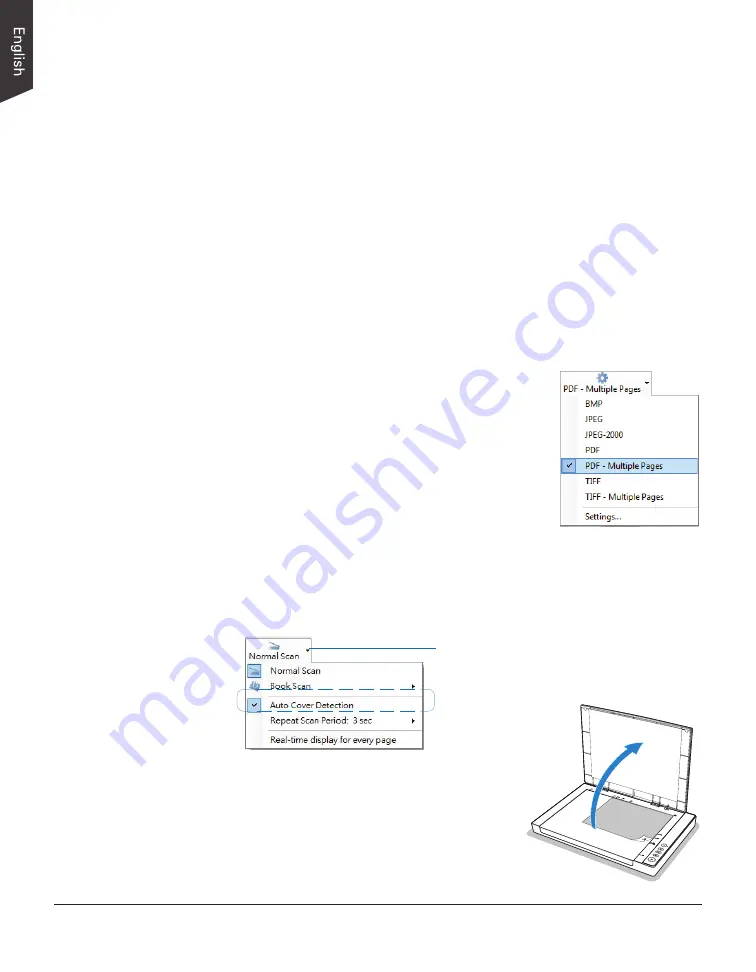
4. In the Main interface, click the
File Name
menu
button to select a file format for the scanned
images.
If you want to save all scanned pages of your
document in one file, please select “PDF-Multiple
Pages” or “TIFF-Multiple Pages” from the drop-
down options menu.
5. Next, enable the Auto Cover Detection function.
a) Click the
Arrow
icon next to the Normal Scan
button (by default) to bring up the Scan mode options menu.
b) Click the “Auto Cover Detection” command in the options menu. A
check appears next to the command when it is enabled.
6. Next, perform the automatic document
scanning and archiving.
a) Raise the scanner lid.
Click the
Arrow
icon to open
the Scan mode options menu.


