


4 LS-3700 User's Manual
•
Do not use the scanner near water. Never spill liquid of any kinds on the
product, or it may result in electric shock or other hazards.
•
This scanner should be situated away from heat sources such as radiators,
heat registers, stoves, or other products (including amplifiers) that produce
heat.
•
Do not store the scanner in which it may be exposed to direct sunlight.
Using the Scanner
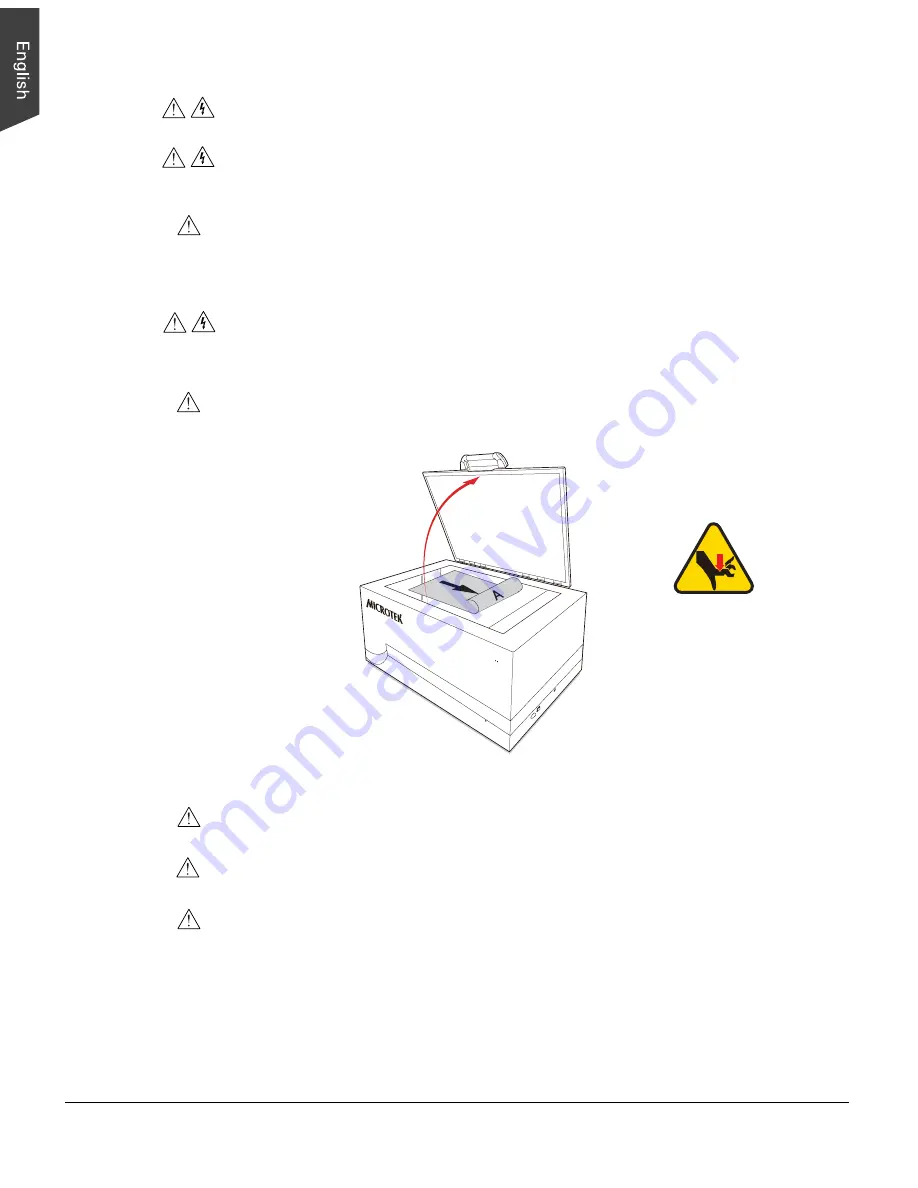
•
When opening the upper cover of the scanner, make sure that it has been
lifted to a proper position. The quick and sudden drop of the upper cover
could result injury or damage to users or equipment.
•
When opening or closing the upper cover of the scanner, please use it
carefully and watch out for pressing your hands.
Maintenance and Service
:
•
When the scanner is going to be cleaned, ensure to turn off the power of each
device and unplug the power cable from the AC outlet.
•
When you need a repair service, unplug the scanner from the power outlet
and consult qualified service personnel.
•
When replacement parts are required, use replacement parts that are specified
by the manufacturer or have the same characteristics as the original parts.
Lift the upper
cover of the
scanner to a
proper position to
avoid its sudden
drop.
Attention: When opening
or closing the upper cover
of the scanner, use it
carefully and watch out
for pressing your hands.


