


ArtixScan DI 4020 Plus/ArtixScan DI 2020 Plus User's Manual 21
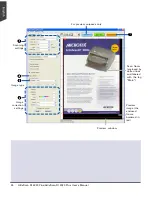
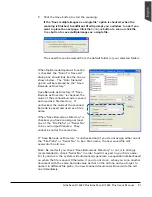
b) Select your image output type in the Scan Type drop-down menu.
–
Select
RGB Color (24 bits)
to scan the image in color.
–
Select
Grayscale (8 bits)
to scan the image in grayscale.
–
Select
Black & White (1 bit)
to scan the image in black-and-white.
c) Select a dimension in the Paper Size drop-down menu as your preview
image size.
d) Select your desired image output resolution in the Resolution
drop-down menu.
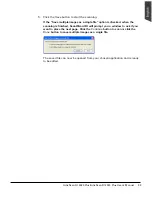
e) If the “Auto-crop & Auto deskew” option is selected, the scanner
automatically detects the size of the original image, crops the full scan
frame to fit the image, and removes unwanted black borders after the
scan, as well as corrects the distorted image for proper alignment.
4. Click the
Preview
button to perform a preliminary view of the entire image.
When done, a preview image appears in the preview window.
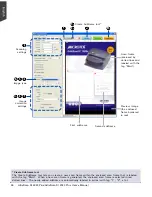
5. If necessary, click the
Scan Frame
tool button to adjust the size of the scan
frame (enclosed within the red dotted lines and labeled with the tag “Main”).
Drag on the edge or corner of the scan frame to resize the scan frame.
6. Select your image type in the Attribute drop-down menu.
–
Select
Line Art
to scan line art images (images in one color or in black-
and-white, such as logos or mechanical blueprints).
–
Select
Photo
to scan color prints.
–
Select
Text
to scan text.
7. If necessary, adjust image quality by using the image correction tools.
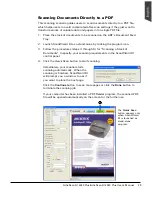
8. Click the
Scan
button, or click the
Custom Scan
button and select
Save to File
to start scanning.
–
If ScanWizard DI is launched as a Plug-In from an image-editing program,
the scanned image is delivered after the scan to your application, where
the image can be saved, printed, or modified further.
–
If ScanWizard DI is launched as a stand-alone program, the scanned
image can be saved after the scan to a file or opened in an image-editing
program.