background image

 6

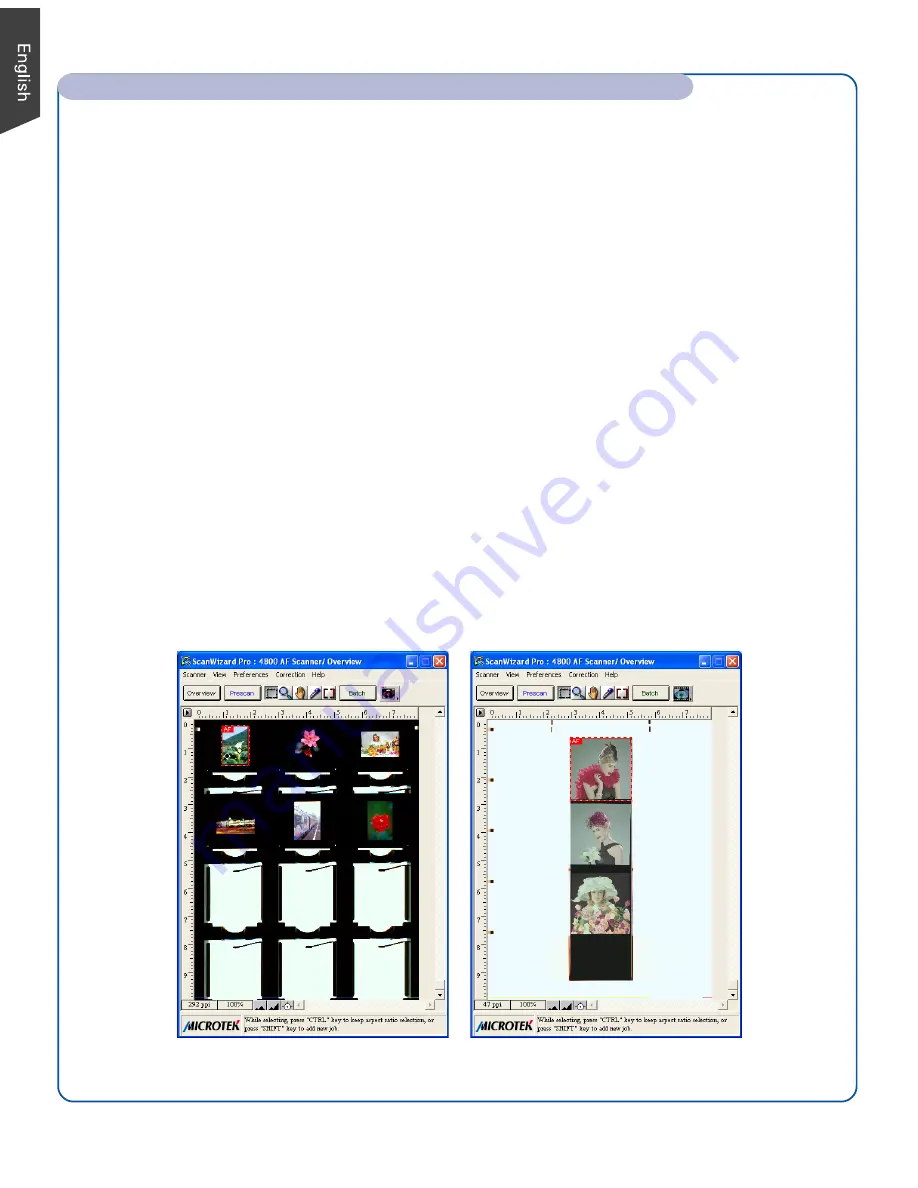
Preview window when

scanning positives

Preview window when

scanning negatives

Scanning Non-Damaged Positive or Negative Film

1. Select the film you wish to scan, then follow the procedures for positioning transparent film

detailed in the “Position the Scan Material” section of the Start Here guide.

2. Launch ScanWizard Pro.
3. If scanning positive film such as 35mm slides:

a) Go to the Preview window of ScanWizard Pro and from the Scan Material menu, choose

Positive / Positive Film

.

b) Follow steps 4 to 8 of the procedures detailed in “Scanning Non-Damaged Photos” (the first

column in this section).

If scanning negatives:
a) Go to the Preview window of ScanWizard Pro and from the Scan Material menu, choose

Negative / Negative Film

. The Negative Scan Settings window appears.

b) Go to the Negative Scan Settings window, choose the film brand, film type, and ISO settings

that match the film you use. For more details, refer to a PDF document called “ScanWizard

Pro Reference Manual” in your Microtek software CD-ROM and see the 

Addendum to

ScanWizard Pro

 section.

c) Follow steps 4 to 8 of the procedures detailed in “Scanning Non-Damaged Photos” (the first

column in this section).

4. To complete the scan, click the 

Scan

 (or “Batch”) button in the Preview window to start

scanning.

How to Scan: Scanning Photos, Using DIGITAL ICE, and Scanning Film (cont.)

Содержание ArtixScan F1

Страница 1: ...the software Skip this step if you have a newer version of Photoshop Elements already installed on your computer B Place the Microtek software CD ROM into the CD ROM drive and double click the ScanWi...

Страница 2: ...p 4 Connect Scanner To the power adapter A Remove the yellow Step 4 sticker from your scanner B Connect the power cord to the back of the scanner C Plug the power cord into a power source To the Hi Sp...

Страница 3: ...ther when the holders are put together Assembling the 35mm Filmstrip Holder with the Main Holder Assembling the 4 x 5 Film Holder with the Main Holder Assembling the 6 x 22 cm Film Holder with the Mai...

Страница 4: ...roller software for the ArtixScan F1 The four windows of ScanWizard Pro are shown here to familiarize you with the interface and to prepare you for the material in the next section on Scanning ScanWiz...

Страница 5: ...the Preview window of ScanWizard Pro choose Reflective from the Scan Material menu 4 Click the Overview button in the Preview window to see a preliminary scan of the image 5 Select the Scan Frame tool...

Страница 6: ...he first column in this section If scanning negatives a Go to the Preview window of ScanWizard Pro and from the Scan Material menu choose Negative Negative Film The Negative Scan Settings window appea...

Страница 7: ...tings window that works best for you Select Normal or Strong 3 If the colors in your photo or film are faded and need restoring check the Automatic Color Restoration box in the Settings window 4 Click...

Страница 8: ...ht comes on when the scanner is turned on Make sure your scanner is connected to your computer and plugged into a power source 2 Add Remove Hardware Wizard appears on your screen Click the Cancel butt...

Страница 9: ...s on your screen Finally select and click the title of the manual you wish to view Missing Items If your package is missing items please call Microtek Customer Service Copyright 2007 Microtek Internti...

Страница 10: ...10...

Отзывы: