background image

10

Auto

We strongly recommend that you use the Auto hot key to get optimized
visual quality from your monitor. Pressing the Auto key will perform the
adjustment automatically.

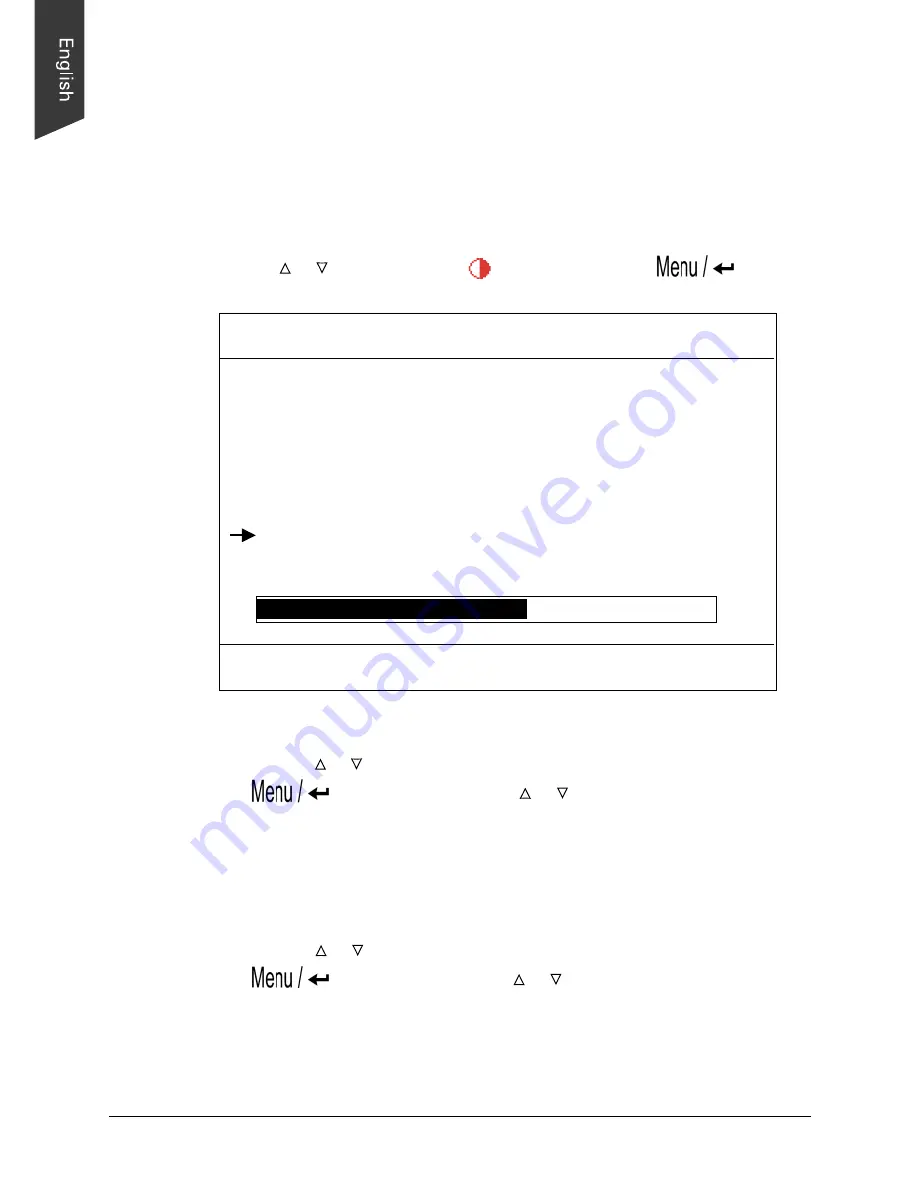
RGB Adjustment

Use the   &   key to select the 

 icon, then the press 

 key. A

screen similar to the one below will appear.

Contrast Adjustment

Use the   &   key to select the CONTRAST item, then press the

 key to highlight. Press   &   to get the best contrast

optimization. With this control, you can adjust the Red, Green, and
Blue (R,G,B) channels simultaneously or individually. You can also use
this control to change RGB purity.

Color Balance Adjustment

Use the   &   key to select the color balance item, then press the

key to highlight. Press   &   to get the best color balance

effect or to set the RGB color values individually . You can also use
this control to change RGB intensity.

Note: The easiest way to adjust the contrast and color balance setting is
to use the auto-balance item.

1280X1024

75 Hz/80 KHz

Auto-Balance
CONTRAST

RED

20

GREEN

18

BLUE

19

BALANCE

RED

49

GREEN

50

BLUE

26

EXIT

VERSION

SXGAHF581-4500

Содержание 710S

Страница 1: ...710S 17 LCD MONITOR USER S MANUAL...

Страница 2: ...ii Table of Contents FCC Compliance Statement ii Introduction 1 Factory preset Modes 2 Specifications 3 Installing the Monitor 5 Control Functions 7 Appendix 14 Signal connector pin assignment 16...

Страница 3: ...in a particular installation If this equipment does cause harmful interference to radio or television reception which can be determined by turning the equipment off and on the user is encouraged to tr...

Страница 4: ...es This digital apparatus does not exceed the Class B limits for radio noise emissions from digital apparatus as set out in the Radio Interference Regulation of the Canadian Department of Communicatio...

Страница 5: ...solution onto a rag Without applying excessive pressure clean the screen with the slightly dampened rag 2 Do not place your LCD monitor near a window Exposing the monitor to rain water moisture or sun...

Страница 6: ...self If a problem occurs contact the manufacturer s authorized service center About your monitor This monitor is a microprocessor controlled color monitor that uses a TFT LCD panel The monitor conform...

Страница 7: ...A XGA SXGA Macintosh Resolution 640 x 400 640 x 350 720 x 400 640 x 480 640 x 480 640 x 480 800 x 600 800 x 600 800 x 600 800 x 600 1024 x 768 1024 x 768 1024 x 768 1280 x 1024 1280 x 1024 640 x 480 8...

Страница 8: ...Frequencies Horizontal 31 47Kto80KHz Vertical 60Hzto75Hz NumberofPixels 1280x1024pixels Pixelpitch 0 264mm Picture Tube 17 TFT LCD panel Power Input 110 240 VAC auto sensing Frequency 48 62Hz Consump...

Страница 9: ...Adjustment Control Type Digital OSD On Screen Display Compatibility IBM and compatibles Apple Macintosh NEC Environmental Limits Operating Temp 32 to 104 F 0 to 40 C Storage Temp 4 to 140 F 20 to 60 C...

Страница 10: ...e that the monitor and the system unit power switches are OFF 2 Plug one end of the 15 pin signal cable to the monitor and the other end to the video signal connector at the rear of the system Tighten...

Страница 11: ...ack side of the stand 2 Push the slider to the right 3 While pressing on the slider with one hand use the other hand to bring the LCD panel down until it is on an even level with the VESA mount Locate...

Страница 12: ...igure below and described in the following paragraphs 17 LCD Monitor Description of control keys 1 Power Switch 2 Cursor up down or Decrement Incremental or Brightness Up Down hot key 3 Menu Enter 4 A...

Страница 13: ...are also used to increase or decrease values for items selected through the key 3 Auto Auto adjustment This is a hot key that automatically adjusts the phase and position of the LCD monitor for the be...

Страница 14: ...the OSD screen by pressing any OSD key A screen similar to the one below will appear the highlight bar will depend on the OSD key you are using If you press the keys the bar will be at the volume item...

Страница 15: ...h this control you can adjust the Red Green and Blue R G B channels simultaneously or individually You can also use this control to change RGB purity Color Balance Adjustment Use the key to select the...

Страница 16: ...e to the exit item then press the key VERTICAL HORIZONTAL POSITION ADJUSTMENT Use the key to move to the icon for vertical adjustment or to the icon for horizontal adjustment then press the key to hig...

Страница 17: ...lay signal to reduce display flicker An invalid phase tracking will cause unstable and flickering display Use the key to move to the Phase item then press the key to highlight Press to obtain better i...

Страница 18: ...select the item then press the key to highlight Press to change the volume value Audio Volume Control Use the key to select the item then press the key to highlight Press to change the volume value M...

Страница 19: ...connections are secure and the system is running on the correct timing Refer to table 1 on page 6 for information on timing 2 Turn off the LCD monitor then turn it back on Press the upper Function Con...

Страница 20: ...isplay mode to Dual Scan or CRT and try again If there is still no display then there may be a problem with your system Contact technical support 5 If the power LED is not lit check to see if the AC p...

Страница 21: ...Input Analog Green Input Analog Blue Input Ground Digital Ground Analog Red Input Analog Green Input Analog Blue Input NC Sync Ground Ground SDA DDC Data H Sync V Sync SCL DDCCLK Pin 1 Pin 2 Pin 3 Pi...

Отзывы: