background image

D5CUB System Board Manual

Section 2: Configuring the D5CUB

17

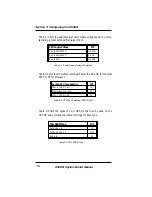
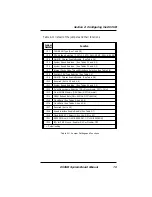
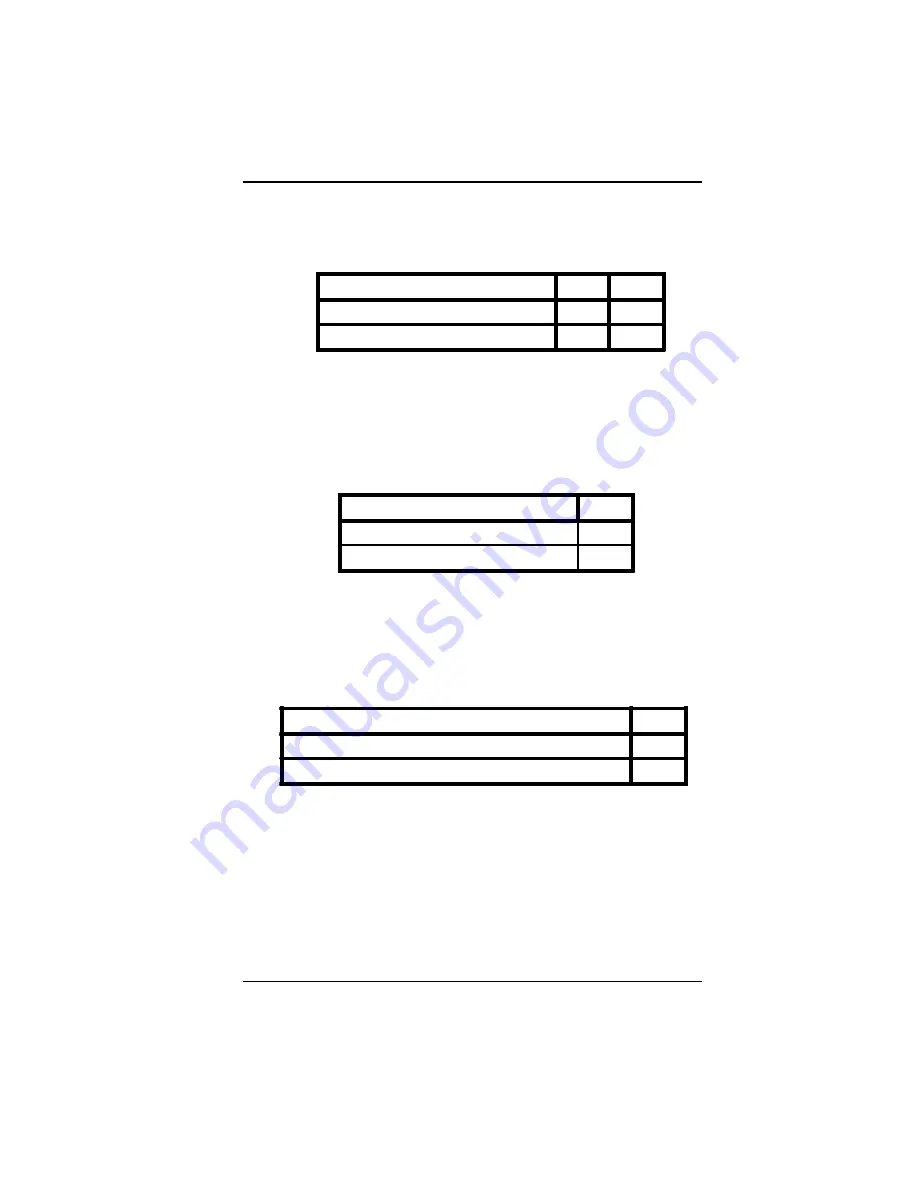
Table 2-6 shows the jumper settings that are used to enable or disable
the Multi I/O chipset.

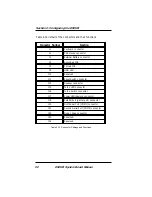
Table 2-7 shows the jumper settings that are used to enable or disable
the sound interface.

Table 2-8 shows the jumper settings that are used to select whether the
internal processor cache operates in Write Back or Write Through
mode.

Table 2-6: Multi I/O Chipset

Table 2-7: Sound Interface Enable/Disable

Table 2-8: CPU Internal Cache Write-Back/Write Through Selection

Multi I/O Chipset Enable/Disable

JP4

JP9

Enabled

2-3

1-2

Disabled

1-2

2-3

Sound Interface Enable/Disable

JP18

Enabled

1-2

Disabled

2-3

CPU Internal Cache Write-Back /Write-Through Selection

JP7

Write Through

ON

Write Back

OFF

Содержание D5CUB ISA

Страница 1: ...D5CUB PCI ISA System Board Manual Document Number 06 00287 02 Rev B June 1996 221 Warren Ave Fremont CA 94539 7085 ...

Страница 2: ...out notice All Rights Reserved No part of this document may be photocopied reproduced translated or reduced to any medium or machine form without prior written consent from Micronics Portions of the Manual Portions of this manual were copied with permission from Award Software Inc and Micro Computer Systems Inc All rights reserved Trademarks Award Modular BIOS is a registered trademark of Award So...

Страница 3: ...nvironment 13 D5CUB System Board 14 Jumper Settings 15 Section 3 Installing the D5CUB 21 Introduction 21 System Memory Support 21 Installing the D5CUB 22 Tools Required 22 Equipment Required 22 System Memory 23 SIMMs Supported 23 Upgrading Rules 23 Mixing EDO and FPM Memory 24 Memory Configurations 25 Installing the SIMMs 26 Removing SIMMs 26 Installing a CPU 27 Installing a PCI Peripheral Card 28...

Страница 4: ...eatures Setup 43 Power Management Setup 44 PnP PCI Configuration Setup 46 Load BIOS Defaults 48 Load Setup Defaults 48 Integrated Peripherals 49 Supervisor Password 51 User Password 51 IDE HDD Auto Detection 52 HDD Low Level Format 53 Save and Exit Setup 54 Exit Without Saving 54 Section 5 Installing Sound Device Drivers 55 About Device Drivers 55 Installing the Sound Drivers 56 Appendix A Technic...

Страница 5: ...echnical Support 60 Online Services 61 Appendix B Post Messages 63 Appendix C Hard Disk Drive Types 65 Appendix D Updating the System BIOS 67 Appendix E Compatibility 69 Limited Warranty 72 Non Warranty Service 73 FCC Statement 74 Declaration of Conformity 75 Index 76 3 ...

Страница 6: ...ure 4 7 PnP PCI Configuration Screen 46 Figure 4 8 Integrated Peripherals Screen 49 Figure 4 9 IDE HDD Auto Detection Screen 52 Figure 4 10 HDD Low Level Format Screen 53 List of Tables Table 2 1 System Speed Selection Intel 15 Table 2 2 System Speed Selection Cyrix 15 Table 2 3 Power Supply Voltage Selection 16 Table 2 4 Pentium CPU Type Selection 16 Table 2 5 TAG SRAM Type Selection 16 Table 2 6...

Страница 7: ...gulator permits the use of Intel s fastest processors and the Cyrix 6x86 processor The D5CUB comes with many features These include support for Fast Page Mode FPM and Extended Data Out EDO memory Error Checking and Correction ECC pipelined burst level 2 cache the Award Plug and Play BIOS and an optional feature for integrated 16 bit sound Micronics builds all products to exacting standards using t...

Страница 8: ...2K pipelined burst external Level 2 cache Support for up to 256MB of onboard system memory Four 32 36 bit 72 pin double sided SIMM sockets to accommodate xxxx xxxx xxxx xxxx xxxxxx xxxx iiiii 1MB x 32 36 4MB xx4MB x 32 36 16MB xxxx iiiii 2MB x 32 36 8MB xx8MB x 32 36 32MB xxxx 16 MB x 32 36 64 MB xxxx xxxx xxxx Supports EDO memory ECC support via chipset PCIlocalbusIDE xxxx xxxx xxxx xxxx xxxx xxx...

Страница 9: ...ion and display of ECC and EDO memoryx Auto configuration of IDE hard disk types ESS 1788F Soundxxxx xxxx xxxx xxxx xxxx xxxxxxx Sound Blaster compatible 16 bit Stereo xxxx xxxx Input Output Game and MIDI ports xxxx xxxx xxxx iiiii sound support is optional Software Compatibility The D5CUB system board has been thoroughly tested for compatibility with a variety of operating systems and envi ronmen...

Страница 10: ...e Magnifying Glass it refers to something you should take a closer look at before proceeding further When you see the Exclamation Mark it gives important information on avoiding damage Common Names DRAM Dynamic Random Access Memory ECC Error Checking and Correction ECP Enhanced Communications Port EDO Extended Data Out FPM Fast Page Mode IDE Integrated Drive Electronics PCI Peripheral Component In...

Страница 11: ...nd yourself to prevent damaging static dis charge by using an anti static wrist or ankle strap or touch a safely grounded metal object 3 Remove the D5CUB from its packaging 4 Configure and verify the system board s jumper set tings refer to Jumper Settings in Section 2 5 Install the CPU and the system memory 6 Install the system board in the chassis and make all necessary case connections 7 Instal...

Страница 12: ...d drive s to match your configuration If you are installing one or more IDE drives the BIOS auto matically configures your drive s for you when the setting in the Type column is Auto the default set ting See Chapter 4 for additional information and additional instructions 13 Verify that the floppy drive type s shown for Drive A and Drive B if installed are correct If necessary change the setting s...

Страница 13: ...ny of the other setup options in the main menu that contain settings you want to review or change for information on the various setup options in the main menu see Chapter 4 When you are finished press F10 to select Save Exit Setup You are now finished with the BIOS configuration 17 If you are using the sound option install the sound controller device drivers 18 If you have installed a CD ROM driv...

Страница 14: ...D5CUB System Board Manual Section 1 Quick Installation 12 ...

Страница 15: ...ing a special anti static wrist or ankle strap If you do not have an anti static strap available touch both of your hands to a safely grounded object such as the power supply or chassis of a computer that is connected to the power socket After you have grounded yourself ground the D5CUB board via one of the solder pads that surround its mounting holes When you removethe D5CUB from its packaging pl...

Страница 16: ...D5CUB System Board Manual D5CUB System Board Section 2 Configuring the D5CUB 14 Figure 2 1 D5CUB System Board Diagram ...

Страница 17: ...90 MHz External 60 MHz Internal OFF ON ON 2 3 2 3 100 MHz External 66 MHz Internal ON OFF ON 2 3 2 3 120 MHz External 60 MHz Internal OFF ON ON 1 2 2 3 133 MHz External 66 MHz Internal ON OFF ON 1 2 2 3 150 MHz External 60 MHz Internal OFF ON ON 1 2 1 2 166 MHz External 66 MHz Internal ON OFF ON 1 2 1 2 200 MHz External 66 MHz Internal ON OFF ON 2 3 1 2 Table 2 2 System Speed Selection for Cyrix P...

Страница 18: ...ble 2 5 lists the types of TAG SRAMs that can be used on the D5CUB and provides the jumper settings for each type 16 Table 2 3 Power Supply Voltages Selection Table 2 4 CPU Type Selection P54C P55C CPU Supply Voltage JP3 3 3V P54C P54CT 1 2 STD 3 4V P54C P54CT 2 3 VR 3 5V P54C 4 5 VRE TAGSRAMType JP1 Aster 16K x 8 1 2 Winbond 16K x 8 OFF 32K x 8 2 3 Table 2 5 TAG SRAM Type PentiumCPUType Selection...

Страница 19: ...r settings that are used to select whether the internal processor cache operates in Write Back or Write Through mode Table 2 6 Multi I O Chipset Table 2 7 Sound Interface Enable Disable Table 2 8 CPU Internal CacheWrite Back WriteThrough Selection Multi I OChipset Enable Disable JP4 JP9 Enabled 2 3 1 2 Disabled 1 2 2 3 Sound Interface Enable Disable JP18 Enabled 1 2 Disabled 2 3 CPU Internal Cache...

Страница 20: ... reset all BIOS default settings Any changes you have made will be lost Table 2 10 lists the available clock ratios internal external and the corresponding jumper settings Note that these settings are also in cluded in Tables 2 1 and 2 2 the System Speed Selection tables Clear CMOS Memory JP13 Normal OFF Clear ON Table 2 9 Clear CMOS Memory Clock Ratio Internal External Intel Cyrix JP15 JP16 1 5 1...

Страница 21: ...m CPU Type Selection See Table 2 4 JP9 Multi I O Chipset Enable Disable See Table 2 6 JP10 Reserved Set to 3 5 and 4 6 JP11 System Speed Selection See Tables 2 1 and 2 2 JP12 Color Monochrome Selection ON Monochrome OFF Color JP13 Clear CMOS Memory ON Clear OFF Normal JP14 DRAM Refresh Rate ON 60MHz OFF 66MHz JP15 Clock Ratio See Tables 2 4 and 2 9 JP16 Clock Ratio See Tables 2 4 and 2 9 JP17 Rese...

Страница 22: ... connector J4 Secondary IDE J5 Primary IDE J8 HDD LED J10 Reserved J11 Reset Switch connector J13 Speaker connector J15 Turbo LED connector J16 Turbo Switch connector J17 Power LED Keylock connector J18 Parallel Port printer port connector J20 First Serial Port COM1 connector J21 Second Serial Port COM2 connector J22 Floppy Drive connector J23 Reserved J24 Reserved Table 2 12 Connector Settings an...

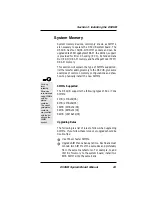
Страница 23: ... prob lems arise while installing peripherals contact the computer dealer where you purchased the peripheral or Micronics Technical Support Department System Memory Support The flexibility of the D5CUB is augmented by its sup port for Error Checking and Correction ECC Ex tended Data Out EDO DRAM memory and Fast Page Mode FPM DRAM memory The D5CUB allows vast memory capability without worrying abou...

Страница 24: ...Micronics recommends using the following tools to install the D5CUB Small Phillips screwdriver Tweezers or a pair of needle nose pliers Tray to hold loose screws Equipment Required Micronics recommends using the following equipment with the D5CUB for a typical configuration Chassis with standard hardware A high quality power supply capable of providing continuous power within a 5 volt range PS 2 m...

Страница 25: ...ow to physically install the new SIMMs SIMMs Supported The D5CUB supports the following types of 60 or 70ns SIMMs 4MB 1MBx32 36 8MB 2MBx32 36 16MB 4MBx32 36 32MB 8MBx32 36 64MB 16MBx32 36 Upgrading Rules The following is a list of rules to follow when upgrading SIMMs If you follow these rules your upgrade should be trouble free Use 70ns or faster SIMMs Upgrade SIMMs one bank at a time Each bank mu...

Страница 26: ...and FPM memory The memory configuration will default to the speed of the slowest RAM installed Follow the rules below Install the two types of memory in separate banks For example install EDO memory in Bank 0 and FPM memory in Bank 1 When installing SIMMs fill Bank 0 then Bank 1 NOTE Mixing EDO and FPM memory is not recom mended ...

Страница 27: ... 1M Bx32 36 48M B 2 4M Bx32 36 2 2M Bx32 36 64M B 2 8M Bx32 36 64M B 2 4M Bx32 36 2 4M Bx32 36 72M B 2 8M Bx32 36 2 1M Bx32 36 80M B 2 8M Bx32 36 2 2M Bx32 36 96M B 2 8M Bx32 36 2 4M Bx32 36 128M B 2 8M Bx32 36 2 8M Bx32 36 128M B 2 16MBx32 36 256M B 2 16MBx32 36 2 16M Bx32 36 Memory Configurations The table below lists the most common memory configu rations The memory available depends on the num...

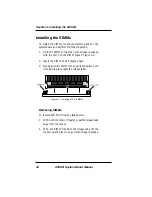
Страница 28: ... notch on the SIMM socket Figure 3 1 2 Insert the SIMM at a 45 degree angle 3 Gently push the SIMM into an upright position until it locks into place past the release tabs Figure 3 1 Installing a 72 Pin SIMM Removing SIMMs To remove SIMMs follow the steps below 1 With both thumbs or fingers press the release tabs away from the socket 2 With the SIMM free from the release tabs lift the module up an...

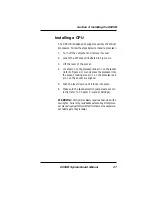
Страница 29: ...in 1 on the processor and pin 1 on the socket refer to Figure 2 1 Gently place the processor into the socket making sure pin 1 on the processor and pin 1 on the socket are aligned 5 Push the lever down until it locks into place 6 Make sure the speed selection jumpers are set cor rectly refer to Chapter 2 Jumper Settings WARNING Pentium processors require a heat sink with a cooling fan Failure to p...

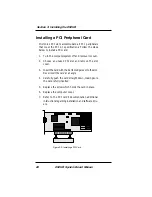
Страница 30: ...move its cover 2 Choose an unused PCI slot and remove the slot cover 3 Insert the card with the bottom edge level to the slot Never insert the card at an angle 4 Carefully push the card straight down making sure the card is fully inserted 5 Replace the screw which holds the card in place 6 Replace the computer cover 7 Refer to the PCI card s documentation additional instructions regarding installa...

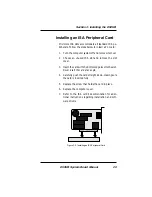
Страница 31: ...hoose an unused ISA slot and remove the slot cover 3 Insert the card with the bottom edge level to the slot Never insert the card at an angle 4 Carefully push the card straight down making sure the card is inserted fully 5 Replace the screw that holds the card in place 6 Replace the computer cover 7 Refer to the ISA card s documentation for addi tional instructions regarding installation and soft ...

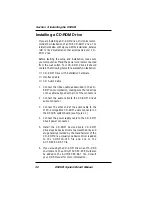
Страница 32: ...bon cable as described in the CD ROM s documentation making sure the red stripe on the cable is aligned with pin 1 of the connectors 2 Connect the audio cable to the CD ROM drive s audio connector 3 Connect the other end of the audio cable to the MPC 2 compatible CD ROM audio connector on the D5CUB system board see Figure 2 1 4 Connect the power supply cable to the CD ROM drive s power connector 5...

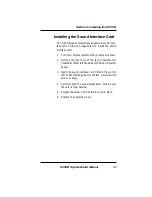
Страница 33: ...ter system off and remove its cover 2 Remove the slot cover of the sound interface slot located at the far left hand side of the D5CUB system board 3 Insert the sound interface card refer to Figure 3 4 with the bottom edge level to the slot Never insert the card at an angle 4 Carefully push the card straight down making sure the card is fully inserted 5 Replace the screw which holds the card in pl...

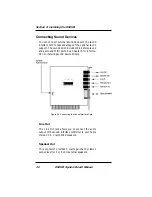
Страница 34: ...me and MIDI ports See Chapter 5 for informa tion on installing sound device drivers Figure 3 4 Connecting the Sound Interface Card Line Out The Line Out jack allows you to connect the audio output of the sound interface controller to your home stereo VCR or amplified speakers Speaker Out This connector provides 3 watts per channel stereo output level for 4 or 8 ohm external speakers Section 3 Inst...

Страница 35: ...erface card such as a CD player or radio Use the appropriate converter cable to interface to your external equipment Microphone You may connect a 300 600 ohm microphone into the MIC jack Game Port MIDI You can use this connector to connect an IBM PC compatible joystick or a MIDI instrument Section 3 Installing the D5CUB 33 ...

Страница 36: ...D5CUB System Board Manual Section 3 Installing the D5CUB 34 ...

Страница 37: ...ur cables and peripherals for bad connections You may also get beep codes or error messages If this occurs consult Appendix B for a guide to possible solutions After the system properly boots it is ready to be config ured The following information explains the proper procedures for BIOS configuration Setup The Setup program is used to configure the computer s BIOS Basic Input Output System The com...

Страница 38: ...as shown in Figure 4 1 Figure 4 1 Power Up Screen When Press DEL to enter SETUP appears near the bottom of the screen press the DEL key to start the Setup program The main CMOS Setup utility screen Figure 4 2 appears with the highlight on STAN DARD CMOS SETUP Note that the Setup program can only be activated during the boot sequence Section 4 The BIOS Setup Utility ...

Страница 39: ...ed Peripherals screen In addition there are four screens containing options that do not have to be set unless you want to the Power Management Setup screen the Supervisor Password the User Password and the IDE HDD Auto Detection screen The main menu screen also contains the following op tions Load BIOS Defaults option Load Setup Defaults option HDD Low Level Format option Save Exit Setup option an...

Страница 40: ... this option on the main menu screen and press Enter Figure 4 3 Standard CMOS Setup Screen Date and Time To set the date use arrow keys to highlight the date and follow the same procedure to set the time Hard Disks Setup You can specify the physical and electronic properties of the disk drives installed Relevant specifications include the type number of cylinders CYLS heads HEAD write pre compensa...

Страница 41: ...d The BIOS supports 2 88MB 1 44MB 1 2MB 720KB and 360KB floppy drives Video This sets the type of video board installed into the system The default setting is EGA VGA Halt On Halt On enables the system to halt on several conditions The default setting is All Errors Base Extended Other Memory A small section in the lower right corner of the screen displays important information about your system th...

Страница 42: ...is option on the main menu screen and press Enter Figure 4 4 BIOS Features Setup Screen Virus Warning This selection enables the virus warning feature for the hard disk boot sector When enabled a warning message is displayed and a beep sound is produced whenever an attempt is made to write on the hard disk s boot sector The default setting is Disabled CPU Internal Cache Thisselectionenablestheinte...

Страница 43: ... drive A becomes drive B and drive B becomes drive A Boot Up Numlock Status When set to OFF default this selection activates Numlock on system bootup if the BIOS detects a numeric keyboard Security Option The Security Option selection determines whether the password will be asked for in every system boot or when entering into the SETUP default program OS Select for DRAM 64MB This selection allows ...

Страница 44: ...le this option if problems occur Video BIOS Cache The Video BIOS Cache selection allows you to cache the video BIOS for even higher performance The default setting is Enabled System BIOS Shadow This selection shadows the system BIOS for faster perfor mance The system BIOS will always be shadowed System BIOS Cache The System BIOS Cache selection allows you to cache the system BIOS for even higher p...

Страница 45: ... main menu screen and press Enter Figure 4 5 Chipset Features Setup Screen DRAM Timing This selection configures the DRAM read write timing for the maximum performance The options are 60ns and 70ns default NOTE Before changing this selection verify the speed of the DRAM currently installed 8 Bit I O Recovery Time This selection defines the 8 bit I O recovery time Older ISA card may need longer I O...

Страница 46: ...e DRAM type can be set for Parity default Non Parity or ECC Selecting ECC will detect the parity error and allow the system to correct the error Power Management Setup ThePowerManagementSetupoptioncontrolsthepower management functions of the system To access the POWER MANAGEMENT SETUP screen highlight this option on the main menu screen and press En ter Figure 4 6 Power Management Screen ...

Страница 47: ... power management options The de fault setting is YES Video OFF Method This selection defines the video off method in standby mode The options are V H SYNV Blank default DPMS and Blank Screen Doze Standby Suspend Mode These selections set the amount of time that elapses for the system to enter the power saving mode The timer starts when the Standby Mode is activated The options are 1 min default 2...

Страница 48: ...wakes up from Doze or Standby modes The options are ON or OFF PnP PCI Configuration Setup The PnP PCI Configuration Setup option sets the vari ous system functions and internal addresses of PnP and PCI devices and onboard PCI IDE controller To access the PnP PCI CONFIGURATION SETUP screen high light this option on the main menu screen and press Enter Figure 4 7 PnP PCI Configuration Screen Section...

Страница 49: ... to single edge or logic level Level Edge sensitivity is programmed per controller Every IRQ input for a given bank is either Level default or Edge triggered PCI IDE IRQ Map To This selection defines the onboard IDE IRQ routing either from the PCI Bus or the ISA Bus The default setting is PCI AUTO Primary Secondary IDE INT These selections defines the primary secondary IDE INT of the PCI IDE card ...

Страница 50: ...he Load BIOS Defaults question Load Setup Defaults This selection allows automatic configuration of all the options in the Standard CMOS Setup BIOS Features Setup and Chipset Features Setup with the setup defaults If problems are encountered after load ing the setup defaults reboot the system and load the BIOS defaults To select LOAD SETUP DEFAULTS highlight this option on the main menu screen and...

Страница 51: ...en and press Enter Figure 4 8 Integrated Peripherals Configuration Screen IDE HDD Block Mode This selection enables or disables multiple sector reads and writes for IDE drives The default setting is Enabled On Chip Primary Secondary PCI IDE These selections enable or disable the Primary and Secondary PCI IDE The default settings are Enabled Onboard FDC Controller This selection enables or disables...

Страница 52: ...lel Port Mode This selection specifies the onboard parallel port mode The default setting is Normal When you choose the ECP setting the ECP Mode Use DMA selection will be displayed This selection allows you to select the DMA 1 or 3 default channel to transfer your data Onboard Audio Chip This selection enables or disables the onboard sound controller The default setting is Enabled Audio I O Base A...

Страница 53: ...menu screen and press Enter The password can be no more than eight characters long The program will prompt you to confirm the new pass word before exiting and enabling the utility To disable the password press Enter when the program prompts you to enter the new password WARNING If you forget the Supervisor Password it cannot be disabled without resetting the CMOS User Password The User Password ut...

Страница 54: ...een The IDE HDD Auto Detection option provides auto configuration of the hard drive installed in your system It supports LBA Large and Normal modes If your hard disk drive s capacity is under 528MB select the Normal mode NOTE It is recommended that you select Normal mode for your hard disk drive if you will be using UNIX If the system s hard disk drive has a capacity of over 528MB and supports LBA...

Страница 55: ...use this utility This selection allows you to perform a low level format of your hard disk drive To select the HDD LOW LEVEL FORMAT option highlight this option on the main menu screen and press Enter Figure 4 10 HDD Low Level Format Screen The selections available are Low Level Format Utility Select Drive Bad Track List and Preformat ...

Страница 56: ...n Highlight the SAVE AND EXIT SETUP option and press Enter Press Y to confirm the changes made and N or ESC if additional modifications are needed before exiting the setup program Exit Without Saving This selection abandons all previous settings then exits and reboots the system From the main menu screen highlight the EXIT WITHOUT SAVING option and press Enter Press Y and the system will exit the ...

Страница 57: ...on how to install a CD ROM drive and how to connect external sound devices About Device Drivers Device drivers are necessary for the computer system to communicate with devices such as CD ROM drives sound controllers graphics adapters or devices that are not natively supported by the system BIOS Once started device drivers remain active in the background of the computer system Usually a device dri...

Страница 58: ...f you are using Windows 3 1x you must also remove all associated files from the WIN INI and SYSTEM INI files For more information please contact the sound driver manufacturer 3 Start your computer system 4 Insert the sound driver disk into your floppy drive 5 If you are using Windows 3 1x run A SETUP from the Program Manager File menu 6 If you are using Windows 95 refer to the Windows 95 user s ma...

Страница 59: ... 3 SMC669 UMC8669 ALI M5113 I O chip CPU Clock Select Frequency synthesizer chip Jumper selectable CPU speed Form Factor Baby AT size system board 8 5 x 13 Expansion Three 32 bit PCI slots T wo 16 bit ISA slots One shared PCI ISA slot BIOS Award BIOS on 1MB Flash Auto detection of memory size Auto detection and display of ECC and EDO memory Auto configuration of IDE hard disk drives RAM Capacity 4...

Страница 60: ...drives 2 88MB 1 44MB 1 2MB 720KB 360KB PCI IDE Ports Supports up to four IDE devices Mode 4 Enhanced IDE with Bus Mastering Multiple sector transfer support Auto detection of add in IDE board Environmental Specifications The environment in which the D5CUB is located is critical Micronics recommends the following environmental specifications Temperature Range Operating 50 to 104 degrees Fahrenheit ...

Страница 61: ...ppendix A Technical Information Battery Disposal WARNING Please do not open battery dispose of in fire recharge put in backwards or mix with used or other battery types The battery may explode or leak and cause personal injury 59 ...

Страница 62: ...unt of installed memory and other peripherals installed in your computer Try to call from the location of your computer NOTE For Return Material Authorization RMA pur poses please keep a copy of your product receipt In the United States Technical Support 510 661 3000 Technical Support Fax 510 651 6982 RMA Department 510 683 0428 In Europe United Kingdom Technical Support 44 1 256 844 899 United Ki...

Страница 63: ... 1 YMODEM and ZMODEM recommended file transfer protocols 510 651 6837 In Europe United Kingdom Technical Support BBS 44 1 256 63373 Germany Technical Support BBS 49 89 6881686 France Technical Support BBS 3314 7847057 World Wide Web You will find information on product support new prod uct releases and other categories of information Access the Internet and type http www micronics com ...

Страница 64: ...D5CUB System Board Manual Appendix A Technical Information 62 ...

Страница 65: ...m or may require battery replacement DISPLAY SWITCH IS SET INCORRECTLY The display switch on the system board is set to a different setting than indicated in SETUP Determine which setting is correct The display switch can be set for color or monochrome FLOPPY DISK s FAILED 80 Unable to reset floppy subsystem Check configuration and connections or replace the floppy controller card FLOPPY DISK s FA...

Страница 66: ...rate hard disk drive May require hard disk repair or replacement HARD DISK s FAILED 08 Sector verification failure May require hard disk repair or replacement KEYBOARD IS LOCKED OUT UNLOCK THE KEY The keyboard is locked Unlock the keyboard KEYBOARD ERROR OR NO KEYBOARD PRESENT The keyboard or keyboard controller failed Check connections You may have to replace the keyboard or controller MEMORY TES...

Страница 67: ...5 940 8 17 512 940 5 49 940 6 17 512 940 6 21 615 4 17 None 615 7 32 462 8 17 256 511 8 31 733 5 17 None 733 9 117 900 15 17 None 901 10 21 820 3 17 None 820 11 37 855 5 17 None 855 12 52 855 7 17 None 855 13 21 306 8 17 128 319 14 44 733 7 17 None 733 15 Reserved 16 21 612 4 17 0 663 17 42 977 5 17 300 977 18 59 977 7 17 None 977 19 62 1024 7 17 512 1023 20 31 733 5 17 300 732 21 44 733 7 17 300 ...

Страница 68: ...3 30 98 1024 11 17 None 1023 31 87 918 11 17 None 1023 32 72 925 9 17 None 926 33 89 1024 10 17 None 1023 34 106 1024 12 17 None 1023 35 115 1024 13 17 None 1023 36 124 1024 14 17 None 1023 37 17 1024 2 17 None 1023 38 142 1024 16 17 None 1023 39 119 918 15 17 None 1023 40 42 820 6 17 None 820 41 44 1024 5 17 None 1023 42 68 1024 5 26 None 1023 43 42 809 6 17 None 852 44 64 809 6 26 None 852 45 10...

Страница 69: ...ng MS DOS is displayed After the system has rebooted the cursor will appear at the A prompt 3 If you are using Windows 95 press F8 when you see Starting MS Windows 95 Select the option Safe Mode Command Prompt 4 Now you can run the FLASH utility from the A prompt For example to update the D5CUB to BIOS version XX you would type A FLASH D5CUBXX BIN ENTER 5 After the FLASH screen appears select Y es...

Страница 70: ...pport There is a 29 95 fee for this service which includes shipping charges to send your FLASH EPROM chip back to you Also a preprogrammed FLASH EPROM chip can be purchased from Technical Support for 50 00 Overnight shipping costs an additional 10 00 Price and availability subject to change If you prefer to send your system board in for the upgrade the RMA department offers this service free of ch...

Страница 71: ...45S SCSI Q Logic SCSI DFI 400KF IDE PCI Controllers Adaptec AHA2920A SCSI Adaptec AHA2940 SCSI Adaptec AHA2940W SCSI Adaptec AHA2940U SCSI Adaptec AHA2940UW SCSI Adaptec AHA3940 SCSI Bus Logic BT946C SCSI Bus Logic BT956C SCSI Bus Logic KT930 LT SCSI Bus Logic KT930 DT SCSI Q Logic PCI Basic Q Logic IQ PCI 10 Q Logic IQ PCI Network Adapters 3COM 3C509 ISA 3COM 3C590 PCI 3COM 3C595 PCI Intel EXPro ...

Страница 72: ...r 31200 Western Digital Caviar 31000 Western Digital Caviar 21600 Western Digital Caviar 31600 Western Digital Caviar 32500 Graphic Adapters Orchid Kelvin 64 ISA STB Nitro ISA Orchid Kelvin Video 64 Orchid Fahrenheit 64 Orchid Fahrenheit Pro 64 Orchid Fahrenheit ProVideo 64 Orchid Fahrenheit 3D Diamond Stealth 64 VRAM Diamond Stealth 64 Video VRAM Diamond Stealth 64 Video DRAM Diamond Stealth Trio...

Страница 73: ... 2 4 Sunsoft Solaris 2 5 Netware 3 12 Netware 4 1 Windows Applications MS Windows 3 11 MS Windows for Workgroups 3 11 MS Office 4 2 for Windows MS Word for Windows 6 0 MS Excel for Windows 4 0 Lotus 1 2 3 for Windows 4 0 Word Perfect for Windows 6 0 Crosstalk 2 0 for Windows Procomm 2 0 for Windows CorelDraw 5 0 for Windows 3 11 Norton Desktop for Windows 2 0 AutoCad R12 for Windows 3 11 Norton Ut...

Страница 74: ...r inad equate heating or air conditioning or electrical power failures surges or other irregularities 4 any statement about the product other than those set forth in this warranty or 5 nonconformity to models or samples shown to the purchaser Any models or samples were for the sole purpose of suggesting the character of the product and are not intended to form the basis of the bargain A receipt or...

Страница 75: ...ts or any indirect special incidental or consequential damages in connection with the product even if Micronics has been advised of the possibility of such damages Micronics makes no warranties or representations as to performance of products or as to service to distributor or to any person except as set forth in Micronics limited warranty accompanying delivery of product Micronics disclaims all o...

Страница 76: ...nce to radio communications Interfer ence to radio or television reception can be determined by turning the equipment off and on You are encouraged to try to correct the interference by one or more of the following measures Reorient the receiving antenna Increase the separation between the equipment and the receiver Connect the equipment into an outlet on a circuit different from that to which the...

Страница 77: ...Address 221 Warren Avenue Fremont California 94539 USA Tel 510 661 2300 Fax 510 651 9450 Type of Equipment 150 166 200 Desktop Personal Computer Model Name D5CUB Tested by TUV Sudwestdeutschland e v Dudenstrabe 28 D 68000 Manuhezm 1 D 7024 Filderstadt 1 Test Engineer Mr H Koch I the undersigned hereby declare that the specified equip ment conforms to the directives and standards listed above Ming ...

Страница 78: ...lletin Board System BBS 61 C Compatibility Hardware 69 Software 71 Configuring the D5CUB 13 D Diagram D5CUB 14 E Extended Data Out EDO Memory 21 23 Environmental Specifications 58 Error Checking ECC 21 23 F Fast Page Mode FPM Memory 21 23 H Hard Disk Drive Types 65 Help Bulletin Board System BBS 61 Index 76 ...

Страница 79: ... 30 CPU 27 Installing your D5CUB 21 ISA Peripheral Card 29 PCI Peripheral Card 28 Quick Installation 9 Sound Drivers 31 J Jumper Settings 15 M D5CUB System Board Diagram 12 Memory Configurations 25 Installing 26 Mixing 24 Removing 26 Supported 21 23 O Online Services 61 P POST Messages 63 Index 77 ...

Страница 80: ...tility Programs BIOS Features Setup 40 Chipset Features Setup 43 Exit Without Saving 54 HDD Low Level Format 53 IDE HDD Auto Detection 52 Integrated Peripherals 49 Load BIOS Defaults 48 Load Setup Defaults 48 PnP PCI Configuration Setup 46 Power Management Setup 44 Save and Exit Setup 54 Standard CMOS Setup 38 Supervisor Password 51 User Password 51 W World Wide Web 61 Index 78 ...

Отзывы: