


4.
Application Demonstration
This chapter describes how to establish a WST connection between two IS2066B EVBs and a host device, and
perform Audio Streaming and Auto Role Switch demonstration and HSP/HFP demonstration. It also demonstrates
the process of updating the parameters using various tools.
4.1
Establishing a Connection
To establish the Bluetooth connection between two IS2066B EVBs and a host device, perform the following actions:
1.
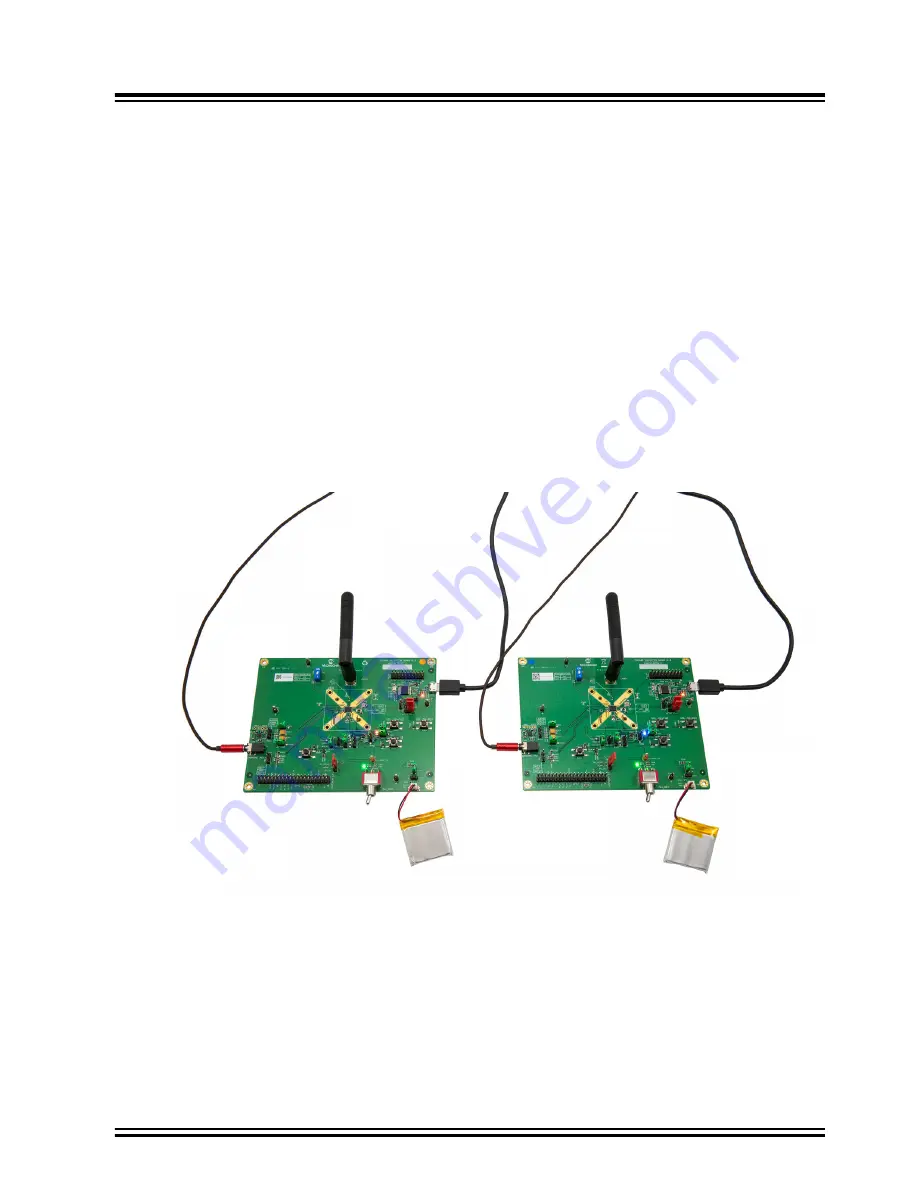
Set the mode selection switch (SW301) to Application mode on both EVBs, see
.
2.
Connect the 4-pin headphone provided in the kit to the audio jack (P1) on both EVBs.
3.
Connect the 4.2V battery to the battery connector (J201) on both EVBs.
4.
Connect the antenna provided in the kit to the SMA connector (CN301) on both EVBs.
5.
Make sure that the 5V On/Off switch is in the ON position.
6.
Connect the USB cable from a PC host (or a USB power source) to the Micro-B USB port (J701) for both
EVBs.
Note:
The two EVBs in the IS2066B EVB kits are pre-programmed and pre-paired with the WST application.
Figure 4-1. Using the Evaluation Board
7.
Observe that the LEDs for both EVBs turn on. It is simulated as an IN-BOX condition (that is, both left and right
inside the charger box) and the EVB units perform automatic WST pairing (primary and secondary) when they
are placed close to each other.
The WST pairing only takes 2-3 seconds. If the pairing process is successful, then:
– The EVB with the red LED blinking changes to steady red, which indicates that it is the
secondary
earbud
.
– The other EVB with the blue LED blinking remains the same, which indicates that it is the
primary earbud
.
– If the pairing is not successful, then both ear buds show a blinking red LED.
– Power cycle (SW201 5V turn off and on again) both EVBs and start again.
IS2066B
Application Demonstration
©
2019 Microchip Technology Inc.
User Guide
DS50002946A-page 11


