background image


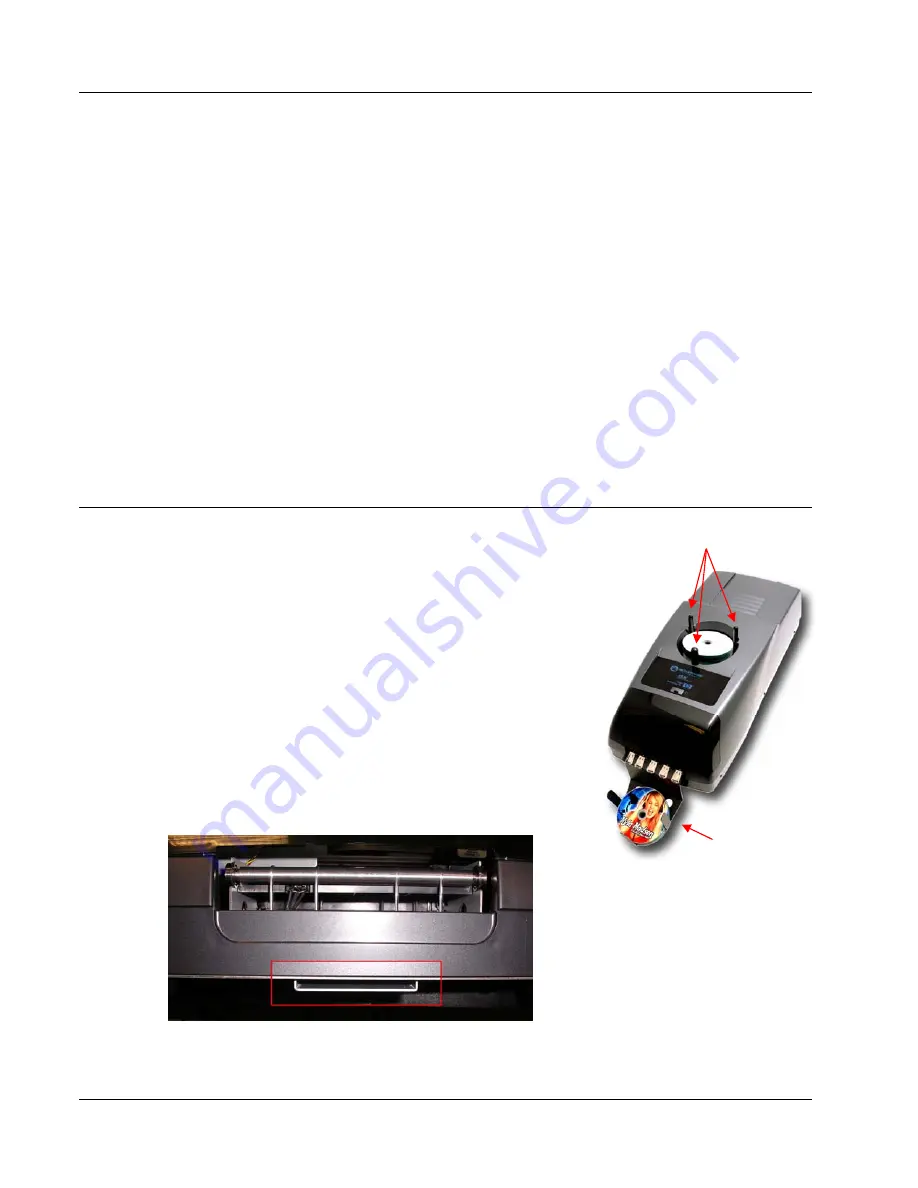
Input Rods 

Output Bin 

System Requirements 

The Microboards GX Auto Printer has the following minimum requirements and compatibilities: 

Operating System 

Microsoft Windows XP with SP2, Windows Vista, or Windows 7.  32- and 64-bit Operating Systems.  

Processor 

Pentium 4 (or equivalent) CPU, running at 2.0 GHz or faster.  

System Memory 

Minimum 1 GB of system memory.  

Hard Drive Space 

Only 10MB of free space is required on the system hard drive for the applications and drivers.  
Additional drive space will be required for saved disc labels. 

USB Connection 

USB 2.0 is recommended.  USB 1.1 may be used but is not recommended, as using USB 1.1 may 
result in more time being necessary for print images to be passed to the printer. 

Assembly and Ink Installation 

Assembly Instructions 

GX Auto Printer Assembly 

Remove the GX Auto Printer system from the shipping box and 
confirm you received all of the items. 

Place the GX Auto Printer on a stable, flat surface.  You will need 
room in front and to the left of the system, as discs will be accessed 
from both locations. 

The input bin posts are pre-installed, with the wide post to the front. 

The Reject Bin is pre-installed on the left side of the GX Auto 
Printer.  This bin, which slides out, should be emptied when you 
know discs have been rejected. 

Slide the 50-disc Output Bin into the channel between the feet at the 
front of the GX Auto Printer, shown below.   

Содержание GX Auto Printer

Страница 1: ...GX Auto Printer For Microsoft Windows 7 Vista and XP Users Manual Microboards Technology LLC Version 1 3...

Страница 2: ...2...

Страница 3: ...TALLATION 9 SETTING PRINTER ALIGNMENT 11 ALIGNMENT 11 GX TOOLBOX 11 PRINT TEST DISC 11 EXERCISE BELT 11 CLEANING 11 USING THE GX AUTO PRINTER 12 LOADING DISCS 12 SURETHING DISC LABELER 12 Creating New...

Страница 4: ...l interference to radio or television reception which can be determined by turning the equipment off and on the user is encouraged to try to correct the interference by one or more of the following me...

Страница 5: ...uto Printer print system GX Auto Printer Quick Start Guide Print Sample Power Cord Alignment CD s Blank Printable CD s Users Manual This document Microboards GX Auto Printer Install CD Includes Window...

Страница 6: ...is not recommended as using USB 1 1 may result in more time being necessary for print images to be passed to the printer Assembly and Ink Installation Assembly Instructions GX Auto Printer Assembly Re...

Страница 7: ...tridges can be changed while the GX Auto Printer is on but it should never be turned on without an ink cartridge in place The GX Auto Printer system ships with one GX 300HC color ink cartridge Remove...

Страница 8: ...always be done when logged in as a user with full Administrator rights Connecting to a PC DO NOT CONNECT YOUR GX AUTO PRINTER TO A COMPUTER BEFORE RUNNING THE INSTALLER LOCATED ON THE INSTALLATION DI...

Страница 9: ...be installed the hardware will need to be installed using the Hardware Wizard Please follow the directions below Windows XP Hardware Installation The Windows Found New Hardware Wizard will appear dur...

Страница 10: ...elect No not this time and click Next 6 Click Next 7 Click Continue Anyway 8 Click Finish for the next screen 9 Select No not this time and click Next 10 Click Next 11 Click Continue Anyway 12 Click F...

Страница 11: ...raphic on the Alignment tab and repeat GX Toolbox A shortcut to the GX Toolbox was added to your desktop during the printer installation Double click the icon to open the toolbox For each of the funct...

Страница 12: ...ating New Labels Any label you create in SureThing must use the Microboards template to print correctly 1 To create a new label either click New Project in the Action window on the left or select New...

Страница 13: ...eferences There are 7 tabs across the top of the window Click each tab to see the available settings Color Tab The Color Tab allows you to specify that the entire image should be printed in grayscale...

Страница 14: ...but also affects the quality of the printed output The default settings are the recommended settings and should be used unless absolutely necessary Diameter Settings Tab The Diameter Settings tab allo...

Страница 15: ...ink level warning will be displayed once more Again either change the cartridge or continue Once the ink level reaches 3 or less the warning will be displayed before each print It is strongly recomme...

Страница 16: ...ormation and small simple graphics Below are some examples for images in Fast Normal and Best Modes Text and Graphics Fast Text and Graphics Normal Text and Graphics Best Photo Mode should be used whe...

Страница 17: ...Accept and click the Next button 3 If you wish to change the default Install directory it can be done here Click Next when completed 4 Click Next to add a shortcut in the Start Menu 5 Choose to add an...

Страница 18: ...to press the OK button on the printer and click the OK button in the dialog to clear the error state Disk Feed error 1 If a disc is not loaded correctly an error message will be displayed on your PC...

Страница 19: ...0mm Power Supply Auto Detect AC Power 90VAC 240VAC 47Hz 63Hz Warranty One Year Limited Warranty Print Technology HP Thermal Inkjet Print Quality Black 600 x 600 dpi with HP PhotoREt Print Quality Colo...

Страница 20: ...20...

Отзывы: