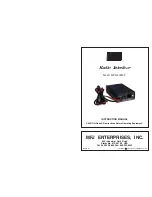
MFJ-5124K/Y Radio Interface
Instruction Manual
©
2005-2006 MFJ Enterprises, Inc.
3
Kenwood Radio Interface
The MFJ-5124K radio interface allows users of AT-300 compatible Kenwood
transceivers to connect to the MFJ-991, MFJ-993 and MFJ-994
IntelliTuner™
Automatic Antenna Tuners. With this interface, DC power is supplied by the
radio and control signals are connected between the radio and the tuner. The
operator can then control the tuner with a single push of the [AT TUNE] button
on the front panel of the radio. Supported Kenwood radios are TS-50S, TS-
450S, TS-480HX, TS-570S, TS-690S, TS-850S, TS-870S, TS-2000, and any
Kenwood radio that supports the Kenwood AT-300 tuner.
Note:
The TS-480HX will automatically reduce its TX power to 100 watts
maximum (25 watts AM) when the radio interface is used.
Connections
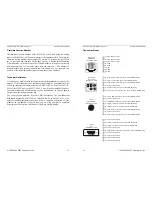
1. Insert the 3.5 mm stereo phone plug into the tuner’s RADIO
INTERFACE jack.
2. Insert the 2.1 x 5.5 mm coaxial power plug into the tuner’s POWER
jack.
3. Insert the 8-pin modular plug into the MFJ-5124’s TO RADIO jack.
4. Important:
Make sure the DC power to the radio has been turned off.
The radio does not fuse the DC power to the tuner, and damage to the
radio can occur if the interface’s power connection comes in contact
with ground.
5. Connect the 6-pin molex connector to the mating 6-pin molex
connector, marked as AT or ACC, on the back of the Kenwood radio.
6. Push the [POWER] button on the tuner to the
in
position. When the
radio is turned on, the tuner will also power on.
7. Some Kenwood radios automatically check to see if an external
antenna tuner is connected during power on, such as the TS-570S (set
jumper JP2 to the A position). This is the factory default setting. If
both needles on the MFJ tuner keep bouncing (
TURN ON RADIO
appears on the MFJ-993) and do not go away, then move jumper JP2 to
the B position.
For other Kenwood radios, the External Antenna Tuner menu in the
radio menu system must be enabled, such as the TS-450S and the TS-
690S (set jumper JP2 to the B position). If the MFJ tuner switches to
bypass mode during power on, then move jumper JP2 to the A position
because the radio is checking for a tuner presence during power on.
MFJ-5124K/Y Radio Interface
Instruction Manual
4
©
2005-2006 MFJ Enterprises, Inc.
Refer to your radio’s operating manual for accessing the menu system
and preparing the AT-300 external antenna tuner operation. Use TS-
450S and TS-690S as an example:
a. Press and hold the [ENT] key while turning the power on.
b. Rotate the M.CH/VFO CH control to select menu number 01
on the display.
c. Press the [UP] or [DOWN] key to change the setting to “ON.”
d. Press the [CLR] key to return to normal operation.
Operation
The operation of the MFJ-5124K radio interface is similar to the operation of the
AT-300 described in the Kenwood radio’s operating manual.
1. Press and hold the [AT TUNE] button on the radio for one second to
initiate automatic tuning process. The radio will automatically switch
to CW mode, transmit a 10-watt carrier, and start the tuning process.
When the tuning process is completed, the radio will stop transmitting,
return to its previous mode and power setting.
2. Press the [AT TUNE] button on the radio quickly to bypass the tuner
(some Kenwood radios, such as the TS-690S, do not have this bypass
function) or to cancel tuning in progress.
Note the [TUNE] button on the tuner will not operate the Kenwood radio
interface.

