METREL MD 9880
Thermal camera and DMM operation
14
5.
Thermal camera and DMM operation
Thermal camera basics
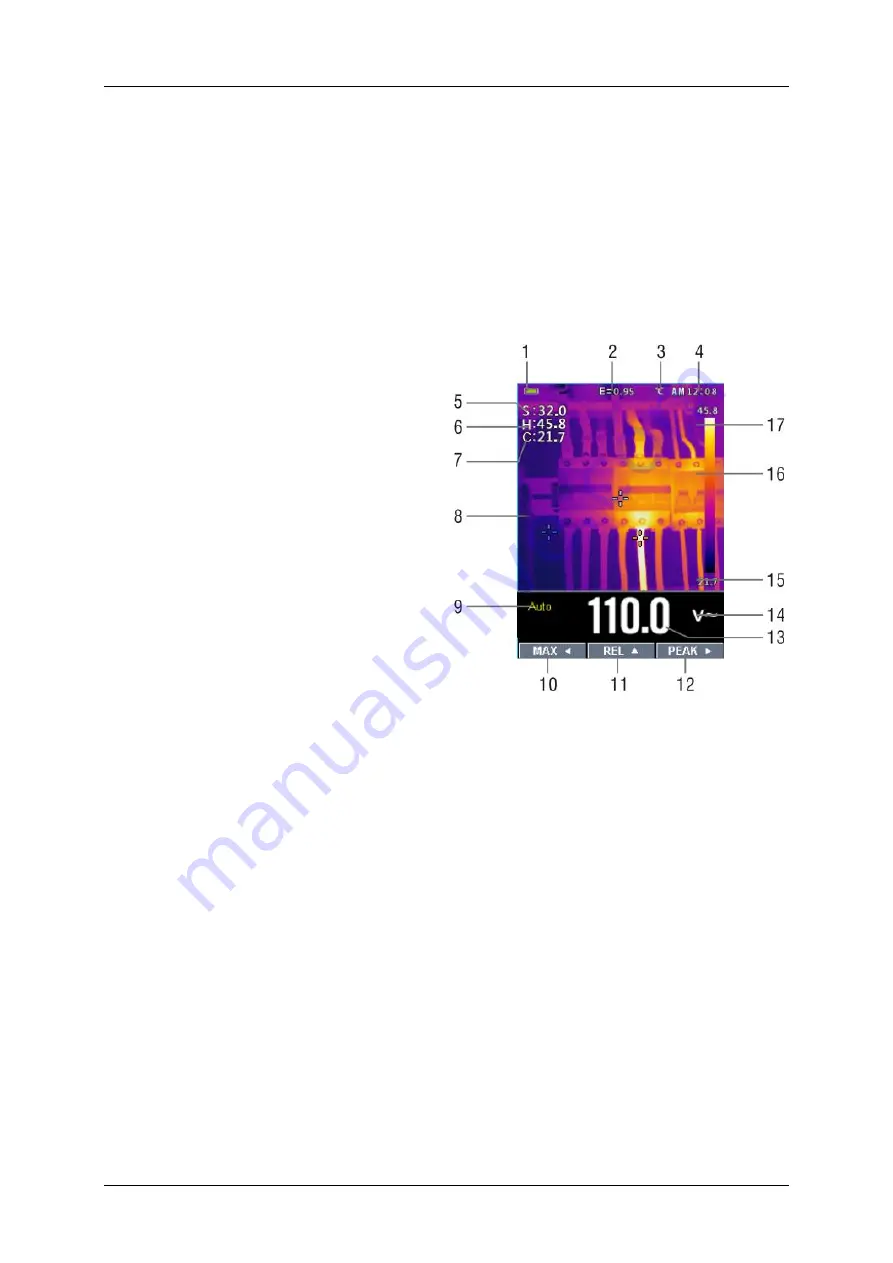
Meter allows using the thermal camera and multimeter at the same time. Multimeter
result is displayed below the thermal image.
Press the red 'IR" button to open the Thermal camera. The palette used in the
thermal image in (figure) is set to IRON. More are available in the Settings.
Open the protective lens cover on the back of the meter to use the thermal
camera.
1. The battery charge indicator.
2. The currently selected
emissivity value. Use the
Settings Menu to change it.
3. The temperature unit icon. Use
Settings Menu to select °C, °F,
or K.
4. Current time of day display
5. Centre crosshair of the thermal
camera temperature
measurement where the centre
spot temperature is taken.
6. Maximum temperature
crosshairs, where the highest
temperature in the scene is
detected.
7. Minimum temperature
crosshairs, where the lowest
temperature in the scene is detected.
8. Thermal display.
9. Auto/manual range icon.
10. MAX soft button.
11. REL soft button.
12. PEAK soft button.
13. DMM measurement result.
14. DMM result unit.
15. Lowest temperature and darkest colour measured in the current frame.
16. The thermal scale shows the colour and associated temperature range for
thermal images. The lighter the colour, the higher the temperature and vice
versa.
17. Highest temperature and lightest colour measured in the current frame.
Using the thermal camera
Set the function switch to any position to turn the Meter ON.
Press the "IR" button to switch to the thermal camera mode.
Target the object by the thermal camera lens. The display will show the temperature
measurement in the upper left hand corner for the targeted area along with the
currently selected emissivity value.


