13. Run job without material
After downloaded a job, press START for the machine to position. While X&Y axis (Ram- and
Backgauge) is positioning, a bar graph indicates while it is positioning
When in position, the bar graphs disappear and the machine is ready to fold. The X and Y values
in the top right hand corner will turn from red to green. Without inserting material, use the
foot switch to execute the folds until all folds are completed and the press is ready for the
first fold. Observe between every fold that the machine is positioning correctly.
Fold up the job with actual material. Check angles.
14. Correct under or overfolding
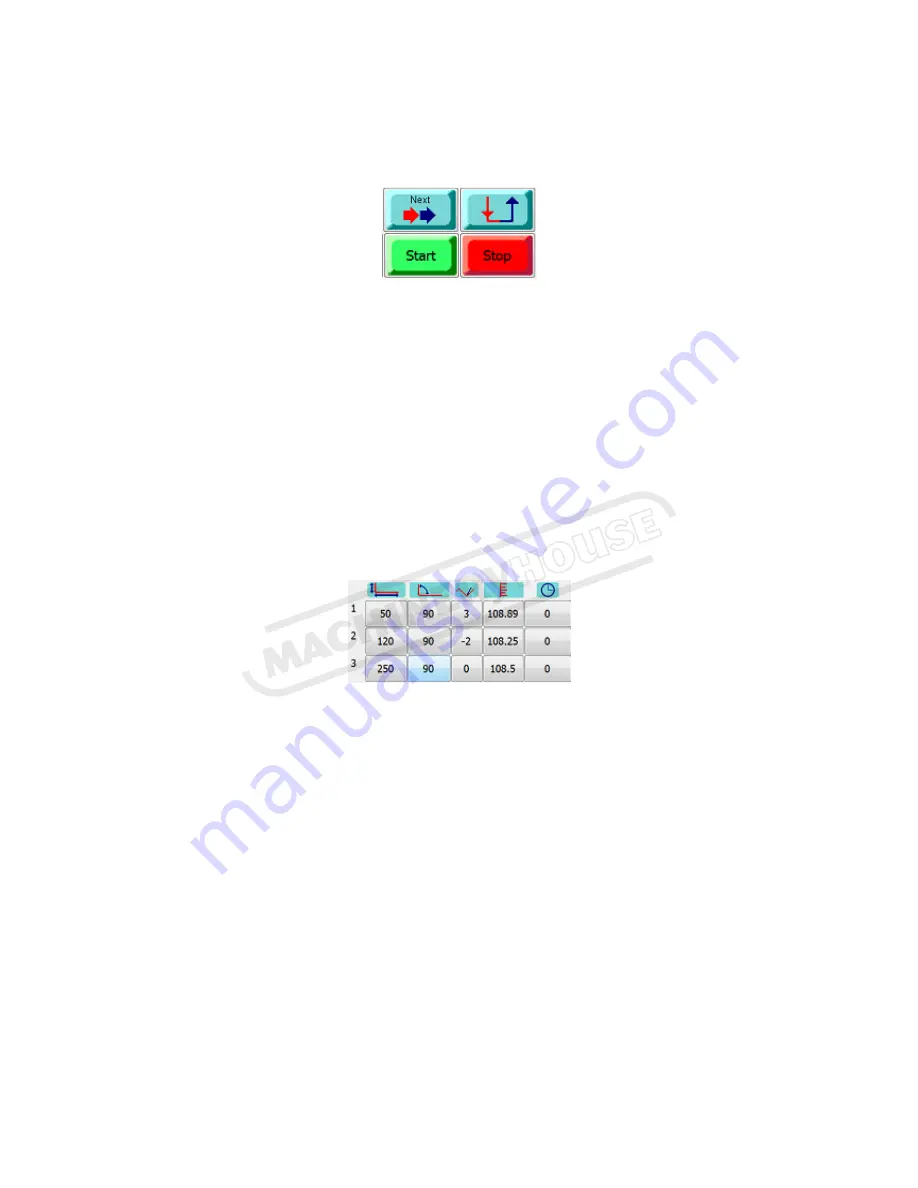
The third column from the left is the angle trim column. If a fold is 5 degrees under, enter 5
into the appropriate cell
If it overfolds, enter -5.
Look at the difference in Tool-depth column
(4
th
from the left) Fold 3 is a 90d
Fold 3 0 trim depth = 108.5
Fold 2 -2 trim = 108.25
Fold 1 +3 trim = 108.89
If the trim values is generally all high, lets say 8 degrees on average, it can be because the
tensile strength is different or maybe the V width is slightly larger than measured. It is then
better to change the tensile strength correction on the Die screen and use no or small trim
values. Refer to section 22.
Page 10
Instruction Manual for PB-170B (S909F)
04/12/2014


