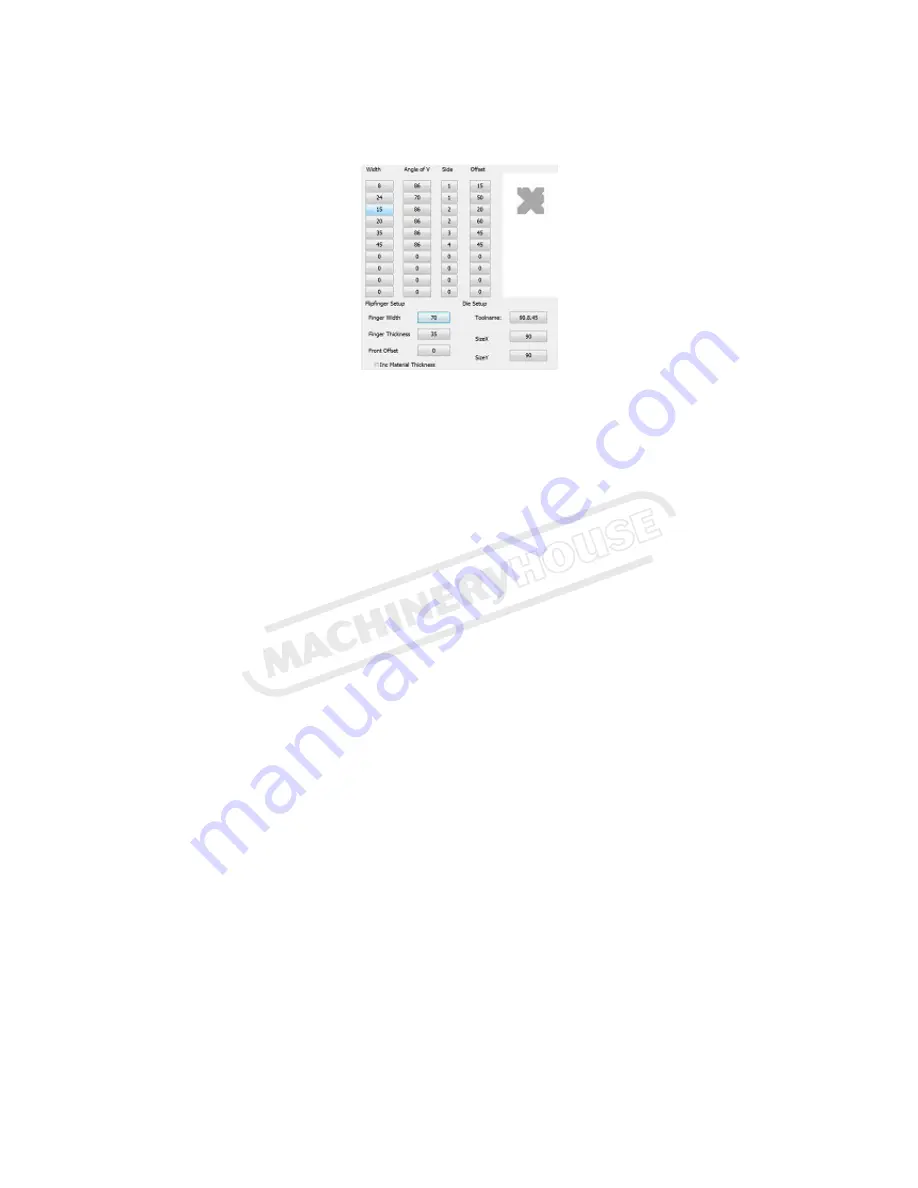
24. Program and save a new die
Press on the bottom DIE on the graphic to go to the DIE screen.
Type the overall dimension of the tool as SizeX and SizeY.
Now use the Data area on the left to enter the V sizes etc.
Before actually programming the new Die, lets use the above example to explain the Data area.
The fist column contains all the V sizes, 8,24,15,20 etc.
The next column contains the Angle for each V 86,70,86 etc.
The next column is the side number on the block. Top side is side1, then 2,3 & 4 in a clockwise
direction. To enter a side number, press on it and it will toggle from 1 to 4. It will not bring up a
keypad.
The last column is the offset which is the distance from the left edge to the centre of the V,
15,50,20,60 etc.
Now clear the whole data field by entering a zero into the top left cell.
Measure the V width of the first V and enter in line one, then angle, then side one, then the
distance from the left edge of the DIE to the centre of the V.
Now do the same for all the V’s
Name the Die and Save.
Tip: Use descriptive names such as 95.8.48 so it can be easily identified in future. 95 indicates
height, smallest V is 8mm and largest is 48mm.
Page 17
Instruction Manual for PB-110B (S904F)
04/12/2014


