Operation
PRM FH | Version 1.04 | EN
21
Step 1: Set the main switch on the electric box from "0" to "1". The display (
Pos. 3, Fig. 13) lights up.
Step 2: Press the START button on the control panel to dtart the hydraulic
pump. The machine is ready for operation.
Step 3: Move the upper roller up and down with buttons 3 and 4 (Fig. 13).
Step 4: Insert the material. Use the pedals to move the rollers and carry out the
bending work.
Step 5: After completion of the bending work, press the EMERGENCY STOP
button and set the main switch from "1" to "0". The machine is out of
operation.
9.2 Mounting the standard bending rollers
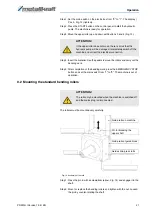
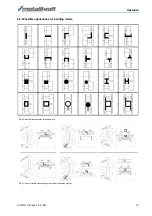
The rollers must be mounted very carefully.
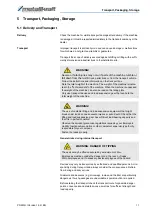
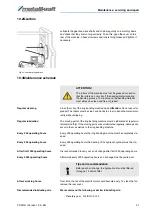
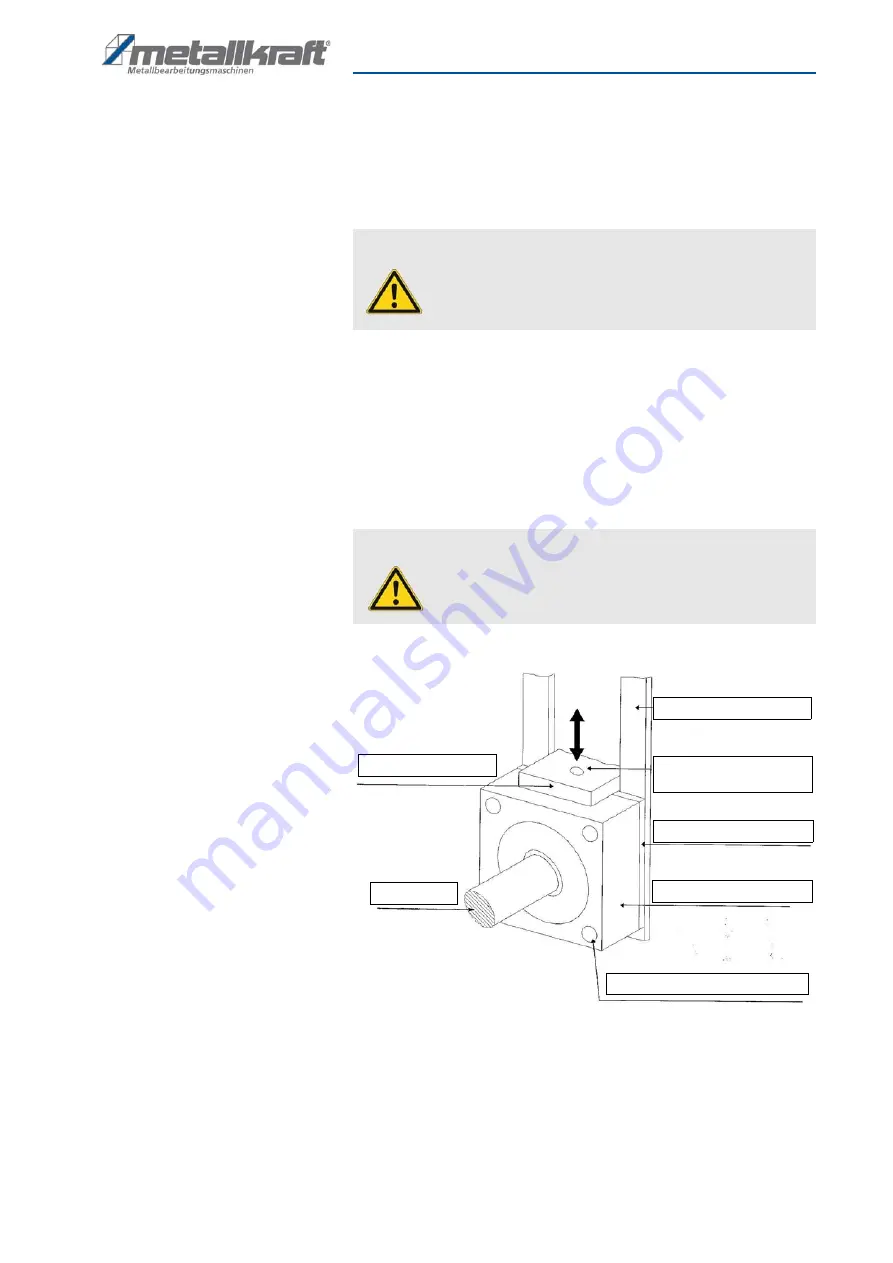
Fig. 14: Assembly of the rolls
Step 1: Press the pin in with a screwdriver (arrow, Fig. 14) and engage it in the
shaft.
Step 2: Mount or replace the bending rollers and tighten with the nut. Loosen
the pin by counter-rotating the shaft.
ATTENTION!
If the upper roller does not move, there is a risk that the
hydraulic pump will be damaged. Immediately switch off the
machine and correct the electrical connection.
ATTENTION!
The rolls only be mounted when the machine is switched off
and the mains plug is disconnected.
Guide rails on machine
Pin for blocking the
upper shaft
Guide rails at guide block
Guide slide, press rolls
Содержание PRM 50 FH
Страница 1: ...PRM 50 FH Operating Instructions PRM 50 FH Ring Bending Machine hydraulic PRM 60 FH...
Страница 36: ...36 PRM FH Version 1 04 EN Spare parts Fig 26 Spare parts drawing 2 PRM 50 FH Spare parts drawing 2...
Страница 38: ...38 PRM FH Version 1 04 EN Spare parts Spare pars drawing 2 Fig 28 Spare parts drawing 2 PRM 60 FH...
Страница 39: ...Spare parts PRM FH Version 1 04 EN 39 Spare parts drawing 3 Fig 29 Spare parts drawing 3 PRM 60 FH...
Страница 40: ...40 PRM FH Version 1 04 EN Spare parts Spare parts drawing 4 Fig 30 Spare parts drawing 4 PRM 60 FH...
Страница 49: ...Notes PRM FH Version 1 04 EN 49 15 Notes...
Страница 50: ...www metallkraft de...

