ENGLISH
14
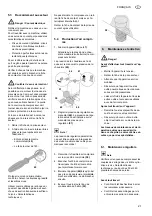
Wait until the maximum tank pres-
sure is reached (the compressor
shuts OFF).
The tank pressure is indicated on the
tank pressure gauge
.
to re-
quired working pressure. The current
working pressure is indicated on the
regulated pressure gauge
.
A
Caution!
The regulated pressure may not be set
higher than the max. working pressure
of the connected air tools!
3. Connect air hose to compressed air
outlet
4. Connect air tool. You are now ready
to work with the air tool.
5. Switch the compressor OFF
you do not intend to continue work-
ing immediately afterwards. Unplug
after switching OFF.
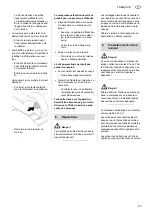
6. Drain condensate from pressure
vessel once a day
A
Danger!
Prior to all servicing:
– Switch machine OFF.
– Unplug power cable.
– Wait until the compressor has come
to a complete stop.
– Ensure the compressor and all air
tools and accessories connected to
it are relieved from pressure.
– Let the device and all air tools and
accessories cool down.
After all servicing:
– Check to see that all safety devices
are operational.
– Make sure that no tools or other
parts remain on or in the machine.
Repair and maintenance work other
than described in this section must
only be carried out by qualified spe-
cialists.
6.1
Periodic maintenance
A
Caution!
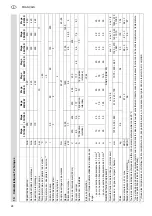
On a new compressor pump, check the
tightening torque of the cylinder head
bolts (see 'Technical Data') after the
first 50 and 250 hours of operation.
Prior to each use
Check air hoses for damage and re-
place if necessary.
Check all screwed connections for
tightness and tighten if necessary.
Check power supply cable for dam-
age and have replaced by a quali-
fied electrician if necessary.
Every 50 operating hours
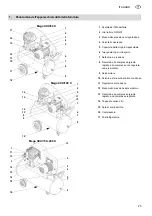
Check air filter element
of com-
pressor pump and clean if neces-
sary.
Check the oil level of the compres-
sor pump
and add oil as re-
quired
.
Every 250 operating hours
Clean or replace the air filter on the
compressor pump.
Clean or replace the air filter
on
the filter/regulator unit.
Every 500 operating hours
Drain the oil and add new oil
.
Check V-belt:
Remove belt guard
Check the V-belt and re-tension
or replace if necessary.
To adjust the V-belt tension,
loosen the four screws at the mo-
tor base and shift the motor
.
Tighten screws at the motor
base.
Install the belt guard again.
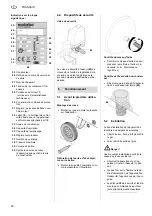
6.
Care and Maintenance
49
50
46
48
51
47
52
53
54
55
56
57


