background image

16

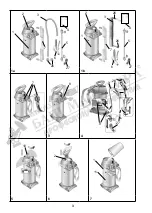
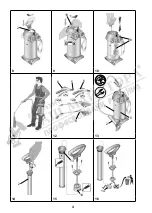
1.  Pull up the red button on the piston pressure gauge [8] until all excess pressure is 

released from the tank. 

(Fig. 3)

2.  Press the piston rod with handle [10] down and turn it counterclockwise.

 Ź7KHSLVWRQURGZLWKKDQGOHLVORFNHG

)LJ

3.  Unscrew the pump [2] from the tank. 

(Fig. 6)

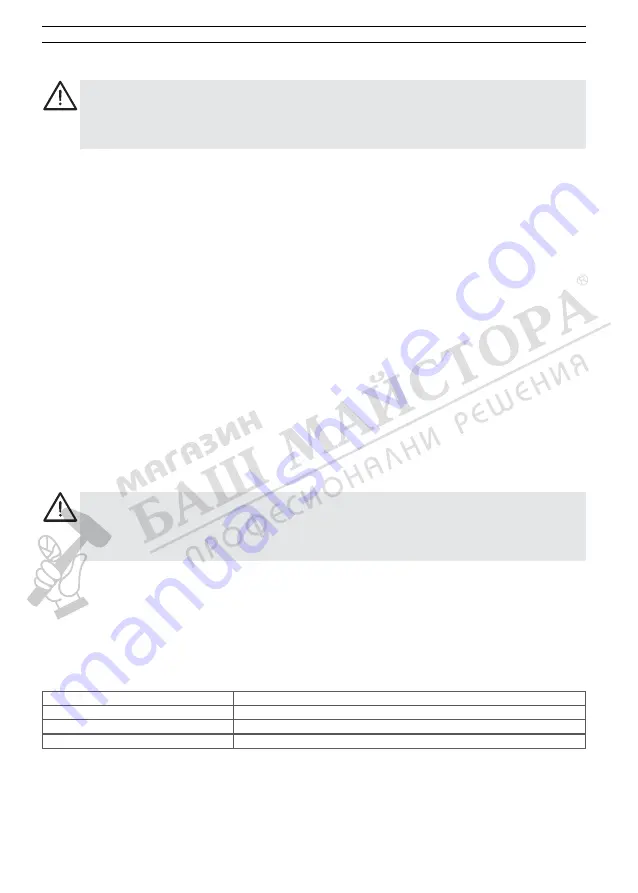
Spraying pressure

6SUD\LQJUDWHZLWKÀDWMHWQR]]OHRULJLQDOHTXLSPHQW

1.5 bar (21.8 psi)

0.49 l/min

2.0 bar (29.0 psi)

0.56 l/min

3.0 bar (43.5 psi)

0.69 l/min

EN ENGLISH

Preparation

+

:HUHFRPPHQG\RXPL[WKHVSUD\LQJOLTXLGLQWKHGHYLFHRUSUHPL[LWLQDQH[WHUQDOWDQN

)LOOWRZLWKZDWHUSRXULQWKHVSUD\LQJDJHQWDQGWKHQDGGPRUHZDWHUXQWLOIXOO

4.  Add the spraying liquid to the tank [1]. 

(Fig. 7)

 &KHFNWKH¿OOLQJOHYHOZLWKWKHVFDOH>@RQWKHWDQN

(Fig. 7)

6.  Screw the pump [2] into the tank. 

(Fig. 8)

7.  Press the piston rod with handle [10] down and turn it counterclockwise.

 Ź7KHSLVWRQURGZLWKKDQGOHLVXQORFNHG

(Fig. 9)

8.  Generate the desired pressure 

ĺ7DEOH

 in tank 

(Fig. 10).

+

7KHPD[LPXPSUHVVXUHVKRXOGQRWH[FHHGEDUUHGOLQHRQWKHSLVWRQSUHVVXUH

JDXJH)LJ,IWKHPD[LPXPSUHVVXUHLVH[FHHGHGWKHVDIHW\YDOYHZLOOHQJDJH

DQGUHOHDVHWKHH[FHVVSUHVVXUH

9.  Press the piston rod with handle [10] down and turn it counterclockwise. 

)LJ

 Ź7KHSLVWRQURGZLWKKDQGOHLVORFNHG

Spraying

+

7RSUHYHQWGULSSLQJKROGWKHVSUD\ZDQGXSZKHQ¿UVWVSUD\LQJDQGDFWLYDWHWKH

VKXWR௺YDOYHXQWLOQRPRUHOLTXLGPL[HGZLWKDLULVHPHUJLQJIURPWKHQR]]OH

 ,IUHTXLUHGUHVHWWKHZKHHOORFN>D@DQGDFWLYDWHWKHVKXWRႇYDOYH>@

(Fig. 12)

 Ź6SUD\LQJPD\QRZEHJLQ

3.  Make certain the optimum spraying pressure is set

ĺ7DEOH

) on the piston pressure 

gauge [8] 

(Fig. 10)

.

7DEOH'HSHQGHQFH6SUD\LQJUDWH±VSUD\LQJSUHVVXUH

4.  If the spraying pressure decreases more than 0.5 bar 

(7.3 psi)

 from the optimum level, 

pump some more.

+

,IOLTXLGPL[HGZLWKDLUHPHUJHVIURPWKHQR]]OHWKHWDQNLVHPSW\

Observe the instructions in the section entitled „Safety“. 

The device must be in an upright position. 

,I¿OOLQJWKHWDQNIURPDZDWHUOLQHHQVXUHWKDWWKHOLQHRUDKRVHGRHVQRWSURMHFW

into the tank.

Observe the instructions in the section entitled “Safety”. 

Operate the device only while it is vertical or suspended upright and nearly vertical. 

Avoid allowing drops of spray to drift onto areas that are not being treated. 

Observe the instructions of the spray product manufacturer!

1.  Hang the device over your shoulder. 

(Fig. 11)

Содержание CLEANER 3270P

Страница 1: ...tung 6 EN ENGLISH Instructions for Use 13 FR FRAN AIS Mode d emploi 20 NL NEDERLANDS Gebruiksaanwijzing 27 ES ESPA OL Instrucciones de uso 34 IT ITALIANO Istruzioni per l uso 41 PT PORTUGU S Manual de...

Страница 2: ...HUYHV GD DV 3275PP 3270PP 3275PE 3270PE 3275P 3270P www mesto de 2 6227KS 1623 1623 6707L 3275PP 3270PP 3275P 3270P 6707E 3275PE 3270PE 6224SB 3275PP 3270PP 3275P 3270P 6224SE 3275PE 3270PE 6307L 327...

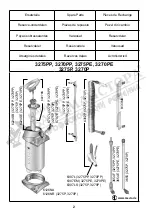
Страница 3: ...1a 1b 2 3 4 5 6 7 3 1 1 2 2 3 3 7 7 8 10 2 1 11 9 7 6 6 26 26 3 3 3 6 5 27 5 26 26 27 27 5 5 4 4...

Страница 4: ...8 9 10 11 12 13 14 15 16 4 2 10 8 6 12a 12b 5 5 1 2 2 13 14 14 6 6...

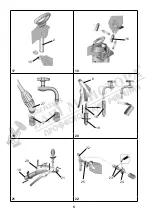
Страница 5: ...17 18 19 20 21 22 5 2 15 16 17 27 6 18 19 19 20 21 22 25 23 24...

Страница 6: ...for use in a safe place where they can be easily found The instructions for use are an integral part of the device and must be enclosed when the device is passed on Particular safety measures are requ...

Страница 7: ...rom frost and ammonia Never blow through the nozzles or valves with your mouth 5LVN RI SRLVRQLQJ There is a risk of slipping or tripping on smooth or wet surfaces snow ice on slopes and on uneven terr...

Страница 8: ...KH VKXW R YDOYH DQG VHFXUH LW ZLWK WKH FDS QXW Fig 4 6FUHZ WKH VSUD ZDQG RQWR WKH VKXW R YDOYH Fig 4 5 Screw the bow 27 onto the spray wand 5 Fig 4 7DQN SXPS KRVH LQVWUXFWLRQV IRU XVH VSUD ZDQG VKXW R...

Страница 9: ...HW YDOYH ZLOO HQJDJH DQG UHOHDVH WKH H FHVV SUHVVXUH 9 Press the piston rod with handle 10 down and turn it counterclockwise LJ 7KH SLVWRQ URG ZLWK KDQGOH LV ORFNHG Spraying 7R SUHYHQW GULSSLQJ KROG W...

Страница 10: ...from the tank Fig 6 4 Dilute the remaining quantity twice in a row with 1 2 liter of water each time and spray the resulting liquid onto the treated area LSH R WKH GHYLFH ZLWK D PRLVW FORWK 6 For dry...

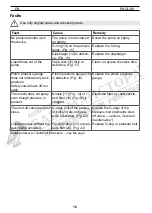
Страница 11: ...uge 16 is defective Fig 18 Replace the piston pressure gauge The nozzle does not spray even though pressure is present Nozzle 17 Fig 19 or DQG OWHU Fig 20 is clogged OHDQ WKH OWHU RU DQG QR OH 7KH VKX...

Страница 12: ...sing errors If defects are discovered during the warranty period MESTO or the distributor in your country will repair the device without charging for the labor or material or at the discretion of MES...

Отзывы: