


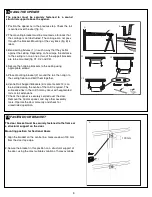


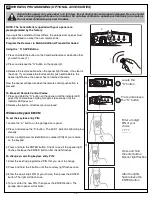


USING YOUR OPENER
1. Your opener can be activated by any of the following devices:
•
Opener control panel
: UP and DOWN Buttons and Green O.S.C.
•
The Outside Keyswitch or Keyless Entry System
(if you have
installed either of these accessories).
•
The Remote Control Transmitter.
Hold the push button down until
the door starts to move.
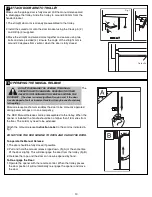
2. Opening the Door Manually: Door should be fully closed if
possible. Weak or broken springs could allow an open door to
fall rapidly. Property damage or serious personal injury could
result.
NOTE: For full instructions on how to operate the door manually
refer to section 18.
Do not use the manual release handle to pull the door open
or closed.
3. When the Opener is Activated by Remote Control:
1. If open, the door will close. If closed, the door will open.
2. If closing, the door will stop.
3. If opening, the door will stop (allowing space for entry and exit of
pets and for fresh air).
4. If the door has been stopped in a partially open or closed position,
it will reverse direction.
5. If an obstruction is encountered while closing, the door will reverse
to the UP limit.
6. If an obstruction is encountered while opening, the door will
reverse and stop.
7. The optional Protector System™ uses an invisible beam which,
when broken by an obstruction, causes a closing door to open
and prevents an open door from closing. It is STRONGLY
RECOMMENDED for homeowners with young children.
4. The opener lights will turn on under the following conditions:
When the opener is initially plugged in; when power is restored after
interruption or when the opener is activated.
Lights will turn off automatically after 3 minutes.
Once a Month
• Manually operate door. If it is unbalanced or binding, call a
qualified door technician.
• Check to be sure door opens & closes fully. Adjust limits
and/or force if necessary.
• Repeat the safety reverse test. Make any necessary
adjustments.
Once a Year
• Lightly grease the chain and inside the rail assembly where
the trolley slides.
• Internally the opener does not require additional lubrication.
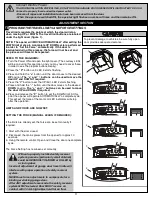
Battery of the remote control:
The batteries in the remote have an extremely long life.
If the transmission range decreases, the batteries must be
replaced. Batteries are not covered by the warranty.
Replacing battery (CR2032):
To replace battery, turn remote control around and open the
case with a screwdriver. Lift cover and lift control board below.
Slide battery to one side and remove. Observe polarity of
battery!
Assemble again in reverse direction.
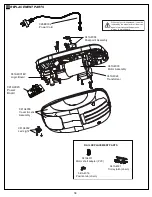
REPLACE BATTERIES IN REMOTES
12
VD
C
Pb
Cd
Hg
CARE OF YOUR OPENER
To prevent SERIOUS INJURY OR DEATH:
observe the following instructions for the
battery
- NEVER allow small children near batteries.
- If battery is swallowed, immediately notify doctor.
- Danger of explosion if battery is replaced improperly.
- Replacement only by identical or equivalent type.
- Dispose of old battery properly. Batteries should not
be treated as household waste. All consumers are
required by law to dispose of batteries properly at the
designated collection points.
- Never recharge batteries that are not meant to be
recharged.
- Do not short-circuit batteries or take them apart.
- If necessary, clean contacts on batteries and contacts
before loading.
- Never expose batteries to excessive heat such as
sunshine, fire or the like!
16
25
27
26
or
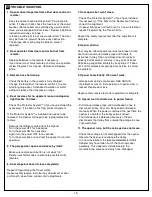
Carefully
Remove Battery
(CR2032 x 1)
To replace battery for optional remote control transmitters -
E943M, E940M & E945M, use a screwdriver blade to pry
open the case as shown. Insert battery positive side up.
MAINTENANCE AND CARE OF YOUR OPENER


