


27
Chapter 4 Use Your Extender as an Access Point
2.
Go to
Settings
>
Wireless
>
WPS
.
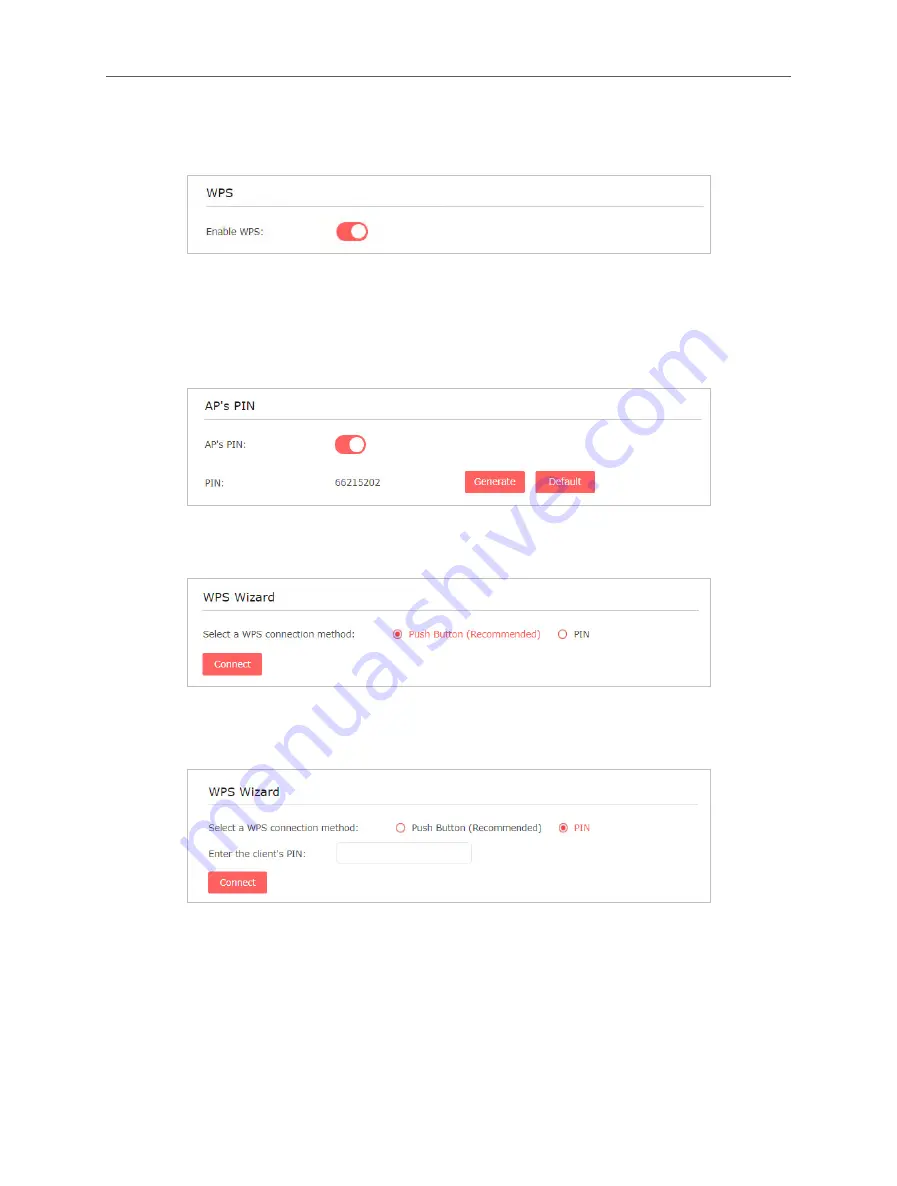
3. Enable
WPS
.
4.
Connect via WPS:
•
AP’s PIN: Enable
AP’s PIN
and enter the PIN on your device. You can click
Generate
to get a new PIN or click
Default
to restore the PIN to its factory
one.
•
Push button: Select
Push Button
and click
Connect
, then enable WPS on
your device within 2 minutes.
•
Client’s PIN: Select
PIN
and enter your device’s PIN in the blank, then click
Connect
.
5.3
LED Explanation for the Access Point Mode
When the extender works in the Access Point mode, you can check its working
status by following the LED Explanation table below.


