7
Connecting the player to a PC
[Operation procedure]
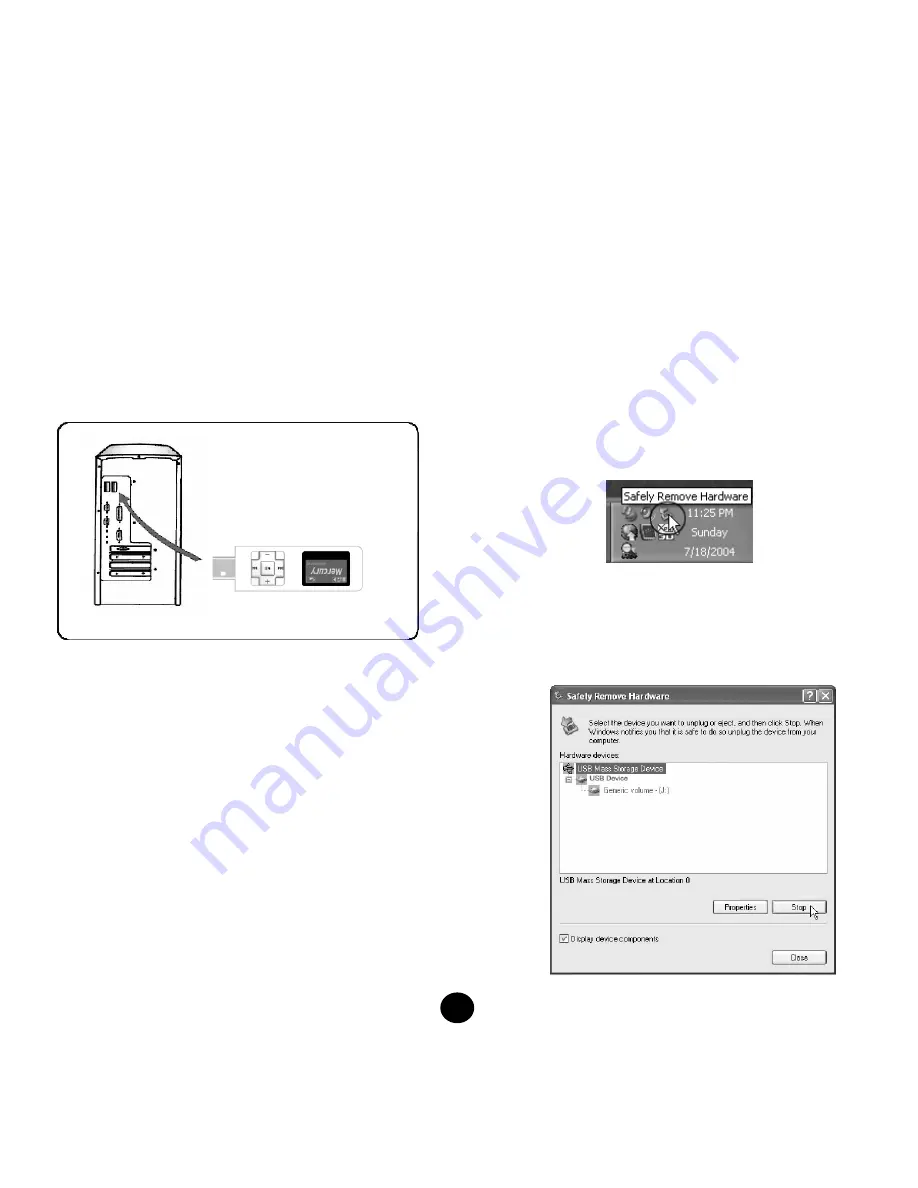
1. If you want to copy music files or update the firmware
to the player, connect it to a PC through the USB port
as shown in the picture below. If the PC cannot detect
the player, insert the tip of a pin or pointed object into
the RESET button on the back of the player to reset it.
2. Pay attention to the orientation of the USB ports on
the player and on the PC. Do not use an USB
extension cable or USB Hub, otherwise you may
experience abnormality in connection, file
transfer and firmware update.
3. After connecting the player to the PC, the OS will
automatically generate a Removable Disk in My
Computer. You can enter this device to access the
data in the player. After connecting successfully, the
LCD screen on the player displays “READY”.
4. You can also access the player from the Window File
Explorer (Windows 2000/XP)/File Manager (Windows
98SE/ME) or My Computer, add your favorite music
files or other files to the player, and delete files.
5. To remove the USB cable from the player after adding
or deleting files, follow the instructions below to avoid
damaging the files on the player.
Remove Hardware
1. Double-click on the Remove Hardware icon in the
taskbar tray as shown in the picture below.
2. Click on the Stop button when the following window
pops up. When the message telling you that you can
remove the hardware safely appears on the screen,
remove the player.
USB
port on
player
USB port on PC


