
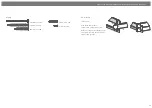


Pre drill
hole
P 5
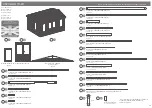
Please retain product label and instructions for future reference
10
7
7
5
5
70mm
screw
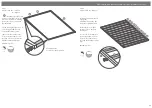
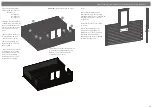
Step 3
(See Pre-Assembly)
Parts needed - No. 4 QTY 2
No. 5 QTY 2
Place the boards (
No’s. 4 & 5
) on
to the assembled base frame
along the longest
sides.
*Ensure the notches at either
end of each board are flush
and level with the ends of the
frame.
Fix each of the starter boards to
the frame by screwing through
the notch into the frame as
shown in the illustration.
4x70mm Screws
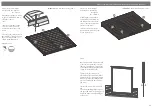
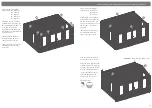
Step 4
(See Pre-Assembly)
Parts needed - No. 5 QTY 6
No. 7 QTY 8
No. 10 QTY 4
Following the same method
outlined in
Pre-Assembly
, lay
the first 6 boards (
No’s. 5, 7 &
10
) onto the starter boards to
create your first level.
*Ensure that the boards are
level and flush with each other
as you lay each one.
4
5
4
4
5
IMPORTANT:
Pre-drill before fixing screws.
IMPORTANT:
Pre-drill before fixing screws.
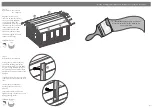
Step 5
Once you have laid 6 log boards (
off
of the starter
) up the door section,
slide the assembled door frame
(No.
2)
over the boards resting the frame
on top of the starter board.
*Please note:
This image is for
illustrative purposes and may differ
from your choice in product (
regard-
ing door position
). Nevertheless the
process of fitting the door frame is
the same.
**Please Note:
The short boards at
the
front of the building (either side of
the door and window opening’s) can
be placed either side depending on
your needs.


