
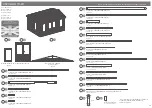


It is ESSENTIAL that you apply wood treat-
ment immediately after the building has
been assembled.
P 11
Please retain product label and instructions for future reference
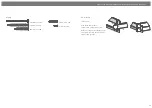
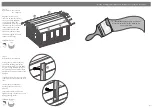
Step 18
Parts needed - No. 19 QTY 4
No. 20 QTY 4
Align the shorter Fascia’s
(
No. 19)
with the sides of the
roof and fix using 4x40mm
screws per fascia. Do the
same with the longer Fascia’s
(No. 20)
to the front and back
of the roof. Ensure to screw
through the fascia into the
roof purlins and eaves frame.
*Ensure the angled cuts meet
at the top of the apex.
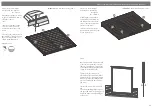
32x40mm Screws
Pre drill
hole
40mm
screw
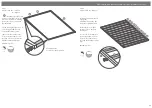
Step 19
Parts needed - No. 22 QTY 8
Arrange the storm braces (
No. 22
)
around the building (
internally
).
Place 2x storm braces per side fixing
into place using 2x80mm bolts per
brace making sure the washer & nut
are tightened from the outside of the
building.
*Ensure the storm braces are secured
at the highest point possible on each
side.
**Storm braces will help your
building expand and contract
properly.
***Important: Ensure each bolt is
tightened using a washer so as not to
damage the log boards.
16x80mm Bolt Sets
Pre drill
hole
80mm
bolt
19
19
19
19
20
20
20
20
22
22


