P 6
Please retain product label and instructions for future reference
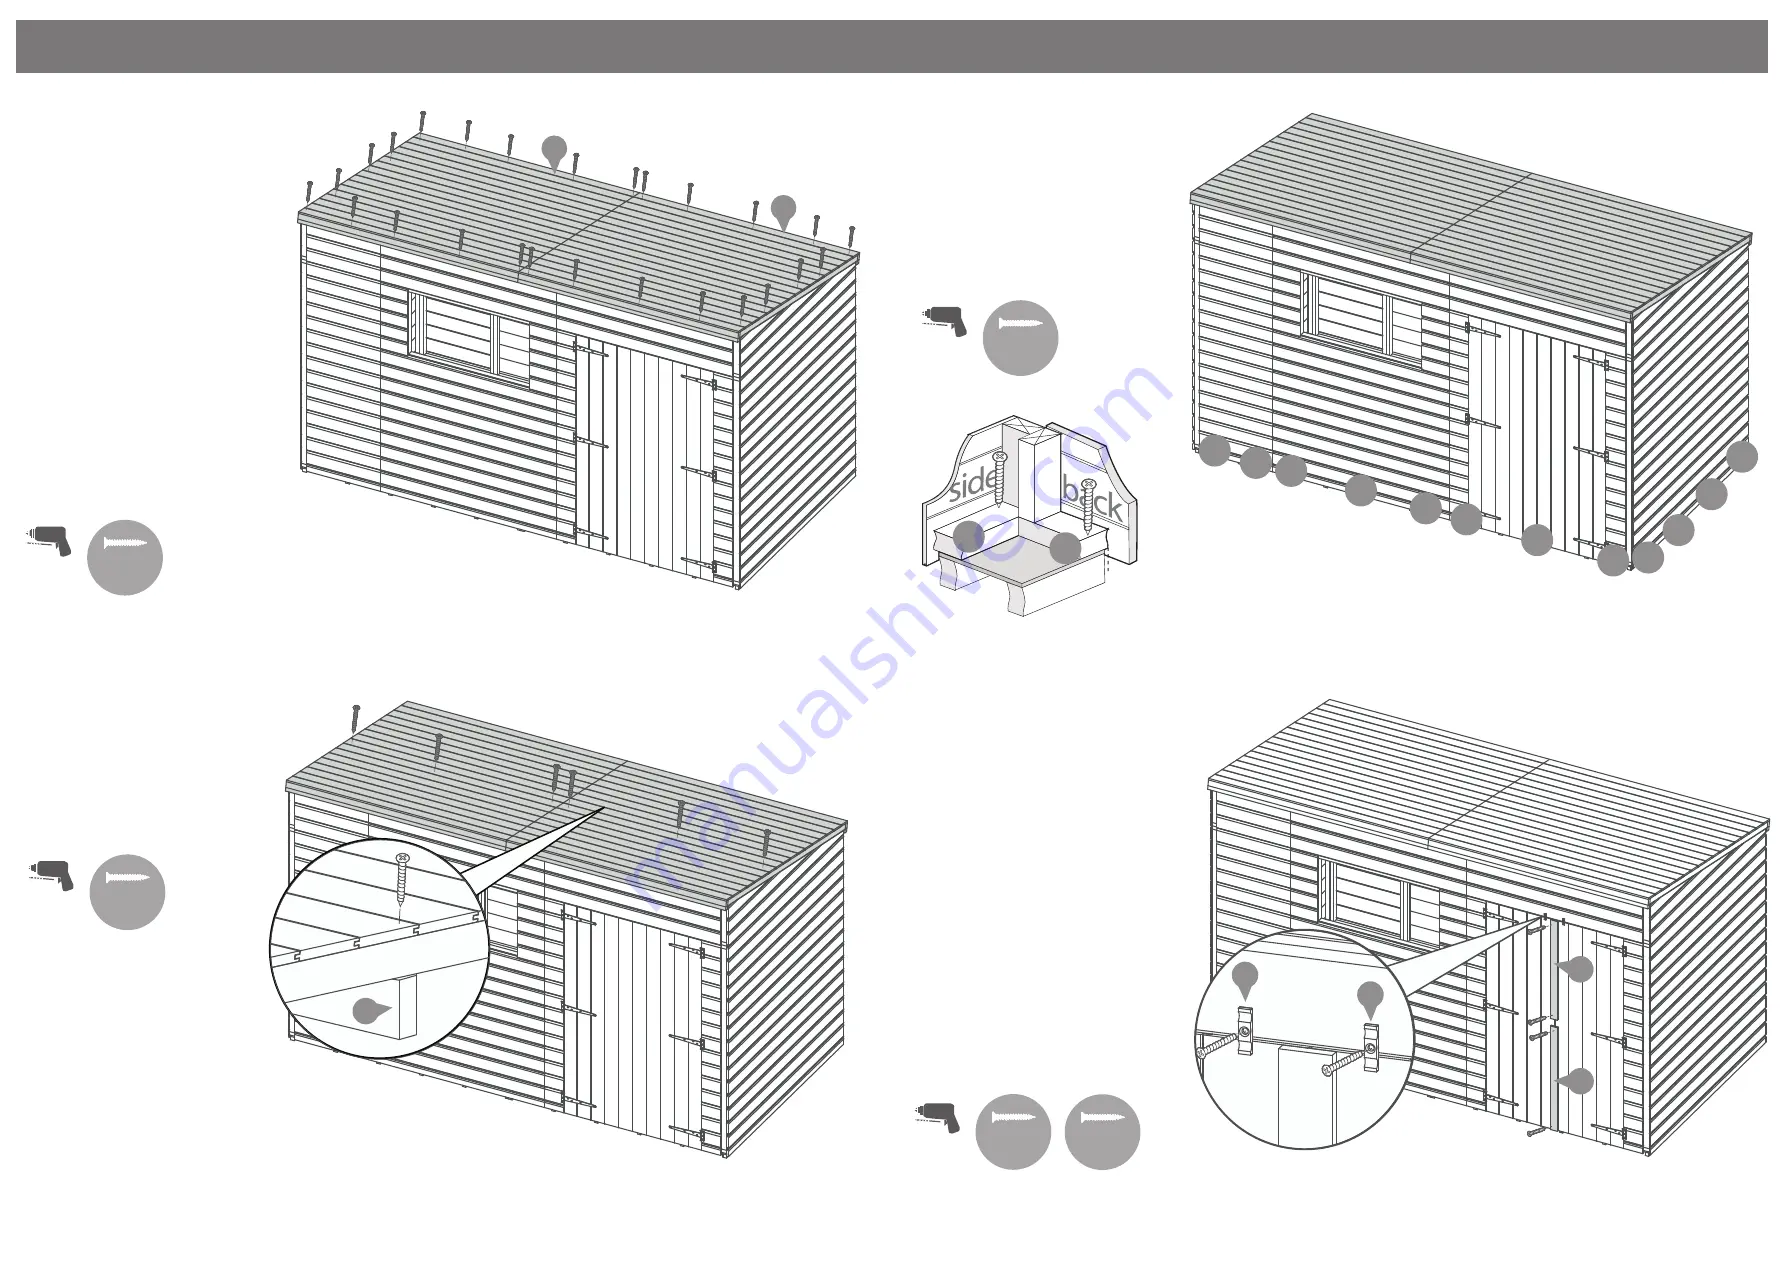
Step 15
Parts needed - No.16 QTY 1
- No.17 QTY 1
- No.26 QTY 2
Fix the Door Cover trims
(No.16 &
No.17)
to the Primary door
(Left
side)
, Ensure the cover trims are
flush to the top and bottom of the
door. secure using 2x20mm screws
per cover trim.
Fix the Turn buttons
(No.26)
above each door using 2x30mm
screws, Ensure the turn buttons
hold the door.
4x20mm Screws
2x30mm Screws
Pre drill
hole
20mm
screw
30mm
screw
Using 6x100mm screws, fix the roof
(No.7)
onto the ridge bar
(No.14)
,
ensuring to go through the roof
framing and into the ridge bar.
6x100mm Screws
100mm
screw
Pre drill
hole
26
26
16
17
14
Step 12
7
7
Fix the roofs
(No.7)
to the top of the
building, ensuring the side edges
are flush with the building and
there is equal spacing at the front
and back.
Using 26x70mm Screws, fix the roof
(No.7)
around each edge, ensuring
the screws go through to the panel
framing below.
HINT - Follow the nailing line of the
framing on the roof panels so that
you are more likely to fix through
the roof framing into the panel
framing below.
26x70mm Screws
70mm
screw
Pre drill
hole
Step 13
b
b
b
b
b
b
b
b
b
b
b
b
50mm
screw
Pre drill
hole
Once the roof is fixed, attach the
building to the floor with 50mm
screws.
Ensure the screws go through the
panel into the floor framing
24x50mm Screws
b
b
Step 14
Содержание 01DTPRMSHPN1206DDOP-V1
Страница 10: ...2 1 3 4...
Страница 11: ...1 2 REGISTER FOR YOUR ANTI ROT GUARANTEE TODAY PLEASE SCAN HERE...


