R
if the area is lit by fluorescent bulbs or LED
lighting (the display may flicker)
R
if there is a sudden change in temperature,
e.g. when driving into a heated garage in
winter
R
if the camera lenses are dirty or covered
R
if the vehicle components in which the
cameras are installed are damaged. In this
event, have the camera position and setting
checked at a qualified specialist workshop.
Do not use the 360° camera in this case. You
can otherwise injure others or cause damage
to objects or the vehicle.
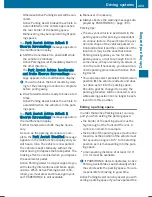
Guide lines are always shown at road level.
On vehicles with height-adjustable chassis,
depending on technical conditions, leaving
the standard height can result in:
R
inaccuracies in the guide lines
R
inaccuracies in the display of generated
images (top view)
Activation conditions
The 360° camera image can be displayed if:
R
your vehicle is equipped with a 360° cam-
era
R
the SmartKey is in position 2 in the ignition
lock
R
COMAND/Audio 20 is switched on
R
the
360° Camera
360° Camera
function is switched on
Switching on the 360° camera
X
Press the
Ø
button in the center con-
sole for longer than two seconds.
Depending on whether position D or R is
engaged, the following is shown:
R
a split screen with top view and the
image from the front camera or
R
a split screen with top view and the
image from the rear view camera
or
X
Press the
Ø
button in the center con-
sole.
The vehicle menu is displayed.
X
Select
360° Camera
360° Camera
and press
7
to con-
firm.
Depending on whether position D or R is
engaged, the following is shown:
R
a split screen with top view and the
image from the front camera or
R
a split screen with top view and the
image from the rear view camera
Activating the 360° camera using
reverse gear
The 360° camera images can be automati-
cally displayed by engaging reverse gear.
X
Make sure that the SmartKey is in position
2 in the ignition lock.
X
Make sure that the
Activation by R
Activation by R
gear
gear
function is selected in COMAND/
Audio 20 (see the separate COMAND/
Audio 20 operating instructions).
X
To show the 360° camera image: engage
reverse gear.
The area behind the vehicle is shown in the
COMAND/Audio 20 display in split-screen
mode. You see the top view of the vehicle
and the image from the rear view camera.
Selecting the split-screen and full
screen displays
Switching between split screen views
X
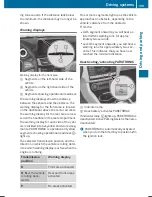
To switch to the line with the vehicle icons:
slide
5
the controller.
X
To select one of the vehicle icons: turn
3
the controller.
X
To switch to
180° View
180° View
: turn
3
the
controller to select
180° View
180° View
and press
7
to confirm.
i
The
180° View
180° View
option is only available in
the following views:
210
Driving systems
Driving
and
parking
Содержание CLS 2015
Страница 4: ......
Страница 32: ...30...
Страница 44: ...42...
Страница 85: ...Useful information 84 SmartKey 84 Doors 90 Trunk 92 Side windows 97 Sliding sunroof 100 83 Opening and closing...
Страница 106: ...104...
Страница 226: ...224...
Страница 286: ...284...
Страница 287: ...Useful information 286 Stowage areas 286 Features 293 285 Stowage and features...
Страница 313: ...Useful information 312 Engine compartment 312 Maintenance 316 Care 317 311 Maintenance and care...
Страница 344: ...342...
Страница 396: ...394...
Страница 397: ...395...
Страница 398: ...396...


