background image

ENGLISH

Page | 22


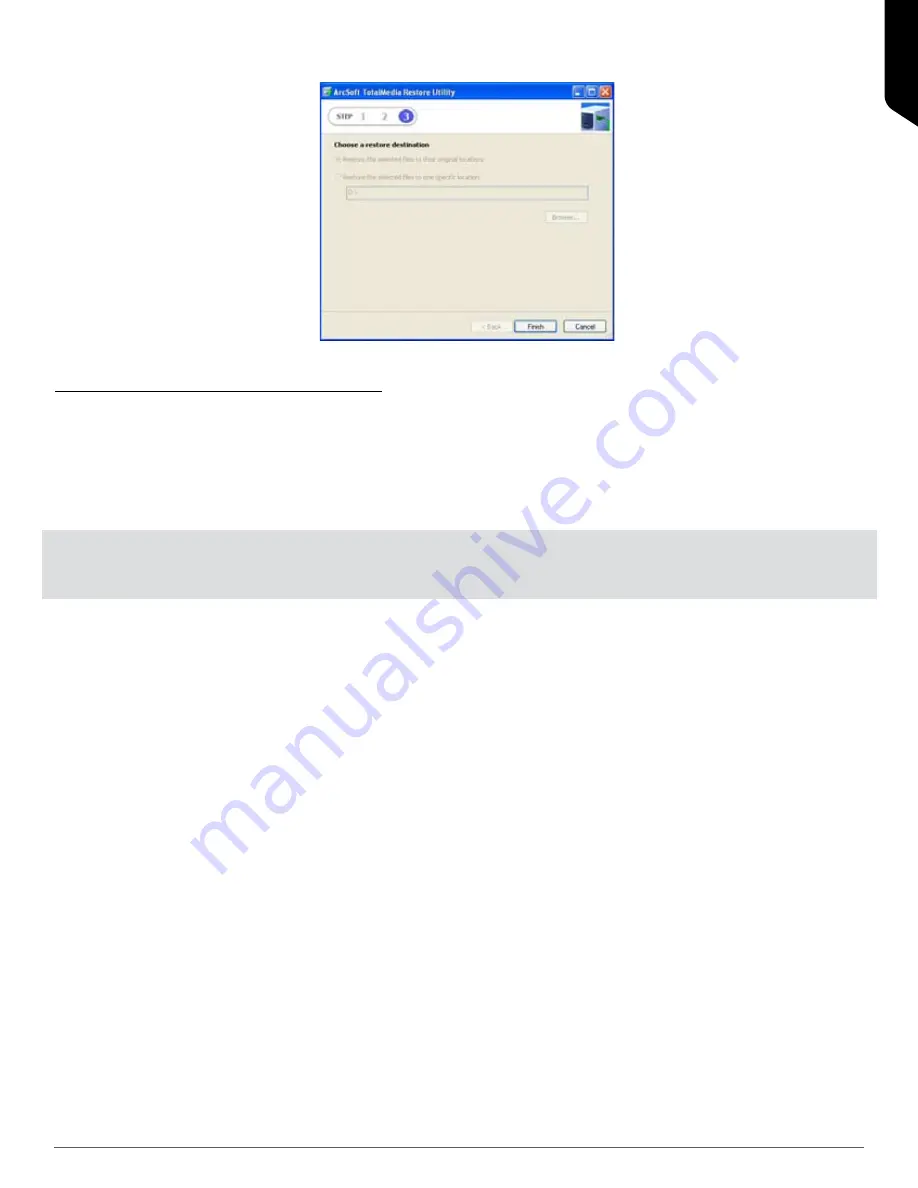
i.  Click “Finish” to complete the restoration (Figure 48). 

7.  REFORMATTING THE ULTRA TRAVELDRIVE


A. Windows


The Memorex Ultra TravelDrive comes pre-formatted with FAT32 (File Allocation Table 32-bit) File System.  FAT32 is 


the standard file system for Windows 98SE and Me and is supported in Windows 2000, XP and Vista.  However, 


FAT32 file system has 4GB limitation for the largest supported file.  If you need to use the Ultra TravelDrive on a 


computer that requires Windows NTFS (NT File System), you  need to reformat the drive.  To reformat the Ultra 


TravelDrive to a NTFS file system: 

IMPORTANT NOTE:

 Reformatting permanently erases all the data on the Ultra TravelDrive, and you will lose any files 

that have not been copied to another hard disk or to an optical disc.  This is considered a procedure for ADVANCED 
USERS, and extreme caution should be applied before performing this operation. 


1. Save all files on the Ultra TravelDrive to another medium such as a hard drive, a flash card, or an optical disc.  


  Reformatting permanently erases all the data on your drive and you will lose any unsaved files.


2. Remove the Ultra TravelDrive from your computer as described above. 


3. Close all open applications including anti-virus software that may interrupt the format process.


4. Double-click on the “My Computer” icon on the desktop.


  a.  Note the hard drives that appear in “My Computer” and the drive letters associated with them.  Write  


    them down on a piece of paper.  You DO NOT WANT TO FORMAT these drives by accident because that 


    would destroy all files stored on those drives and require reinstalling your operating system. 


  b.  Close “My Computer.”


    3.  Insert your Ultra TravelDrive, wait for the computer to detect it and activate it.


a.  Double-click on the “My Computer” icon on the desktop again and compare the listing of the hard  


     drives in your system with those that you have written down. The new drive that appears is the Ultra 


     TravelDrive.


b.  Right-click on the icon for the Ultra TravelDrive.  


1. Click on “Properties” to confirm that this drive’s capacity matches that of your Ultra TravelDrive.  


2. Select “Format” from the drop-down menu that appears.  Select NTFS from the choices of 


  formats.


3. Optional: Type in a name in “Volume label” if you have more than one Ultra TravelDrive and  


  prefer to assign names to differentiate them.


4. Click on “Start.”  A warning notice appears that all data will be erased.  Click “OK.”  The 


  formatting will only take a few seconds, and a “Format Complete” notice will appear when the 


  formatting is done. 

Figure 48.

Содержание 32020012483

Страница 1: ...m use and enjoyment from your new Ultra TravelDrive The guide describes in detail the Ultra TravelDrive features as well as the TotalMedia Backup software that is included with the drive The software...

Страница 2: ...oving the Ultra TravelDrive c Using the Ultra TravelDrive Apple Macintosh a Connecting the Ultra TravelDrive b Removing the Ultra TravelDrive c Using the Ultra TravelDrive 5 CHANGING FACEPLATES 7 6 TO...

Страница 3: ...ts if the drive was permanently damaged when it got wet and or if it is not thoroughly dry before connecting MAKE SURE YOUR HANDS ARE DRY when plugging or unplugging the device into a computer DO NOT...

Страница 4: ...information for extra safety in transferring files TotalMedia Backup software for quick easy customizable back ups No specific hardware requirements for use on most computer systems Uses standard USB...

Страница 5: ...2 0 port for maximum performance b You may need to use the auxiliary USB power cable together with the USB data cable due to limited bus power on some computers c Windows 98SE requires the installatio...

Страница 6: ...ess files on the drive To remove the drive a Click on the green arrow in the lower right panel of the desktop system tray Figure 3 to stop the drive before removing it b Letter assigned to your Ultra...

Страница 7: ...e the FAT32 format B REMOVING YOUR DRIVE IMPORTANT NOTE Do not remove the Ultra TravelDrive while the BLUE POWER AND ACTIVITY LED is flashing Inter rupting the data flow while the LED is flashing may...

Страница 8: ...flush with the base See Figure 9 6 TOTALMEDIA BACKUP and BUTTON MANAGER SOFTWARE A INSTALLATION MICROSOFT WINDOWS 1 Insert the ArcSoft TotalMedia CD disc into your disc drive 2 The installation shoul...

Страница 9: ...ager installs itself first in a very short time Once the software has installed itself a mes sage confirming a successful installation appears Click Next to start the TotalMedia Backup software instal...

Страница 10: ...all TotalMedia Backup Figure 15 Click Next 9 A user license agreement of TotalMedia Backup appears Figure 16 Read the agreement and click Yes if you want to continue installing the backup software 10...

Страница 11: ...for any up dates if you are connected to the Internet or click Cancel to skip the checking process If the software is up to date a confirmation message appears Figure 22 Click OK If a new update is av...

Страница 12: ...Memorex Software Installer to start the installation b The welcome page to the installer Figure A2 Click on Continue c A screen with Important Information appears Figure A3 Read through this document...

Страница 13: ...llation Click on Install h An authentication screen appears that requires a password if you do not have administrative rights Figure A8 Enter your name and password and click OK i A warning notice app...

Страница 14: ...uble click on the TotalMedia Backup icon to open the program or press the Quick Backup button on your Ultra TravelDrive to open the program B USING THE TOTALMEDIA BACKUP SOFTWARE 1 Double click the To...

Страница 15: ...r to make a full back up of all the selected files or an incremental backup of only new files added since the last back up c A full back up screen displays the number of files in each selected categor...

Страница 16: ...cremental backup is done on the same date as the first backup a number is added to the date as in the example below If the date of the incremental backup is different from the original date the new da...

Страница 17: ...red should now appear Click Save 5 Put a check mark in the boxes of personal document folders you want to back up Figure 35 Clicking on the folders on the left displays on the right the folders and fi...

Страница 18: ...he same dialogue as in Figure 37 above appears Select the files you want to be backed up as described above and click Next d The schedule settings page opens with options for naming the backup comment...

Страница 19: ...ghting it and clicking Back up Now Viewing a backup report by highlighting it and clicking View Report Disabling a particular backup by highlighting it and clicking Disable Stopping a backup by clicki...

Страница 20: ...kup files on other drives or media c Double click on a highlighted file or click Open to open the restore utility The utility displays detailed information about the backup you have selected Figure 42...

Страница 21: ...The destination can be either the original location from which they were backed up or a different destination selected by clicking on the Browse button Click Restore to continue g TotalMedia will chec...

Страница 22: ...escribed above 3 Close all open applications including anti virus software that may interrupt the format process 4 Double click on the My Computer icon on the desktop a Note the hard drives that appea...

Страница 23: ...nd active In Windows double click the My Computer icon to bring up a list of active drives If your Ultra TravelDrive does not appear there use the auxiliary USB power cable that is included with the U...

Страница 24: ...at can erase portions of the drive It is always a wise policy to keep a backup of your files before traveling and leaving the Ultra TravelDrive home while traveling with a laptop makes the most sense...

Страница 25: ...n implied warranty lasts or the exclusion or limitation of incidental or consequential damages so the above limitations or exclu sions may not apply to you This limited warranty gives you specific leg...

Отзывы: