background image

G

mjjGu–›ŒG

h• GŠˆ•ŽŒšG–™G”–‹Šˆ›–•šG•GŠ–•š›™œŠ›–•G–G›šG‹ŒŠŒGžŠGˆ™ŒG•–›GŒŸ—™Œšš“ Gˆ——™–Œ‹G‰ G›ŒG—ˆ™› G™Œš—–•š‰“ŒG–™GŠ–”—“ˆ•ŠŒGŠ–œ“‹GG
–‹G›ŒGœšŒ™NšGˆœ›–™› G›–G–—Œ™ˆ›ŒG›ŒGŒ˜œ—”Œ•›UG

mjjGjˆœ›–•G

{šGŒ˜œ—”Œ•›GˆšG‰ŒŒ•G›Œš›Œ‹Gˆ•‹G–œ•‹G›–GŠ–”—“ Gž›G›ŒG“”›šG–™GˆGj“ˆššGiG‹Ž›ˆ“G‹ŒŠŒSG—œ™šœˆ•›G›–Gwˆ™›GX\G–G›ŒGmjjGyœ“ŒšUG
{ŒšŒG“”›šGˆ™ŒG‹ŒšŽ•‹G›–G—™–‹ŒG™Œˆš–•ˆ‰“ŒG—™–›ŒŠ›–•GˆŽˆ•š›Gˆ™”œ“G•›Œ™Œ™Œ•ŠŒG•GˆG™Œš‹Œ•›ˆ“G•š›ˆ““ˆ›–•UG{šGŒ˜œ—”Œ•›GŽŒ•Œ™ˆ›ŒšSGG
œšŒšGˆ•‹GŠˆ•G™ˆ‹ˆ›ŒG™ˆ‹–G™Œ˜œŒ•Š GŒ•Œ™Ž Gˆ•‹SGG•–›G•š›ˆ““Œ‹Gˆ•‹GœšŒ‹G•GˆŠŠ–™‹ˆ•ŠŒGž›G›ŒG•š›™œŠ›–•šSGˆ• SGŠˆœšŒGˆ™”œ“G•›Œ™Œ™Œ•ŠŒG
›–G™ˆ‹–GŠ–””œ•Šˆ›–•šUGo–žŒŒ™SG›Œ™ŒGšG•–GŽœˆ™ˆ•›ŒŒG›ˆ›G•›Œ™Œ™Œ•ŠŒGž““G•–›G–ŠŠœ™G•GˆG—ˆ™›Šœ“ˆ™G•š›ˆ““ˆ›–•UGpG›šGŒ˜œ—”Œ•›G‹–ŒšGG
ŠˆœšŒGˆ™”œ“G•›Œ™Œ™Œ•ŠŒG›–G™ˆ‹–G–™G›Œ“Œš–•G™ŒŠŒ—›–•SGžŠGŠˆ•G‰ŒG‹Œ›Œ™”•Œ‹G‰ G›œG™••ŽG›ŒGŒ˜œ—”Œ•›G–Gˆ•‹G–•SG›ŒGœšŒ™GšGG
Œ•Š–œ™ˆŽŒ‹G›–GŠ–™™ŒŠ›G›ŒG•›Œ™Œ™Œ•ŠŒG‰ G–•ŒG–™G”–™ŒG–G›ŒG–““–ž•ŽG”Œˆšœ™ŒšGbG
TGyŒ–™Œ•›G–™G™Œ“–Šˆ›ŒG›ŒG™ŒŠŒ•ŽGˆ•›Œ••ˆUGGGGGGGGGGGGGGGGGGGGGGGGG
TGp•Š™ŒˆšŒG›ŒGšŒ—ˆ™ˆ›–•G‰Œ›žŒŒ•G›ŒGŒ˜œ—”Œ•›Gˆ•‹G™ŒŠŒŒ™UG
TGj–••ŒŠ›G›ŒGŒ˜œ—”Œ•›G•›–Gˆ•G–œ›“Œ›G–•GˆGŠ™Šœ›G‹Œ™Œ•›G™–”G›ˆ›G›–GžŠG›ŒG™ŒŠŒŒ™GšGŠ–••ŒŠ›Œ‹UG
TGj–•šœ“›G›ŒG‹Œˆ“Œ™G–™Gˆ•GŒŸ—Œ™Œ•ŠŒ‹G™ˆ‹–V{}G›ŒŠ•Šˆ•G–™GŒ“—UG

             Table of Contents

1. Safety Note ........................................................... 3
2. Denomination of Each Part................................... 4
3. Explanation of LCD Screens ................................ 5
4. Preferation before Using(Charging)...................... 6
6. Usage of DC Power .............................................. 7   
  6-1. PC USB Port Power Usage ............................. 7   
  6-2. USB PC Adapter(5V) Power Usage ................ 6
7. Power On/Off ........................................................ 8

8. Play Back Mode Selection .................................... 8
9. Recording ............................................................. 9
10. Adjustment of Mike Sensitivity .......................... 10
11. Playing the Recorded File ................................ 11
12. Volume Control ................................................. 11
13. Controlling the Play Speed ............................... 12
14. Uploading / Downloading Files ......................... 13
15. Browsing Folder and File .................................. 14
16. Setting the Mode ............................................. 15\
  16-1. Erase (Deleting the file) ............................... 16

  16-2. EQ setting the EQ  ...................................... 16
           (playing  characteristics) 
  16-3. REP(repeated playing) Setting  ................... 17
  16-4.  Setting the MIC(microphone) Sensitivity .... 17
  16-5. Setting the (recording) Mode ....................... 18
  16-6. Setting the LOW CUT Mode........................ 18
  16-7. Selecting the LCD ....................................... 19
  16-8. Setting the Voice Operation 
           System(VOS) ............................................... 19
  16-9. Selecting the Recording Folder ................... 20

  16-10. Formatting ................................................. 20
  16-11. Exiting from the mode setting .................... 20
17. Using Ball-point Pen ......................................... 21
18. Using Gender  .................................................. 22
  18-1 Listening by Earphone ................................. 22
  18-2. By using Ear MIC and 
           Recording  Phone Call (option) ................... 22
  18-3. By Using Land Line Phone Adaptor 
           and Eecording  Phone Call (option)............. 23
Warranty card, Specifications  ................................ 24

Содержание MQ-D920

Страница 1: ...Tk WVtxTk _WG Owner s Manual Before connecting operating or adjusting this product please read this owner s manual carefully and completely Designs and specifications are subject to change without not...

Страница 2: ...er On Off 8 8 Play Back Mode Selection 8 9 Recording 9 10 Adjustment of Mike Sensitivity 10 11 Playing the Recorded File 11 12 Volume Control 11 13 Controlling the Play Speed 12 14 Uploading Downloadi...

Страница 3: ...aution and warning for the main body Caution Shocking or dropping the product may cause the failure Do not use alcohol benzene or thinner to clean the surface of the product Do not use the earphone to...

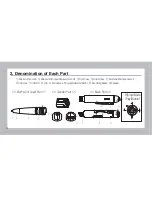
Страница 4: ...mination of Each Part eeGi T Gs Gw Gcc i T Gw Gs GGG Gi T Gw Gs Gy Gw GGG Gm Gj GGG Go Gj GGG Gl Vt Gq GG G ziGq GGG G ziGw GGG GsjkGGG Gt GGG Gq Vt Ow PGi GGG Gy Gi GG Gz eeGn Gw Gcc eeGt Gw Gcc q Vt...

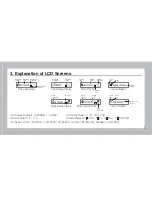
Страница 5: ...w w m G s m G m G u m G s t m t m Gu t w t m Gu lxGt w t Gm u i p y w y m t z uhG oxG uhG oxG uhG oxG msG twZG msG twZG Qt Gz aGuG uvyths SGGoG opno Qy Gm aGhSGGiSGGjSGGk Qy Gt aGswSGGoxSGG oxSGGwjt Q...

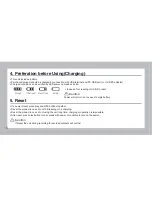
Страница 6: ...ess play and REC buttons together Reset the product in case of no USB reading or no charging Reset the product in case of not using the unit long time charging or operation is impossible After reset p...

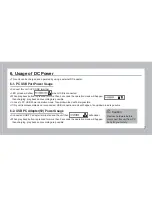
Страница 7: ...g are possible In case fo PC USB Power operation mode file up down load will be impossible If this unit is disassembled and reconnected USB connection made will happen file up down load is possbie 6 2...

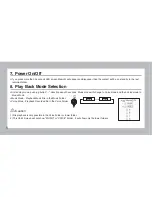
Страница 8: ...y mode push jog button direction about 3 seconds Music mode will change to Voice mode and then Voice mode to Music Mode Music Mode Playback Music File in the Music Folder Voice Mode Playback Recorded...

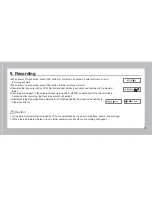
Страница 9: ...er Recording will happen in the selected folder starting with A R00001 continnusly If stop the unit with in 3 seconds after recording the Recorded content will be lost Initial Recording mode See Mode...

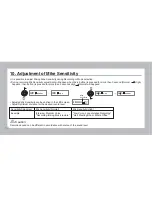
Страница 10: ...than 3 seconds High Normal will happend Adjusted Mic Sensitivity can be verified in the LED screen Adjust Optirmum distance for the desired record level Recorded sound can be different in accordance w...

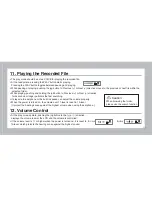
Страница 11: ...on for 2seconds or longer performs the fast searching It plays via the earphone or the built in speaker so adjust the volume properly When the power is turned on the volume over 11 level is reset to 1...

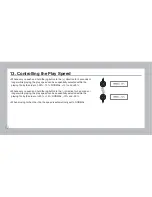
Страница 12: ...entially selected within the playing file by the order of 20 10 NORMAL 10 and 20 Whenever you push and hold the jog button to the direction for 3 seconds or longer while playing the play speed can be...

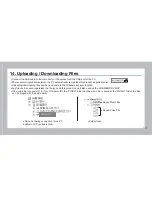
Страница 13: ...ing files can be used same to the Windows explorer function Any file can be saved regardless the file type and this product can be also used as the USB MEMORY DISC If the voice file is saved at A B C...

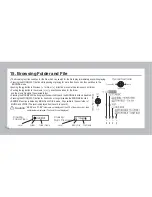
Страница 14: ...he previous or next folder Pushing the jog button to the volume or direction searches for the folder and the music file within the selected folder Pressing the MODE PLAY button plays the searched file...

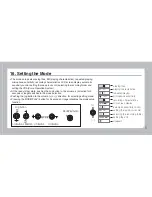
Страница 15: ...screen display automatic sensitivity control setting the ready to record selecting the recording folder and setting the VOS Voice Operation System At the ready stop state pushing the Jog button to the...

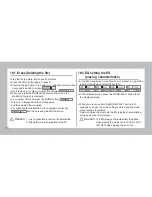
Страница 16: ...the file deletion it is cancelled by selecting and then pressing the MODE button At the EQ mode screen Use Previous or Next jog button to select the playing characteristics EQ At the selected screen...

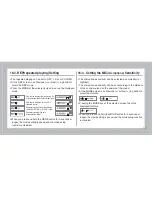
Страница 17: ...jog button to select the distance Pressing the MODE key at the selected screen to set the displayed distance When you press and hold the MODE button for 3 seconds or longer the mode setting is saved a...

Страница 18: ...rding mode can be set to long playing LP high quality HQ extra high quality XHQ or CD quality PCM depending on the recording environment PCM mode is optimal for the music recording which can make a hi...

Страница 19: ...increase At screen use Previous or Next jog button to select ON 3 10 30 60 seconds Press the MODE PLAY at the selected screen to set as OFF 3 10 30 60 seconds or ON If LCD is selected screen as OFF 3...

Страница 20: ...t this product 16 11 Exiting from the mode setting At screen press the MODE button to disable the mode setting Or pressing and holding the MODE button for 3 seconds or longer saves the mode setting an...

Страница 21: ...ft and then ball point pen lead out or comes Exchange ball point pen lead catch Front case and if is detached turning ball point pen lead exchangeable parts to left pull the ball point pen lead to sep...

Страница 22: ...ne 18 2 By using Ear MIC and Recording Phone Call option Connect earphone to earphone microphone of Gender terminal and can listen the recording contents and music Set the built in MIC in ear connect...

Страница 23: ...ine cable of telephone connects as follows Press record button shortly to begin recording If press record button again recording stops and stored Separate audio cable in product if recording ended Key...

Страница 24: ...sd SG dX Z U t Gk G Gy t y G j G G j G h G G QGj G G G G G GsjkGvmmG WG U johynlkGzly pjl TGt G G G G G G U TGt G G G GGG G G G U TGt G G G G G G G SG SG SG GGG G G U TGp G G G G G G G G U h G G GG h...

Отзывы: