


7�5
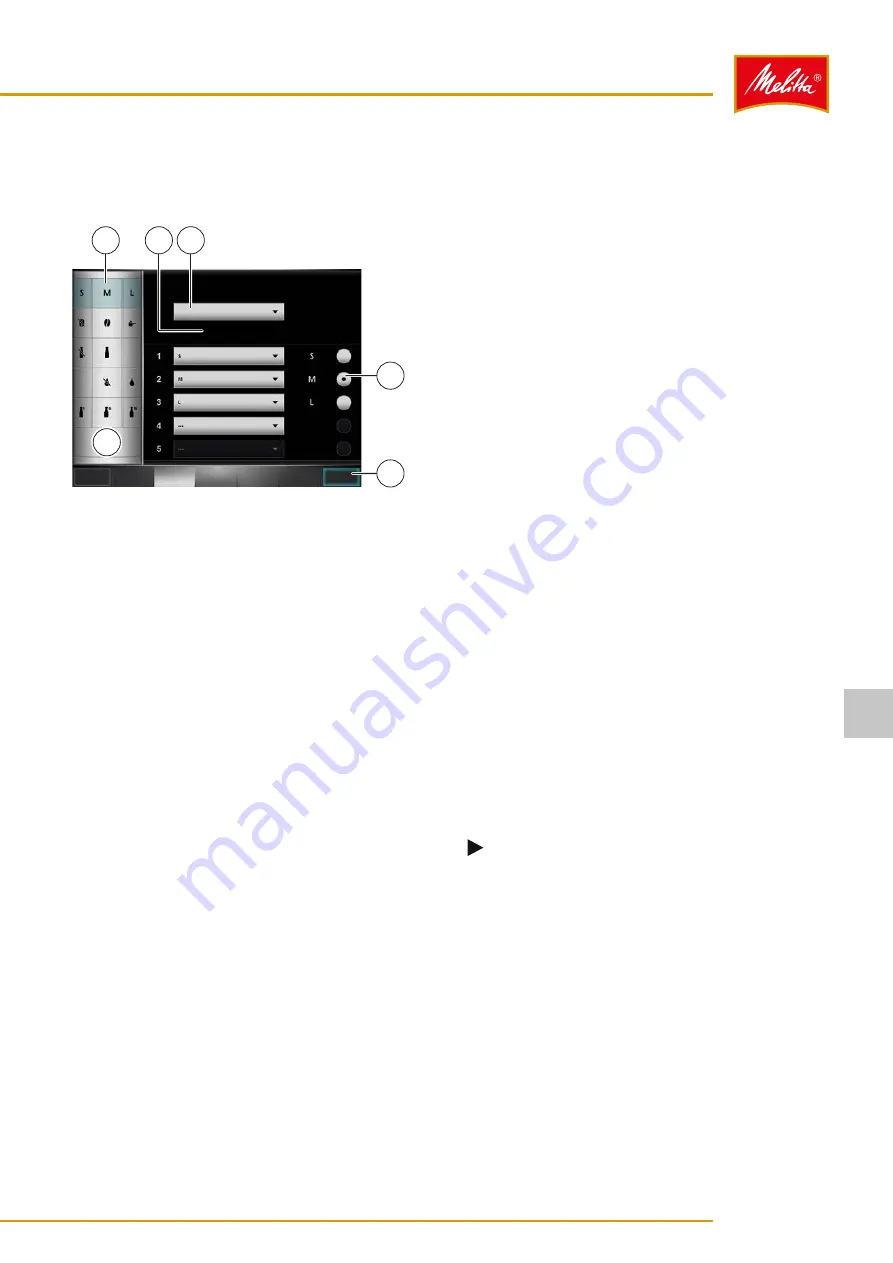
Menu option "Product filter"
Here you can set the selection criteria for filtering dis-
pensing products available in waiter operation.
000163
SIZE
COFFEE
MILK TYPE
SYRUP
MILK TEMPERATURE LEVELS
SELECTION
PRODUCT
FILTER
UNIT
PRODUCT
OPERATION
Logout
Product filter configuration
SIZE
Save
CONFIGURATION
ICON
DEFAULT
2
3
1
4
5
6
Fig. 30: Menu option "Product filter"
A list of all possible main criteria can be found in
7�5�1
Adding main criterion
1. Press on an empty entry (1).
2. Select the required criterion (4).
͵
If all possible criteria have already been added, it
is not possible to add another criterion.
3. Add filters as described in chapter 7.5.3 on page 23.
9
The main criterion has been added.
7�5�2
Deleting main criterion
1. Select the required main criterion (2).
2. Select the entry "---" (4).
3. Save your changes using the "Save" button (6).
͵
Otherwise you will be prompted to confirm
whether you want to discard the changes or
whether you want to go back to save the changes.
9
The main criterion has been deleted.
7�5�3
Editing main criteria
1. Select the required main criterion (2).
2. Use the buttons under "Configuration" (3) to select
the filters you want to activate for pre-selection in
waiter operation (e.g., no coffee component, coffee,
decaffeinated coffee).
͵
Selecting the entry "---" means that the filter is
not activated in waiter operation.
3. Set the filter to be preselected by default (5) (e.g.,
Coffee).
4. Save your changes using the "Save" button (6).
͵
Otherwise you will be prompted to confirm
whether you want to discard the changes or
whether you want to go back to save the changes.
9
The main criterion has been edited.
7�6
Menu option "Product"
Here you can change the values for product components,
if enabled by customer service.
7�6�1
Changing products
1. Select the "Product" menu to display a list of all
products.
2. Use the "
" and "
" buttons to move the list to
display all the programmed products.
3. Press on a product to edit it.
4. Use the "
" and "
" buttons to scroll through the
various settings options.
5. Select the component to be changed (e.g., Coffee
variety) or the value to be changed (e.g., Article
number).
6. Change the values for the product using the screen
keyboard.
Note
Products marked with a * in the ID cannot be
edited. These products are pre-programmed in
the basic settings for the machine.
7. Save your changes using the "Save" button.
͵
Otherwise you will be prompted to confirm
whether you want to discard the changes or
whether you want to go back to save the changes.
9
The values of the product components are changed.
Settings
23
26646 • 20160202
7


