background image

INTRODUCTION

Please read all instructions before operating your
new toaster. We suggest you save the instruction
manual for later use.
When using electrical appliances, basic safety
precautions should always be followed, including
the following:

IMPORTANT SAFEGUARDS

Read all instructions thoroughly before use.

Do not touch hot surfaces. 

To protect against electrical shock do not

immerse cord, plugs, or toaster in water or

other liquid during use or when cleaning. 

Close supervision is necessary when any

appliance is used by or near children.

WARNING: Children must be made aware of

the possible danger of electrical appliances if

used incorrectly.

Unplug from outlet when not in use and

before cleaning.

Do not operate any appliance with a

damaged cord or plug or after appliance

malfunctions, or if it has been damaged in

any manners. Return appliance to an

authorised service dealer for examination,

repair, or adjustment.

Do not use outdoors or in a bathroom.

Do not let cord hang over edge of table or

worktop or touch hot surface.

Do not place on or near a hot gas or electric

burner.

To disconnect; remove plug from wall outlet.  

Do not use appliance for other than intended

use. 

Oversize foods, metal foil packages, or

utensils must not be inserted in a toaster as

they may involve a risk of fire or electrical

shock.

A fire may occur if toasters are covered or

touching flammable material, including

curtains, draperies, walls, and the like, when

in operation. 

Do not attempt to dislodge food when

toaster is plugged in.

Do not place anything on top of the toaster

when in use. 

This appliance must not be left unattended

during use.  

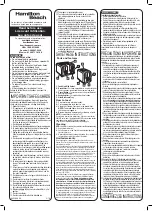
LIST OF COMPONENTS

1. 

Electronic Variable browning control

2. Cancel 

button

3. 

Bread Carriage lever/high lift feature

IMPORTANT POINTS

Remove all packaging material from the

bread before inserting in the toaster.

Do not toast bread with sugar or glaze, or

bread with stuffing.

Do not toast thick pieces of bread, they can

get stuck in the toaster. 

If the bread gets stuck in the toaster, remove

the plug from the power outlet and let the

toaster cool off. 

Move the carriage up and down a couple of

times to release the bread. Do never use

metal objects to remove the bread.

INSTRUCTIONS FOR USE

Before using for the first time, run for a few

minutes without bread. Some smoke may appear

at first, this is normal and will disappear after a

short while.

Plug into a power outlet and turn the power

outlet to on position.

Place the bread in the openings. Adjust the

selector knob to your desired toast colour

position. Turn the selector knob to the right

between 1 and 5. The browning level will

10

UK

1.

2.

3.

WT-101A_IM  02/02/05  11:06  Side 10

Содержание 643-040

Страница 1: ...DK Br drister 2 SE Br drost 4 NO Br drister 6 FI Leiv npaahdin 8 UK Toaster 10 DE Toaster 12 PL Opiekacz do pieczywa 14 RU 16 643 040...

Страница 2: ...et i folie og meget tykke skiver eller halve stykker br d m ikke varmes i br dristeren da det kan resultere i brandfare S rg altid for at der ikke er brandbart materiale i n rheden af br dristeren n r...

Страница 3: ...g altid stikket ud af stikkontakten og lad br dristeren afk le helt Vend br dristeren p hovedet og ryst forsigtigt apparatet til alle br dkrummer er fjernet Br dristeren skal t mmes for br dkrummer j...

Страница 4: ...olie eller mycket tjocka br dskivor f r inte v rmas i br drosten eftersom de kan utg ra brandfara Se alltid till att det inte finns br nnbart material i n rheten av br drosten n r den r ig ng Br drost...

Страница 5: ...ch l t br drosten svalna helt V nd br drosten upp och ned och skaka f rsiktigt tills alla br dsmulor har avl gsnats Br drosten ska regelbundet t mmas p br dsmulor Torka av yttersidan med torr eller h...

Страница 6: ...ke varmes i br dristeren da dette kan medf re brannfare S rg alltid for at det ikke finnes brennbart materiale i n rheten av br dristeren mens den er i bruk Br dristeren m aldri v re tildekket n r den...

Страница 7: ...et ut av stikkontakten og la br dristeren avkj le helt Snu br dristeren p hodet og rist apparatet forsiktig til alle br dsmuler er fjernet T m br dristeren regelmessig for br dsmuler T rk br dristeren...

Страница 8: ...a eritt in paksuja leip viipaleita ja puolikkaita leipi ei saa l mmitt leiv npaahtimessa Pid huolta ettei leiv npaahtimen l hell ole helposti syttyvi aineita tai esineit kun leiv npaahdin on k yt ss L...

Страница 9: ...es kaikki leiv nmurut ovat poistuneet Leiv npaahdinta on tyhjennett v s nn llisesti Pyyhi ulkokuori puhtaaksi kuivalla tai kostealla liinalla l k yt mink nlaisia voimakkaita tai hankaavia puhdistusain...

Страница 10: ...ges or utensils must not be inserted in a toaster as they may involve a risk of fire or electrical shock A fire may occur if toasters are covered or touching flammable material including curtains drap...

Страница 11: ...or crumbs Clean off remains of bread burns etc Never insert any object even a cloth in the toaster Once the crumbs have been removed refit the tray ensuring that it is in the correct position ENVIRONM...

Страница 12: ...gen Folienverpackte Lebensmittel sehr dicke Brotscheiben oder gr ere Brotst cke nicht im Ger t w rmen da dies zu Br nden f hren kann Sicherstellen da sich kein brennbares Material in der N he des Ger...

Страница 13: ...den Toaster vollst ndig abk hlen lassen Den Toaster kopf ber umdrehen und vorsichtig sch tteln bis alle Brotkr mel entfernt sind Der Toaster ist regelm ig von Brotkr meln zu leeren Au enseite mit ein...

Страница 14: ...h gazowych elektrycznych lub w ich pobli u Nie wk adaj do opiekacza pieczywa zapakowanego w foli oraz grubo pokrojonego pieczywa albowiem mo e to by powodem po aru Podczas u ywania opiekacza nie mog z...

Страница 15: ...u opiekania KONSERWACJA Wyjmij wtyczk z gniazdka sieciowego i pozostaw opiekacz do ca kowitego wystygni cia Wyci gnij szufladk na okruchy i opr nij j Odwr opiekacz do g ry dnem i lekko potrz saj c usu...

Страница 16: ...Ide Line 1 2 3 16 RU 1 2 3...

Страница 17: ...1 5 17...

Страница 18: ...Adexi Group 18...

Страница 19: ...19...

Отзывы: