background image

GEBRAUCHSANLEITUNG

92

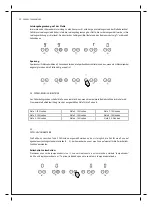
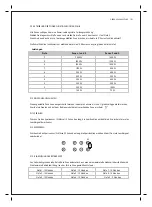
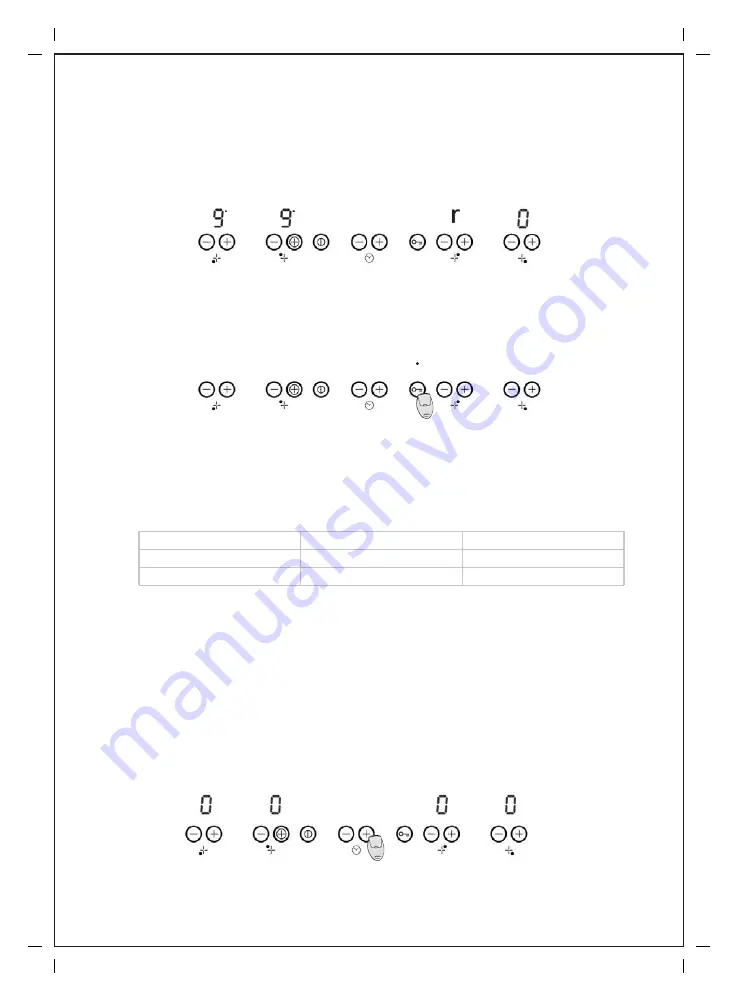
Leistungsbegrenzung auf der Platte

Immer wenn der Anwender die Leistung zu erhöhen versucht, wird der ganze Leistungsstand der Platte berechnet.
Falls dieser Leistungsstand höher ist als die Leistungsbegrenzung der Platte, die vorher ausgewählt wurde, ist die
Leistungserhöhung nicht erlaubt. Ein akustisches Fehlsignal (Bip) läutet und das Bedienmodul zeigt"r" während 3
Sekunden an.

Sperrung

Sperrsensor (Schlüssel) während 3 Sekunden drücken, die Sperrfunktion schaltet ein und aus, wenn ein Schlüsselsymbol
angezeigt wird und die Platte nicht gesperrt ist.

                                             .

2.8. ZEITBEGRENZUNG IN BETRIEB

Aus Sicherheitsgründen schaltet die Zone automatisch aus, wenn die maximale Betriebszeit überschreitet wird.
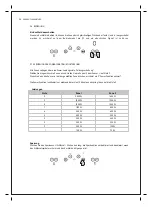
Die maximale Betriebszeit hängt von der ausgewählten Stufe für die Zone ab:

Stufe 1 -10 Stunden

Stufe 4 -10 Stunden

Stufe 7 -10 Stunden

Stufe 2 -10 Stunden

Stufe 5 -10 Stunden

Stufe 8 -10 Stunden

Stufe 3 -10 Stunden

Stufe 6 -10 Stunden

Stufe 9 -3 Stunden

2.9.
ZEITSCHALTUHR-BETRIEB

Die Zeit kann zwischen 1 und 99 Minuten ausgewählt werden und es ist möglich, die Zeit für eine Zone auf
irgendeinem Lesitungsstand einzustellen (0 .. 9),  der Anwender kann nur eine Zone auf einmal für die Zeitschaltuhr-
Funktion auswählen.

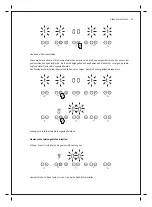
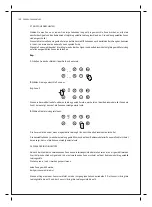
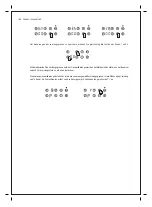
Zeitschaltuhr einschalten:

Pressionar o sensor de temporizador (+) ou (-), soa um sinal sonoro e o visor mostra o simbolo "temporizador"
de 00 e os displays mostram um "t" a piscar, indicando que uma zona tem o temporizador ativado.

Содержание MPVINDMI1600

Страница 1: ...ION HOB INDUKTIONSKOCHFELD INSTRUÇÕES TÉCNICAS INSTRUCCIONES TECNICAS TECHNICAL INSTRUCTIONS TECHNISCHE ANWEISUNGEN PT Instalação Utilização Manutenção ES Instalación Uso Manutención GB Installation Use Maintenance DE Installation Bedienung Pflege ...

Страница 2: ...uções Gerais 5 2 Utilização e Funcionamento 8 2 1 Instalação 8 2 2 Ligação Eléctrica 8 2 3 Utilização 9 2 4 Recipientes 9 2 5 Sensores 10 2 6 Utilização 12 2 7 Ativar função power zona dooster 12 2 8 Limite de Tempo em Funcionamento 14 2 9 Funcionamento do temporizador 14 3 Imagens 26 4 Pós Venda 27 5 Conservação do Ambiente 27 MANUAL DE INSTRUÇÕES 2 ...

Страница 3: ...as instruções O seu aparelho não deverá ser utilizado para outros fins que não estejam previstos no manual de instruções A sua segurança está prevista apenas para uso doméstico e não para uso comercial A utilização incorrecta não será abrangida e cancela automaticamente o direito da garantia Assistência Certifique se que em caso de avaria entrega o seu aparelho para assistência a um técnico qualif...

Страница 4: ...ca deve ser prevista na canalização fixa um meio para desligar a placa da rede de alimentação conforme as regras de instalação É necessário instalar entre o aparelho e a rede eléctrica um interruptor omnipolarcomaberturamínimaentreoscontactosde3mm apropriado à carga e correspondente às normas de segurança em vigor No caso de um aparelho com ficha e cabo de alimentação ligar a ficha sempre a uma to...

Страница 5: ...u papel Eliminar qualquer detergente residual pois pode prejudicar o vidro quando aquecido Para incrustações severas recomenda se a utilização de uma espátula adequada para a limpeza do vidro ver figura 5 Atenção No caso de derreterem na placa objectos de plástico açúcar ou alimentos açucarados devem ser eliminados enquanto quentes com o auxílio de uma espátula e com todo o cuidado para evitar que...

Страница 6: ...m recebido instruções relativas ao uso do aparelho de uma forma segura e compreenderem os riscos envolvidos As crianças não devem brincar com o aparelho A limpeza e manutenção não devem ser feitas por crianças sem supervisão AVISO Perigo de incêndio não armazenar objetos sobre a superfície de cozedura AVISO se a superfície do plano de cozedura estiver partida desligue o aparelho para evitar a poss...

Страница 7: ...alado atrás de uma porta decorativa para evitar um sobreaquecimento AVISO utilizar a protecção da mesa de trabalho conforme a fig 9 O uso de protecções inadequadas pode causar acidentes Antes de proceder à instalação do aparelho deverá retirar a película de plástico adesivo que protege algumas partes metálicas Atenção Antes de proceder a qualquer acção de manutenção e limpeza deve desligar o apare...

Страница 8: ... contacto acidental com o fundo quente da placa A placa deverá ser colocada a uma distância mínima de 60 mm da divisória ou do forno que se encontrar imediatamente debaixo dela ver figura 4 Ventilação Deve prever os espaços para ventilação descritos na figura 4 nomeadamente uma saída de ar quente com pelo menos 10mm de altura na frente e em toda a largura da placa e uma entrada de ar fresco na tra...

Страница 9: ...cipiente com um diâmetro semelhante ao da área a utilizar e de fundo espesso Os recipientes não devem ter fundo áspero para evitar riscar o vidro e devem estar limpos e secos antes de serem colocados sobre a placa vitrocerâmica Se utilizar recipientes não adequados o termóstato desactivará antes de alcançar a temperatura requerida prolongará o tempo de cozinhado e desperdiça energia Recomenda se t...

Страница 10: ...35 MANUAL DE INSTRUÇÕES 10 2 5 SENSORES Este aparelho está equipado com sensores electrónicos que são activados colocando o dedo por cima dos símbolos Por favor tenha em atenção que só pode utilizar um sensor de cada vez excepto para desligar uma zona actuando em simultâneo nos sensores e Nunca coloque objectos na zona dos sensores a zona dos sensores deve permanecer desocupada para evitar a ocorr...

Страница 11: ...quear o uso de sensores quando a placa está desligada de modo a evitar ser ligada acidentalmente crianças limpeza Para activar desactivar esta função o sensor deve ser tocado continuamente durante 3 segundos Mesmo com a função bloqueio activa é possível desligar as zonas uma a uma ou toda a placa em simultâneo Aumentar tempo para Aumentar o tempo a temporizar Este sensor em simultâneo com o sensor...

Страница 12: ...ada visualiza se um P função power ativa A função power só funciona durante os primeiros 10 minutos passando de seguida para o nível 9 H no display indica Calor residual Atenção a zona ainda está quente De 0 a 9 indica a potência escolhida Indica os minutos que faltam para acabar a função temporizador 00 intermitente indica fim do tempo estipulado Indica que a função bloqueio está activa Indica qu...

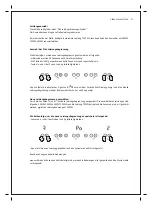
Страница 13: ... é emitido um sinal sonoro e aparecerá no display do temporizador e o limite de potência actual aparecerá no display da zona 1 e no display da zona 4 7200W Para seleccionar uma nova potência limite Com os sensores e o limite de potência é escolhido as potências selecionáveis são 2800W 3500W 6000W 7200W Quando a potência é 7200W se os sensores ou são premidas a potência muda para 2800W A sequência ...

Страница 14: ... quando é excedido um tempo máximo de funcionamento a zona desactivar se á automaticamente O tempo máximo de funcionamento depende do nível escolhido para a zona nível 1 10 horas nível 4 10 horas nível 7 10 horas nível 2 10 horas nível 5 10 horas nível 8 10 horas nível 3 10 horas nível 6 10 horas nível 9 3 horas 2 9 FUNCIONAMENTO DO TEMPORIZADOR O valor do tempo pode ser selecionado entre 1 e 99 m...

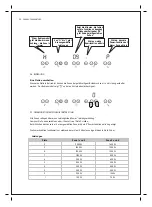
Страница 15: ...play da placa a indicar que não está seleccionada a potência dessa placa O display do temporizador começa a piscar indicando que o tempo tem de ser seleccionado Só pode ser escolhida uma zona de cada vez Colocar o nivel de potência desejada Com o sensor seleciona se a potência desejada Colocar o tempo desejado com as teclas e no temporizador MANUAL DE INSTRUÇÕES 15 t t t t t t t t ...

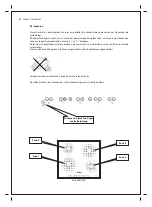
Страница 16: ...NUAL DE INSTRUÇÕES 16 Zona 2 Zona 1 Modelo MI 1301 Sensor diminuir potência Sensor Ligar Desligar Sensor Aumentar tempo Sensor aumentar potência Display Zona 1 Display Tempo Display Zona 2 Sensor Bloqueio ...

Страница 17: ...de modo a evitar ser ligada acidentalmente crianças limpeza Para activar desactivar esta função o sensor deve ser tocado continuamente durante 3 segundos Mesmo com a função bloqueio activa é possível desligar as zonas uma a uma ou toda a placa em simultâneo Aumentar tempo para Aumentar o tempo a temporizar Este sensor em simultâneo com o sensor diminuir desliga a função temporizador Sensor Ligar D...

Страница 18: ...or colocar a zona no nível 9 De seguida Premindo o sensor da zona selecionada visualiza se um P função power ativa A função power só funciona durante os primeiros 10 minutos passando de seguida para o nível 9 Nível Zona 1 e 3 Zona 2 e 4 P 2000 W 1600 W 9 1800 W 1200 W 8 1300 W 1000 W 7 1100 W 800 W 6 900 W 600 W 5 800 W 500 W 4 500 W 400 W 3 300 W 300 W 2 200 W 150 W 1 100 W 75 W Potências Bloquea...

Страница 19: ...ras nível 9 3 horas 2 9 FUNCIONAMENTO DO TEMPORIZADOR O valor do tempo pode ser selecionado entre 1 e 99 minutos é possível colocar o tempo para uma zona em qualquer nível de potência 0 9 o utilizador pode selecionar apenas uma zona de cada vez para a função do temporizador Ativar Temporizador Pressionar o sensor de temporizador ou soa um sinal sonoro e o visor mostra o simbolo temporizador de 00 ...

Страница 20: ...STRUÇÕES 20 Zona 2 Zona 3 Zona 1 Zona 4 Modelo MI 1600 MI 1602 Selecção Zona 4 Sensor Ligar Desligar Display Zona 2 Display Zona 3 Sensor bloqueio Sensor aumentar potência Sensor adiminuir potência Selecção Zona 1 ...

Страница 21: ...sligada de modo a evitar ser ligada acidentalmente crianças limpeza Para activar desactivar esta função o sensor deve ser tocado continuamente durante 3 segundos Mesmo com a função bloqueio activa é possível desligar as zonas uma a uma ou toda a placa em simultâneo Sensor Ligar Desligar Sensor Aumentar Potência Sensor Diminuir Potência Sensor Bloquear 2 6 UTILIZAÇÃO Ligar Desligar Para ligar a pla...

Страница 22: ...não foi escolhida nenhuma potência aparece no display em todas as zonas um ponto que indica que aguarda a selecão da zona 3º Seleccionar nível de potência A seleção acaba se a potência escolhida é 0 o display desliga O tempo de seleção acaba se não foi escolhida nenhuma potência e aparece no display em todas as zonas um ponto que indica que aguarda a selecão da zona 2 8 ESCOLHA DO NÍVEL DE POTÊNCI...

Страница 23: ...a seleccionada pode ser desligada pressionando os sensores e simultaneamente Um beep toca e a zona correspondente apresenta no display 2 11 Bloqueamento Premir o sensor de bloqueio de chave por 3 segundos a função de bloqueio é ativada Aparece sinal luminoso vermelho junto ao sensor 2 12 Desbloquear Premir o sensor de bloqueio de chave por 3 segundos a função de bloqueio é desativada Desaparece si...

Страница 24: ...r nivel de Potência 4º Selecionar a zona a temporizar 5º Selecionar tempo desejado Após 10 s desaparece o símbolo e volta ao nível selecionado anteriormente Selecionar o tempo Pode seleccionar entre 0 e 99 minutos pressionando os sensores ou O tempo escolhido aparece na zona oposta à escolhida Se a zona escolhida para programação de tempo é em baixo vai aparecer na zona de cima o tempo seleccionad...

Страница 25: ...um novo limite de potência é durante os primeiros 30 segundos após ligar o aparelho à rede eléctrica A placa tem de estar desbloqueada e todas as zonas desligadas premir ao mesmo tempo as teclas das zonas 1 e 3 Neste caso a placa está preparada com limite de potencia de 7200 W Pode selecionar com o sensor outros limites permitidos neste aparelho 6000W 3500W 2800W ou 7200W Para salvar alterações do...

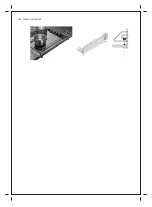
Страница 26: ...MANUAL DE INSTRUÇÕES 26 Fig 1 Fig 3 Fig 4 Fig 6 Fig 6 Fig 2 Fig 5 Fig 7 3 IMAGENS ...

Страница 27: ...rão cobertas pela garantia As reparações de aparelhos eléctricos deverão ser efectuadas apenas por técnicos especializados já que não sendo feito pelos mesmos poderão surgir posteriores complicações nos aparelhos Para evitar perigos desnecessários caso surjam avarias quer nos cabos ou em outro tipo de componentes as reparações devem ser efectuadas nos postos de assistência técnica especializados p...

Страница 28: ... 2 Utilización y Funcionamiento 34 2 1 Instalación 34 2 2 Conexión Eléctrica 34 2 3 Utilización 35 2 4 Recipientes 35 2 5 Teclas Sensoriales 36 2 6 Función Empuje de Calor 38 2 7 Activar la función de potencia zona dooster 38 2 8 Nivel de Potencia 40 2 9 Límite de Tiempo en Funcionamiento 40 3 Imágenes 52 4 Postventa 53 5 Conservación del Medio ambiente 53 INSTRUCCIONES TÉCNICAS 28 ...

Страница 29: ...as instrucciones Este aparato no deberá ser utilizado para otros fines que no sean los previstos en el manual de instrucciones Su seguridad está prevista para el uso doméstico y no para su uso comercial Su uso incorrecto anula automáticamente el derecho a la garantía Después del uso desenchufe la unidad eléctrica a través de los comandos del dispositivo y no confían en la cazuela detector Los obje...

Страница 30: ...de la persona responsable de su seguridad Los niños deben ser supervisados para asegurar que no juegan con el aparato Asistencia Compruebe que en caso de avería entrega su aparato a personal especializado NO PERMITA QUE LOS NIÑOS UTILICEN APARATOS ELÉCTRICOS SIN VIGILANCIA NO PERMITA QUE LOS NIÑOS O ADULTOS CON CAPACIDADES FÍSICAS SENSORIALES O MENTALES REDUCIDAS O PERSONAS CON FALTA DE EXPERIENCI...

Страница 31: ... agua bajo ningún concepto ya que ello podrá ser peligroso PARA EVITAR RIESGO DE INCENCIO O DESCARGA ELÉCTRICA NO EXPONGA AL APARATO AL AGUA O A LA HUMEDAD No coloque su aparato debajo del agua por ejemplo para su lavado 1 4 Limpieza Cada vez que la usemos una vez fría es necesario quitar los restos que hayan quedado pegados porque si la encendemos otra vez dichos restos pueden quedarse pegados de...

Страница 32: ...ste manual de instrucciones sea conservado juntamente con el aparato Este aparato fue concebido para uso no profesional por privado en el interior de las habitaciones Antes de la limpieza apagar el aparato de la electricidad e esperar hasta que esté completamente fría El cable de alimentación del aparato no debe ser sustituido por el usuario para su substitución contactar exclusivamente personal t...

Страница 33: ...ferencias entre su encimera de cocción y un estimulado cardíaco es necessario que este último haya sido diseñado de conformidad con la normativa que lo contempla No obstante recomendamos que las personas con estimulador cardíaco tipo marcapasos consulten con su médico o su fabricante no lo que se refere a la conformidad o a eventuales incompatibilidad del estimulador en caso de duda se abstengan d...

Страница 34: ...ializado que tendrá que respetar las relativas normas de seguridad Antes de proceder a la ligación de la encimera verificar se la instalación eléctrica y el dispositivo de protección están de acuerdo con las características técnicas del aparato Antes de efectuar la ligación eléctrica verificar se la instalación domestica y el dispositivo limitador suportan la carga del aparato ver placa de caracte...

Страница 35: ...o espeso Los recipientes no deben tener lo fondo áspero para no riscar lo cristal y deben estar limpios y secos antes de colocar sobre la encimera Si utiliza recipientes no adecuados el termostato se desactivará antes de alcanzar la temperatura necesaria prolongará el tiempo de cocinado y desperdiciara energía Se recomienda tapar los recipientes mientras cocina con esto economizara una cantidad co...

Страница 36: ... cada vez excepto para apagar una zona actuando en simultaneo en los sensores y Nunca coloque objetos en la zona de los sensores la zona de los sensores debe permanecer desocupada para evitar errores Se ocurre un error todas las zonas serán apagadas y los indicadores de calor residual activados No use guantes para tocar en los sensoriales Zona 2 Zona 3 Zona 1 Zona 4 Usar el dedo limpio y seco suav...

Страница 37: ...uear el uso de los sensores cuando la placa está prendida de modo a evitar ser prendida acidentalmente niños limpieza Para activar desactivar esta función el sensor debe ser tocado continuament durante 3 segundos Aunque la función de bloqueo este activa es posible apagar las zonas una a una o toda la placa en simultáneo Aumentar tiempo para Aumentar el tiempo a temporizar Este sensor en simultáneo...

Страница 38: ...ara el nivel 9 se muestra una P potencia activa La função potencia solo funcionara los primeros 10 minutos después va para el nivel 9 H en el display indica Calor residual Atencción la zona todavia está caliente 0 a 9 indica el potencia Indica los minutos que faltam para acabar la función temporizador 00 intermitente indica fin del tiempo estipulado Indica que la función bloqueo está activa Indica...

Страница 39: ...seleccionar una nueva potencia limite Con los sensores e el limite de potencia es selecionado las potencias seleccionables son 2800W 3500W 6000W 7200W Quando la potencia es 7200W si los sensores o so premidas la potencia canbia para 2800W La secuencia de terminar la grabación del nuevo límite de potencia es presionar al miesmo tiempo los sensores e de las zonas 1 y 4 Una vez hecho esto el nuevo po...

Страница 40: ...R El valor del tiempo si puede seleccionar entre 1 y 99 minutos es posible colocar una zona horaria en cualquier nivel de potencia 0 9 el usuario puede seleccionar sólo una zona a la vez para la función de temporizador Ativar Temporizador Al pulsar el sensor o del temporizador suena un pitido y la pantalla muestra el símbolo de timer de las 00 pantallas y muestran una T a parpadear lo que indica q...

Страница 41: ...onada una zona de cada vez Coloque el nivel de potencia deseado Con el sensor para seleccionar la potencia deseada Coloque el tiempo deseado con el y en el temporizador INSTRUCCIONES TÉCNICAS 41 Zona 2 Zona 1 Modelo MI 1301 ...

Страница 42: ...minuir para Disminuir o nível de potencia Este sensor en simultáneo com el sensor aumentar desliga a zona Bloquear para Bloquear el uso de los sensores durante la utilización Bloquear el uso de los sensores cuando la placa está prendida de modo a evitar ser prendida acidentalmente niños limpieza Para activar desactivar esta función el sensor debe ser tocado continuament durante 3 segundos Aunque l...

Страница 43: ...da para el nivel 9 se muestra una P potencia activa La função potencia solo funcionara los primeros 10 minutos después va para el nivel 9 Nível Zona 1 Zona 2 P 2000 W 1600 W 9 1800 W 1200 W 8 1300 W 1000 W 7 1100 W 800 W 6 900 W 600 W 5 800 W 500 W 4 500 W 400 W 3 300 W 300 W 2 200 W 150 W 1 100 W 75 W Potências H en el display indica Calor residual Atencción la zona todavia está caliente 0 a 9 in...

Страница 44: ...seleccionar una nueva potencia limite Con los sensores e el limite de potencia es selecionado las potencias seleccionables son 2800W 3500W 6000W 7200W Quando la potencia es 7200W si los sensores o so premidas la potencia canbia para 2800W La secuencia de terminar la grabación del nuevo límite de potencia es presionar al miesmo tiempo los sensores e de las zonas 1 y 4 Una vez hecho esto el nuevo po...

Страница 45: ...ZADOR El valor del tiempo si puede seleccionar entre 1 y 99 minutos es posible colocar una zona horaria en cualquier nivel de potencia 0 9 el usuario puede seleccionar sólo una zona a la vez para la función de temporizador Ativar Temporizador Al pulsar el sensor o del temporizador suena un pitido y la pantalla muestra el símbolo de timer de las 00 pantallas y muestran una T a parpadear lo que indi...

Страница 46: ...er Apagar Display Zona 2 Display Zona 3 Led Bloqueo Sensor aumentar potência Sensor adiminuir potencia Display Zona 1 Solo puede ser selecionada una zona de cada vez Coloque el nivel de potencia deseado Con el sensor para seleccionar la potencia deseada Coloque el tiempo deseado con el y en el temporizado ...

Страница 47: ...endida de modo a evitar ser prendida acidentalmente niños limpieza Para activar desactivar esta función el sensor debe ser tocado continuamente durante 3 segundos Aunque la función de bloqueo este activa es posible apagar las zonas una a una o toda la placa en simultáneo Sensor Prender Apagar Sensor Aumentar potencia Sensor Diminuir potencia Sensor bloquear 2 6 UTILIZAR Encender Apagar Para conect...

Страница 48: ... la pantalla en todas las áreas es un punto lo que indica que le espera la zona de elección 3º Seleccionar nível de potencia La selección termina si la potencia elegida es 0 la pantalla se apaga Cuando el tiempo de selección ha terminado y no fue seleccionado el poder de elección la pantalla en todas las áreas es un punto lo que indica que le espera la zona de elección 2 8 ELIJA EL NIVEL DE POTENC...

Страница 49: ...utos pasando a continuación a nivel 9 2 10 DESLIGAR ZONA El área seleccionada se puede apagar pulsando los sensores y simultáneamente Un pitido y la zona correspondiente de la pantalla muestra 2 11 BLOQUEO Presione sensor Bloqueo el clave durante 3 segundos la función de bloqueo se activa y desactiva si aparece el símbolo de la llave y la tarjeta no está bloqueada 2 12 LIMITE DEL TIEMPO EN FUNCION...

Страница 50: ...º Seleccione la zona deseada 3º Elija el nivel de potencia 4º Seleccione el área a la temporizar 5º Seleccione el tiempo deseado Después de 10 s el símbolo desaparece y vuelve al nivel seleccionado previamente Selecionar el tiempo Se puede seleccionar entre 0 y 99 minutos pulsando los sensores o El momento elegido aparece en la opuesta elegido Si el área seleccionada para la programación en el tie...

Страница 51: ...ir un nuevo límite de potencia es Durante los primeros 30 segundos desde el encendido a la red eléctrica La encimera debe estar desbloqueada y todo fuera de las zonas pulse al mismo tiempo las zonas 1 y 3 En este caso la encimera esta preparada con límite de potencia de 7200 W Se puede seleccionar con el sensor otros límites permitidos en esta unidad 6000W 3500W 2800W ou 7200W Para salvar alteraçõ...

Страница 52: ...INSTRUCCIONES TÉCNICAS 52 Fig 1 Fig 3 Fig 4 Fig 6 Fig 6 Fig 2 Fig 5 Fig 7 3 IMAGENS ...

Страница 53: ... la garantía Las reparaciones de aparatos eléctricos deberán efectuarse apenas por personal especializado pudiendo en caso contrario surgir posteriores complicaciones en el equipamiento Para evitar peligros innecesarios en caso de que surjan averías ya sea en los cables o en otro tipo de componentes las reparaciones deben ser efectuadas en los puestos de asistencia técnica especializados ya que es...

Страница 54: ... 56 1 3 Humidity and Water 57 1 4 Cleaning 57 1 5 General Precautions 58 2 Use and operation 59 2 1 Installation 59 2 4 Cookware 60 2 5 Sensors 61 2 6 Use 63 2 7 Activate power function booster zone 63 2 8 Time limit in operation 65 2 9 Timer operation 65 3 Images 78 INSTRUCTION MANUAL 54 ...

Страница 55: ...iance must not be used for any purpose other than that envisaged in the instruction manual It is only designed to be safe for domestic use not commercial use Incorrect use is not covered by the warranty and will void it automatically After use turn off the electrical drive through its command device and do not rely on the pan detector Metal objects such as knives forks spoons and lids should not b...

Страница 56: ...nce Assistance If a fault occurs ensure that your appliance is repaired by a qualified technician DO NOT ALLOW CHILDREN TO USE ELECTRICAL APPLIANCES WITHOUT SUPERVISION DO NOT ALLOW CHILDREN OR ADULTS WHOSE PHYSICAL SENSORY OR MENTAL CAPACITIES ARE REDUCED OR PEOPLE WITH A LACK OF EXPERIENCE KNOWLEDGE TO USE ELECTRICAL APPLIANCES WITHOUT SUPERVISION 1 1 Power Supply 1 Check if the voltage from the...

Страница 57: ... difficult to remove when reheated Use products that are suitable for cleaning glass ceramic hobs Do not use abrasive sponges or powder detergents that could scratch the glass surface Do not use oven cleaning spray as it is very aggressive and could damage the glass surface The glass ceramic hob should not be cleaned using steam or other similar methods To remove minor dirt use hot water and a lit...

Страница 58: ...el In the case of repairs always contact an authorized Service Centre and demand original spare parts Repairs carried out by non competent personnel can cause damages WARNING If the surface is cracked switch off the appliance acting on the protection device from the mains to avoid the possibility of electric shock The hob is designed so as not to interfere with the operation of other electrical eq...

Страница 59: ...e and a fresh air inlet at the rear Both the fresh air inlet and the hot air outlet are essential for proper and efficient functioning of induction hob extend life and prevent damage to property 2 2 Electrical Connection The appliance must be connected to the power supply by a technically qualified person in accordance with current safety standards Before turning the hob on make sure that the elec...

Страница 60: ...he cookware it is ferromagnetic and can thus be used in the induction heating areas see Figure 7 Pots and pans with thick bases and diameters similar to that of the heating area must be used To avoid scratching the glass cookware must not have rough bases and must be clean and dry before being placed on the glass ceramic hob If unsuitable cookware is used the thermostat will deactivate before the ...

Страница 61: ...ea acting simultaneously on the sensors and Do not place objects in the sensor zone the sensor zone should remain clear to avoid errors If there is an error every zone should be disconnected and the residual heat indicators activated Do not use gloves to touch the sensors You should touch the sensors softly and with a clean and dry finger Zone 2 Zone 3 Zone 1 Zone 4 Touch gently with a clean and d...

Страница 62: ...ck the use of sensors when the hob is turned off so that it is not turned on accidentally children cleaning The sensor must be touched continuously for 3 seconds to turn this function on Even when the block function has been activated it is still possible to turn the zones off one by one and to turn the entire hob off simultaneously Increase time to Increase the countdown time When operated simult...

Страница 63: ...tion active The power function will only operate for the first 10 minutes after which it will go back to level 9 W on the display indicates residual heat Warning the zone is still hot From 0 to 9 indicates the elected power Indicates the minutes before the timer function runs out 00 flashing indicates the end of the stipulated time Indicates that the block function is active Indicates that the Pow...

Страница 64: ...ltaneously Doing this causes a signal to sound appears on the timer display and the current power limit will be shown on the zone 1 and zone 4 displays 7200W To select a new power limit Sensors and are used to choose the power limit The following powers can be selected 2800W 3500W 6000W 7200W If the and sensors are pressed when the power is at 7200W the power changes to 2800W The following sequenc...

Страница 65: ...e deactivates automatically when a certain maximum operating time is exceeded The maximum operating time depends on the level selected for the zone level 1 10 hours level 4 10 hours level 7 10 hours level 2 10 hours level 5 10 hours level 8 10 hours level 3 10 hours level 6 10 hours level 9 3 hours 2 9 TIMER OPERATION The time value can be selected between 1 and 99 minutes and it is possible to se...

Страница 66: ...nd plays and the plate s display flashes to indicate that the power has not been selected for the plate in question The timer display starts to flash to indicate that the time has to be selected Only one zone can be chosen at a time Set the desired power level Use the sensor to select the desired power Set the desired time on the timer with the and buttons t t t t t t t t ...

Страница 67: ...INSTRUCTION MANUAL 67 Zone 2 Zone 1 Modelo MI 1301 Sensor decrease power Sensor Connect Disconnect Sensor Increase time Sensor increase power Display Zone 1 Display Time Display Zone 2 Sensor blockage ...

Страница 68: ...ally switching it on children cleaning To activate deactivate this function the sensor should be pressed for 3 seconds Even with the block function active it is possible to switch off zones one by one or all the hob simultaneously Increase time to Increase the time being temporized This sensor simultaneously with the decrease sensor switches off the timer function Sensor Connect Disconnect Sensor ...

Страница 69: ...place zone on level 9 Pressing sensor of the selected zone you see a P power function activated The power function only works on the first 10 minutes and then it goes to level 9 Level Zone 1 Zone 2 P 2000 W 1600 W 9 1800 W 1200 W 8 1300 W 1000 W 7 1100 W 800 W 6 900 W 600 W 5 800 W 500 W 4 500 W 400 W 3 300 W 300 W 2 200 W 150 W 1 100 W 75 W Power Blockage press block sensor switch for 3 seconds t...

Страница 70: ...ours level 8 10 hours level 3 10 hours level 6 10 hours level 9 3 horas 2 9 Timer Operation The time value may be selected between 1 and 99 minutes it is possible to select time for a zone in every power level 0 9 the user may select just one zone at a time for the timer function Activate Timer Press timer sensor or there is a sound and the screen shows the symbol timer of 00 and the displays show...

Страница 71: ... MANUAL 71 Zone 2 Zone 3 Zone 1 Zone 4 Modelo MI 1600 MI 1602 Selection Zone 4 Sensor Connect Disconnect Selection Zone 2 Selection Zone 3 Sensor Block Sensor increase power Sensor decrease power Selection Zone 1 ...

Страница 72: ...plate is off to avoid being accidentally switching it on children cleaning To activate deactivate this function the sensor should be pressed for 3 seconds Even with the block function active it is possible to switch off zones one by one or all the hob simultaneously Sensor Connect Disconnect Sensor Increase power Sensor Decrease power Sensor block 2 6 USE Connect Disconnect To connect the hob pres...

Страница 73: ...election time ends if you did not select a power a point appears on the display of every zone indicating that it is awaiting the selection of zone 3rd Select power level The selection ends if the chosen power is 0 the display disconnects The selection time ends if you did not select a power and a point appears on the display of every zone indicating that it is awaiting the selection of zone 2 8 SE...

Страница 74: ...ed zone may be disconnected pressing sensors and simultaneously There is a beep and the corresponding zone presents on its display 2 11 BLOCKAGE Press block sensor switch for 3 seconds the blocking function is activated A bright red signal appears next to the sensor 2 12 UNBLOCK Press block sensor switch for 3 seconds the blocking function is deactivated The bright red signal disappears 2 12 TIME ...

Страница 75: ...r activated Example 1st Switch on the Hob 2nd Select the intended zone 3rd Choose the Power level 4th Select the zone to be timed 5th Select the intended time After 10 s the symbol disappears and it goes back to the level selected previously Selecting time You can select between 0 and 99 minutes by pressing sensors or The chosen time appears in the opposite zone to the chosen one If the zone chose...

Страница 76: ...tion This hob has an Eco power limit The user may reduce the total power of the hob When you switch the hob on the maximum power is 7200 W this may be reduced by the user to 2800W 3500W or 6000W Eco power limits selection The sequence to choose a new power limit is during the first 30 seconds after connecting the appliance to the power supply The hob must be unblocked and every zone disconnected s...

Страница 77: ... user tries to increase the power level the total value of the hob power is calculated If this total power level is higher than the power limit previously selected the power increase is not allowed There is an error beep and the screen shows a r symbol for 3 seconds ...

Страница 78: ...INSTRUCTION MANUAL 78 Fig 1 Fig 3 Fig 4 Fig 6 Fig 6 Fig 2 Fig 5 Fig 7 3 IMAGENS ...

Страница 79: ...INSTRUCTION MANUAL 79 ...

Страница 80: ...3 1 4 Reinigung 83 1 5 Allgemeine Vorsichtsmaßnahmen 84 3 Bedienung und betrieb 86 2 1 Installation 86 2 2 Elektrischer Anschluss 86 2 3 Bedienung 87 2 4 Kochgeschirr 87 2 5 Sensoren 88 2 6 Bedienung 90 2 7 Ower funktion betätigen booster zone 90 2 8 Zeitbegrenzung in betrieb 92 2 9 Zeitschaltuhr betrieb 92 3 Bilder 105 GEBRAUCHSANLEITUNG 80 ...

Страница 81: ...nweisungen sorgfältig durchzulesen Ihr Gerät soll nicht für andere Zwecke benutzt werden als die die in dieser Gebrauchsanleitung vorgestellt werden Die Gerätsicherheit ist nur für den Hausgebrauch vorgesehen und nicht für kommerzielle Nutzung Eine falsche Benutzung fällt nicht unter die Garantie und macht diese automatisch rückgangig Schalten Sie das elektrische Kochfeld nach der Benutzung über d...

Страница 82: ...ter Beaufsichtigung oder Anleitung von Personen stehen die für ihre Sicherheit verantwortlich sind Kinder müssen beaufsichtigt werden um sicherzustellen dass sie nicht mit dem Gerät spielen Kundendienst Vergewissern Sie sich dass Sie im Falle einer Störung Ihr Gerät einem qualifizierten Fachmann überlassen ACHTEN SIE DARAUF DASS KINDER ELEKTRISCHE GERÄTE NICHT UNBEAUFSICHTIGT BENUTZEN ACHTEN SIE D...

Страница 83: ...cht und bringen Sie es zum Austauschen zu einem autorisierten technischen Kundendienstzentrum 1 3 Feuchtigkeit und Wasser Lassen Sie Ihr Gerät auf keinerlei Weise in Kontakt mit Wasser kommen da dies gefährlich sein kann UM EINE BRANDGEFÄHRDUNG ODER ELEKTRISCHE GEFÄHRDUNG ZU VERHINDERN SETZEN SIE DAS GERÄT NICHT WASSER ODER FEUCHTIGKEIT AUS Stellen Sie Ihr Gerät nicht unter Wasser beispielsweise u...

Страница 84: ...ind mit Hilfe einer Spachtel sorgfältig entfernt werden um Verbrennungen zu verhindern 1 5 Allgemeine Vorsichtsmaßnahmen Der Anschluss des Geräts muss durch geschultes Fachpersonal das mit den Montagenormen und anwendbaren Regelungen vertraut ist durchgeführt werden Es ist sehr wichtig dass diese Gebrauchsanleitung für den Fall eines Besitzerwechsels gemeinsam mit dem Gerät aufbewahrt wird Kinder ...

Страница 85: ...rischer Geräte nicht beeinträchtigt sofern die Letzteren den auf sie anwendbaren Standards entsprechen Das Induktionskochfeld erzeugt in seiner Umgebung elektrische Felder Damit es zu keinen Interferenzen zwischen dem Kochfeld und einem Herzschrittmacher kommt ist es notwenig dass der Letztere in Übereinstimmung mit den geltenden Standards konzipiert wurde Allerdings empfehlen wir Personen die Her...

Страница 86: ... darunter stehenden Ofen eingebaut werden siehe Abbildung 4 Belüftung Die in Abbildung 4 beschriebenen Belüftungsräume müssen eingeplant werden nämlich ein Warmluftabzug mit mindestens 10 mm Höhe an der Vorderseite und entlang der gesamten Breite des Kochfeldes sowie ein Frischlufteinlass auf der Rückseite Sowohl der Frischlufteinlass als auch der Warmluftabzug sind äußerst wichtig für den korrekt...

Страница 87: ...istungsstufe um Energie zu sparen Lassen sie keine Gegenstände auf dem Plattenkochfeld liegen auch wenn dieses ausgeschaltet ist 2 4 Kochgeschirr Das Kochgeschirr ist ein grundlegender Teil des Induktionssystems Die Beschaffenheit des Kochgeschirrs ist äußerst wichtig für die Ergebnisse des Systems Es ist wichtig dass das Kochgeschirr einen völlig flachen Boden hat Alu oder Kupferkochgeschirr funk...

Страница 88: ...leichzeitig die Sensoren und betätigen Stellen Sie nie Gegenstände auf die Sensorzone die Sensorzone muss frei bleiben um das Auftreten von Fehlern zu verhindern Wenn ein Fehler auftritt werden alle Zonen ausgeschaltet und die Restwärmeanzeigen aktiviert Verwenden Sie keine Handschuhe wenn Sie die Sensoren berühren Sie sollten die Sensoren mit sauberem und trockenem Finger und vorsichtig berühren ...

Страница 89: ...Platte ausgeschaltet ist damit diese nicht aus versehen eingeschaltet wird Kinder Reinigung Um diese Funktion zu aktivieren desaktivieren muss der Sensor ununterbrochen während 3 Sekunden berührt werden Aucch wenn die Sperrfunktion aktiv ist ist es moöglich die Zonen im einzelnen oder die ganze Platte gleichzeitig auszuschalten Zeit erhöhen Zeitgesteurte Zeit erhöhen Dieser Sensor schaltet die Zei...

Страница 90: ...wird ein P Power Funktion aktiv angezeigt Die Power Funktion funktioniert nur während der ersten 10 Minuten und geht dann in Stufe 9 über W am Bedienmodul gibt die Abwärme an Achtung die Zone ist immer Von O bis r gibt die ausgewählte Leistung an Zeigt die Minuten die fehlen um die Funktion zu beenden Blinkender Zeitgeber 00 gibt Ende der eingestellten Zeit an Gibt an welche Sperrfunktion aktiv is...

Страница 91: ...t ein akustisches Signal und wird auf dem Zeitschaltuhr Display gezeigt und die aktuelle Leistungsbegrenzung wird am Bedienmodul der Zone 1 und 4 angezeigt Neue Leistungsbegrenzung auswählen Durch die Sensoren und wird die Leistungsbegrenzung ausgewählt Die auswählbaren Leistungen sind folgende 2800W 3500W 6000W 7200W Wenn die Leistung 7200W beträgt und die Sensoren oder gedrückt werden ergibt sic...

Страница 92: ...tsgründen schaltet die Zone automatisch aus wenn die maximale Betriebszeit überschreitet wird Die maximale Betriebszeit hängt von der ausgewählten Stufe für die Zone ab Stufe 1 10 Stunden Stufe 4 10 Stunden Stufe 7 10 Stunden Stufe 2 10 Stunden Stufe 5 10 Stunden Stufe 8 10 Stunden Stufe 3 10 Stunden Stufe 6 10 Stunden Stufe 9 3 Stunden 2 9 ZEITSCHALTUHR BETRIEB Die Zeit kann zwischen 1 und 99 Min...

Страница 93: ... das Bedienmodul blinkt um zu zeigen dass die Leistung dieser Platte nicht ausgewählt wurde Das Display der Zeitschaltuhr beginnt zu blinken um zu zeigen dass die Zeit ausgewählt werden muss Es kann nur ein Feld auf einmal ausgewählt werden Gewünschte Leistungsstufe einstellen Mit dem Sensor wählt man die gewünschte Leistung aus Gewünschte Zeit mit den Tasten und an der Zeitschaltuhr einstellen t ...

Страница 94: ...ne 2 Zone 1 Modelo MI 1301 Sensor reduzieren Leistung Sensor Ein Aus Sensor Zeit erhöhen Sensor erhöhen Leistung Bedienmodul Zone 1 Bedienmodul Zeit Bedienmodul Zone 2 Sensor sperren GEBRAUCHSANLEITUNG 94 ...

Страница 95: ...h Kinder Reinigung zu verhindern Für die Aktivierung Deaktivierung dieser Funktion muss der Sensor 3 Sekunden lang ununterbrochen berührt werden Selbst mit aktivierter Sperrfunktion können die Zonen einzeln oder das gesamte Kochfeld gleichzeitig ausgeschaltet werden Zeit erhöhen um die einzustellende Zeit zu erhöhen Dieser Sensor schaltet die Zeitschaltuhrfunktion gleichzeitig mit dem Sensor reduz...

Страница 96: ...ne mit dem Sensor auf Stufe 9 Wenn Sie dann den Sensor der ausgewählten Zone drücken erscheint ein P Power Funktion aktiviert Die Power Funktion funktioniert nur während der ersten 10 Minuten und springt dann auf die Stufe 9 Stufe Zone 1 Zone 2 P 2000 W 1600 W 9 1800 W 1200 W 8 1300 W 1000 W 7 1100 W 800 W 6 900 W 600 W 5 800 W 500 W 4 500 W 400 W 3 300 W 300 W 2 200 W 150 W 1 100 W 75 W Leistunge...

Страница 97: ...DER ZEITSCHALTUHR Der Zeitwert kann zwischen 1 und 99 Minuten ausgewählt werden es ist möglich die Zeit für eine Zone auf jeder Leistungsstufe einzustellen 0 9 Der Benutzer kann nur jeweils eine Zone für die Zeitschaltuhrfunktion auswählen Aktivierung der Zeitschaltuhr Drücken Sie den Sensor der Zeitschaltuhr oder es ertönt ein akustisches Signal und die Anzeige zeigt das Symbol Zeitschaltuhr auf ...

Страница 98: ... Zone 3 Zone 1 Zone 4 Modelo MI 1600 MI 1602 Auswahl Zone 4 Sensor Ein Aus Auswahl Zone 2 Auswahl Zone 3 Sensor sperren Sensor erhöhen Leistung Sensor reduzieren Leistung Auswahl Zone 1 GEBRAUCHSANLEITUNG 98 ...

Страница 99: ...urch Kinder Reinigung zu verhindern Für die Aktivierung Deaktivierung dieser Funktion muss der Sensor 3 Sekunden lang ununterbrochen berührt werden Selbst mit aktivierter Sperrfunktion können die Zonen einzeln oder das gesamte Kochfeld gleichzeitig ausgeschaltet werden Sensor Ein Aus Sensor Leistung erhöhen Sensor Leistung reduzieren Sensor sperren 2 6 BEDIENUNG Ein Aus Um das Kochfeld einzuschalt...

Страница 100: ...eint auf dem Bedienmodul aller Zonen ein Punkt der anzeigt dass auf die Zonenauswahl gewartet wird 3 Wählen Sie die Leistungsstufe aus Die Auswahl ist beendet wenn die gewählte Leistung 0 ist und sich das Bedienmodul ausschaltet Die Auswahlzeit endet wenn keine Leistung gewählt wird und auf dem Bedienmodul aller Zonen ein Punkt erscheint der anzeigt dass auf die Zonenauswahl gewartet wird 2 8 WAHL...

Страница 101: ...geschaltet werden indem die Sensoren und gleichzeitig gedrückt werden Es ertönt ein Piepton und auf dem Bedienmodul der entsprechenden Zone erscheint 2 11 SPERRUNG Drücken Sie den Sperrsensor Schlüssel 3 Sekunden lang die Sperrfunktion wird aktiviert Es erscheint ein rotes Leuchtsignal beim Sensor 2 12 ENTSPERREN Drücken Sie den Sperrsensor Schlüssel 3 Sekunden lang die Sperrfunktion wird deaktivi...

Страница 102: ...n Sensor der gewählten Zone es ertönt ein akustisches Signal und die Anzeige zeigt das Symbol Zeitschaltuhr an und die Bedienmodule zeigen ein blinkendes t an um darauf hinzuweisen dass für eine Zone die Zeitschaltuhr aktiviert ist Beispiel 1 Schalten Sie das Kochfeld ein 2 Wählen Sie die gewünschte Zone aus 3 Wählen Sie die Leistungsstufe 4 Wählen Sie die Zone aus für welche die Zeit eingestellt ...

Страница 103: ...lche die Zeit programmiert werden soll und legen Sie die gewünschte Zeit fest Ende der Zeit Wenn die festgelegte Zeit zu Ende geht schaltet sich die Zeitprogrammierung automatisch aus Auf dem Bedienmodul erscheint und es ertönt eine Minute lang ein Piepton Wahl der Leistung Dieses Kochfeld verfügt über ein System der Öko Leistungsgrenze Der Benutzer kann die Gesamtleistung des Kochfeldes reduziere...

Страница 104: ...o Leistungsgrenze wird der Gesamtleistungswert des Kochfeldes jedes Mal wenn der Benutzer versucht die Leistungsstufe zu erhöhen berechnet Wenn diese Gesamtleistungsstufe höher ist als die zuvor ausgewählte Leistungsgrenze ist die Erhöhung der Leistung nicht erlaubt Ein Fehler Piepton ertönt und die Anzeige zeigt 3 Sekunden lang ein Symbol r an ...

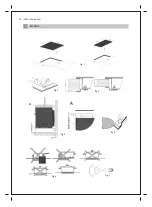
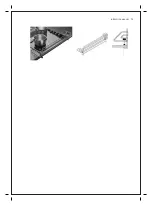
Страница 105: ...Abb 1 Abb 3 Abb 4 Fig 6 Abb 6 Abb 2 Abb 5 Abb 7 3 BILDER GEBRAUCHSANLEITUNG 105 ...

Страница 106: ...GEBRAUCHSANLEITUNG 106 ...

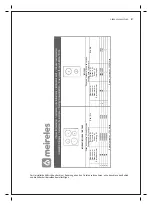
Страница 107: ...tencia W Power W Leistung W Ecw Wh Diâmetro mm Diámetro mm Diameter mm Durchmesser mm Potência W Potencia W Power W Leistung W Ecw Wh 1 210 1500 2000 165 9 1 145 1200 1600 194 2 2 145 1200 1600 194 2 2 210 1500 2000 170 7 3 210 1500 2000 165 9 4 145 1200 1600 180 0 E placa encimera 176 5 Wh kg E placa encimera 182 5 Wh kg Der Hersteller behält sich das Recht vor Änderungen an den Geräten vorzunehm...

Страница 108: ...PGQ1939 8 Rede de Assistência em Portugal http goo gl TWeSzT Red de Asistencia en España http goo gl UZyYvd 200 426 808 107 323 902 ...

Отзывы: