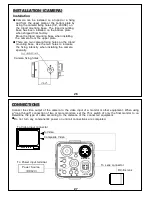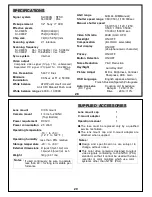
23
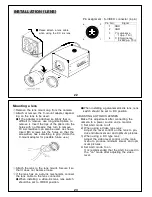
Mounting a lens
①
Remove the lens mount cap from the camera.
②
Attach or remove the C-mount adapter depend-
ing on the lens to be used.
●
If the adapter is attached so tightly that is
difficult to remove, use long-nosed pliers to
remove it. Insert the tips of the pliers into the
holes with no threads, thus turn to remove.
Or a screwdriver can also be used, as shown.
Insert M3 screws into the holes so that the
screwdriver has something to grip. (Store the
C-mount adapter for possible future use.)
③
Attach the lens to the lens mount. Secure it so
that it does not become loose.
④
If the lens has an auto-iris mechanism, connect
the lens cable to the lens connector.
●
When installing a video-iris lens, lens switch
should be set to VIDEO position.
●
When installing a galvanometric-iris lens, lens
switch should be set to DC position.
ADJUSTING AUTO-IRIS LENSES
Make this adjustment after connecting the
camera to a power source and a monitor.
1) Set AGC mode to off.
2) When using a Video type lens :
Adjust the level control on the lens to pro-
duce minimum smear and optimum pictures.
3) When using a DC type lens :
Adjust the video level control on the main
menu to produce minimum smear and opti-
mum pictures.
4) Set AGC mode to on
It is recommended that the AGC be used in
the "on" mode after adjusting the video
level.
22
INSTALLATION (LENS)
■
■
■
■
Please attach a lens cable
when using the DC iris lens
Pin No.
Signal
1
2
3
4
GND
GND
Y (Luminance,
1Vp-p, 75
Ω
)
C (Chrominance,
0.286Vp-p, 75
Ω
)
Pin assignment : S-VIDEO connector (4-pin)
4
3
2
1
Содержание SI-C600N
Страница 16: ...30 MEMO ...


