5. Getting Started
5. Getting Started
ENGLISH
ENGLISH
06
1. Check that all connection cables are connected and the power supply is connected to a power outlet.
2. It is strongly recommended to use an uninterruptible power supply (UPS) in conjunction with the device. The
power button on the front should be red to indicate that the device is receiving power.
3. Press the power button on the front panel.
4. The power LED should now light blue and the device starts.
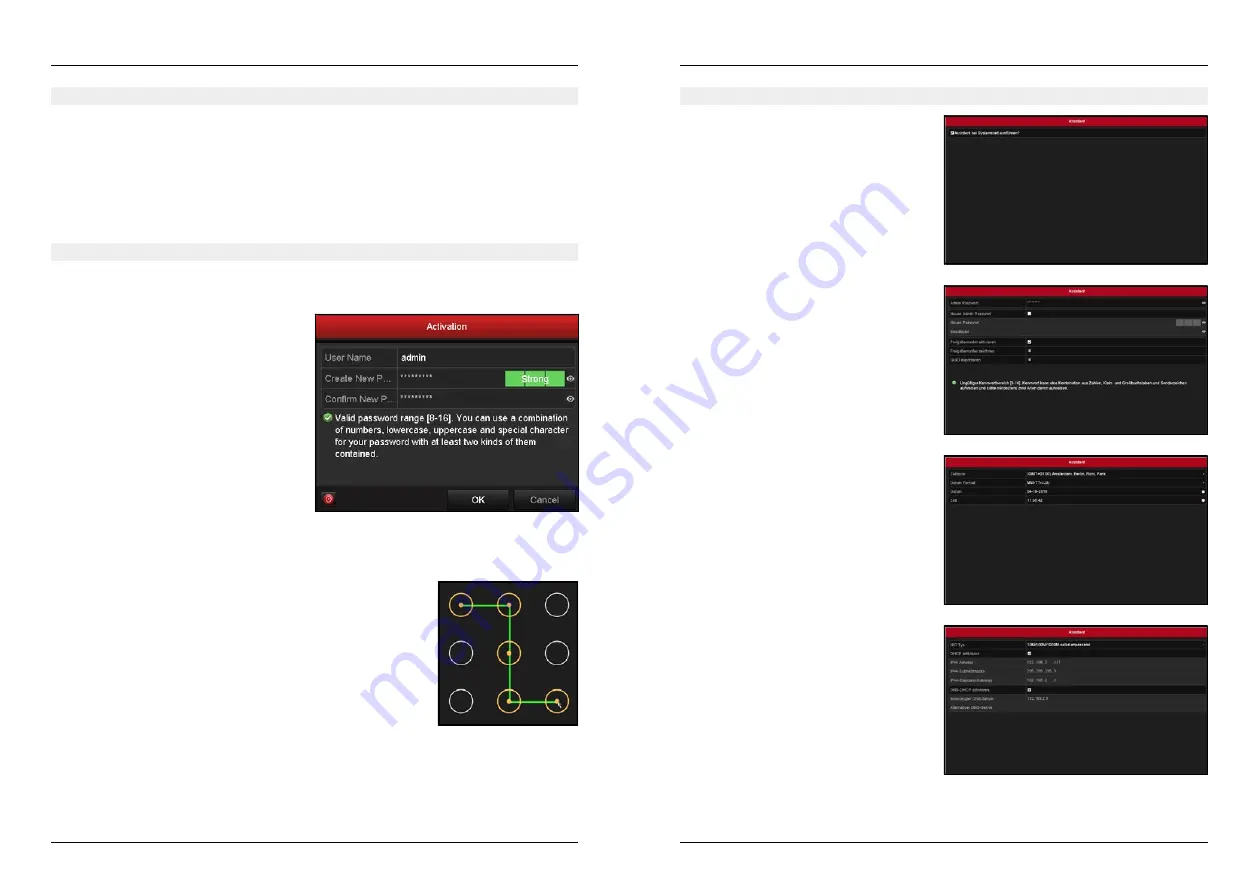
If you are using the device for the first time, you must first define a password in order to activate the device.
Choose a secure, 8-16 digit password to deny unauthorized access to the system.
Make sure that the password consists of different
characters and numbers. Only when the indicator to
the right of the password entry turns green do you
use a secure password and the input is accepted by
the system.
In addition, assign a password for the release of IP
cameras.
Unlock pattern
After confirming the password entry, you can create a unlock pattern to gain
faster access to the system.
After you set a sharing pattern, you must retake it for confirmation.
Admin password and unlock pattern
To continue with the wizard, you must first enter the
admin password that you have assigned to activate
the device.
Alternatively, you can also change the password
here, activate, deactivate or redefine the approval
pattern.
Note:
If the unlock pattern remains activated, it is
always requested when accessing the menu.
Set time and date
Here you can select the time zone you are in, change
the date format (eg DD-MM-YYYY) and set the cur-
rent date and time.
Network connection
Connect the DVR main unit to your network via LAN
cable. In this window you can now set the network
connection.
• Enable DHCP to automatically assign an IP ad-
dress to the system.
• Disable DHCP to manually enter the IP address.
Set menu language
After you have created the approval pattern, you can set the menu language
in the next window. Confirm the language selection, then the device restarts.
The wizard will guide you through the first import-
ant settings on the DVR main unit.
Uncheck the tick if you do not want to use the wi-
zard right now.
You can reopen the wizard each time the system is
rebooted.
Note:
The password input is encrypted, indicated by a * symbol. Click on the eye icon to the right of the password
entry to make the entry visible.
07
5.1 Commissioning of the device
5.2 Activate device
5.3 Assistant at system startup
Содержание HSC 7800
Страница 1: ...HSC 7800 Kurzanleitung...


