Please
note,
that
plotted
image
is
in
plotting
area
rotated
by
270
degree
(or
–90
degree)
and
mirrored
from
some
programming
reasons.
It
means,
X
axis
of
the
grey
plotting
area
represents
Y
axis
of
the
film
loaded
in
photoplotter
(drum
circumference),
while
Y
axis
of
the
grey
plotting
area
represents
X
axis
of
the
film
loaded
in
photoplotter
(drum
axis).
At
the
same
time
the
image
is
mirrored
over
the
Y
axis
of
the
plotting
area.
This
has
no
impact
on
proper
photo
‐
plotting,
as
the
overall
size
of
the
plotted
image
is
the
same.
To
avoid
confusion
with
plot
rotation
on
the
film,
this
is
the
rule:
horizontal
line
of
the
plotted
image
will
be
vertical
in
plotter.
Command
Job
‐
Import
Master
Gerber
or
the
first
left
icon
loads
main
Gerber
file(s),
while
Job
‐
Import
Associated
Gerber
or
„Gbr“
icon
loads
Gerber
files
associated
with
the
master
file.
The
master
Gerber
file(s)
can
be
located
anywhere
inside
the
plotting
area,
usually
on
layer
(film)
number
1
(default),
while
associated
Gerber
files
are
automatically
positioned
under
Master
Gerber
on
different,
specified
layers
(films).
If
Master
Gerber
file
is
for
example
top
side
routing
of
the
PCB,
then
Associated
Gerber
files
are
for
example
silkscreen,
soldermask
or
bottom
side
routing
of
the
same
board
–
they
will
be
in
same
location
as
the
Master
image,
but
on
different
layers
(films),
even
when
penalization
is
done.
Several
Master
Gerber
files
(same
or
different)
can
be
loaded
on
one,
same
layer
(film).
Associated
Gerber
files
are
loaded
into
selected
layer,
which
can
be
selected
in
top
right
window
Active
Layer.
Note:
The
meaning
„Master
Gerber
“
and
„Associated
Gerber“
makes
sense
only
in
case
of
several
artworks
(like
Top
side
routing,
Bottom
side
routing,
Silkscreen,
Soldermask,
etc.)
from
the
same
board
will
be
photo
‐
plotted,
while
one
of
them
(Master)
will
be
panelised
‐
the
other
ones
(Associated)
must
be
then
be
panelised
too
and
be
positioned
exactly
to
the
same
location
as
the
Master
image.
If
films
are
not
panelised,
than
every
Gerber
file
can
be
considered
as
„Master
Gerber“,
as
it
can
be
positioned
anywhere
in
plotting
area
without
considering
another
Gerber
files.
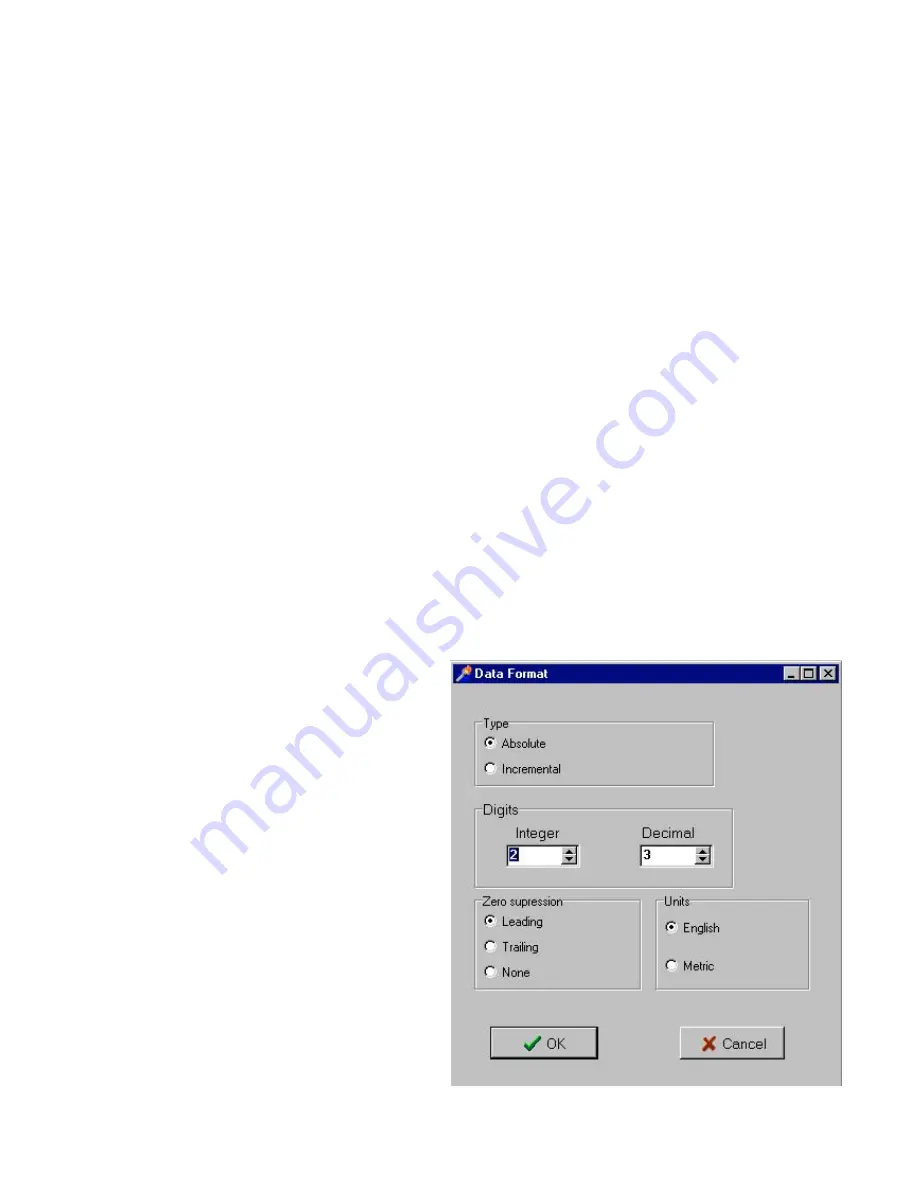
If
standard
Gerber
file
is
loaded
(
RS274
‐
D
),
then
data
format
of
Gerber
file
has
to
be
set
in
dialog
window
using
command
Preference
‐
Data
Format
.
This
data
format
does
not
need
to
be
set
for
the
extended
Gerber
file
(
RS274
‐
X
),
as
this
information
is
directly
in
its
Gerber
file.
After
reading
Gerber
file,
a
small
portion
of
the
image
will
be
displayed
in
top
right
corner
of
plotting
field
like
a
red
rectangle
with
its
size
equal
to
given
image.
This
rectangle
can
be
moved
to
any
location
inside
the
plotting
area
by
left
mouse
button
(click
on
red
rectangle,
hold
button
down,
drag
to
a
new
location,
release
button).
As
plotter
starts
to
plot
at
top
left
corner
and
continues
to
the
right,
it
makes
sense
to
place
this
red
rectangle
to
the
top
left
corner
of
plotting
area.
After
positioning
red
rectangle
inside
plotting
area,
corresponding
aperture
file
must
be
loaded
in
case
of
standard
Gerber
format
(RS
‐
274D)
.
Extended
Gerber
format
(RS
‐
274X)
contains
information
on
used
apertures
and
therefore
does
not
require
to
load
aperture
file.
If
you
are
not
sure
which
format
is
loaded,
see
the
aperture
table
(
Preference
–
Aperture
Table
)
an
Icon
–
if
table
is
empty,
without
information
on
used
D/codes
, than
aperture
file
has
to
be
loaded.
Содержание FP?8000 XL
Страница 12: ......
Страница 20: ...Continue as with any other plot file use Run photoplotter Tools Run Photoplotter or button ...


