


ENGLISH
19
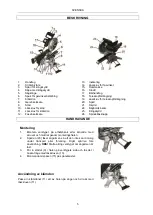
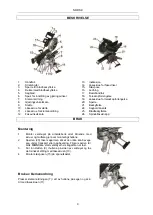
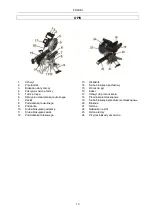
OPERATION
Assembly
1.
Fit the tool on a workbench or equivalent with screws
and nuts through the retaining holes.
2.
The catch (20) locks the saw arm so that it cannot move
during transportation or storage. Release the catch
before use.
NOTE:
Never start the tool if the saw arm is
locked.
3.
Insert the support (9) in the holes on the side of the tool
and lock in the required position with the locking screw
(10).
4.
Fit the dust bag (15) on the sawdust ejector.
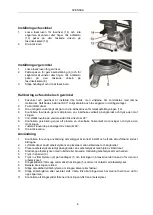
Using the clamp
Fit the clamp (7) in one of the holes on the saw and tighten with
the locking screw (11).
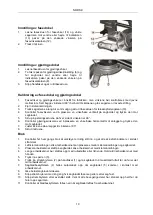
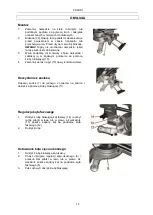
Adjusting the bevel angle
1.
Release the locking screw for the bevel angle
(14) and tilt the saw arm to the left or right until
the indicator (13) points to the required angle on
the bevel angle scale (12).
2.
Tighten the screw.
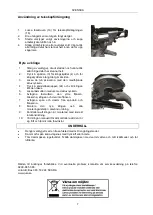
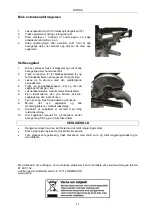
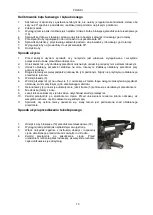
Adjusting the mitre angle
1.
Release the locking screw for the mitre angle.
2.
Grip the lever to adjust the mitire angle (6) and
move the saw table to the left or right until the
indicator points to the required angle on the
bevel angle scale (8).
3.
Release the handle and tighten the locking
screw.


