background image

Helpline No. UK/ North Ireland 0871 37 61 020 Rep. Ireland 1-800-992 508
Web Support www.medion.co.uk 
Model Number: 83388 


Product Description 

2


This universal remote control has eight mode keys and therefore can replace up to eight 
normal remote controls ("8 in 1 function“). These may be remote controls for practically 
every type of remote-controlled consumer electronics (see the supplied code list).  

The labels "

TV

" "

VCR

" "

DVD

" "

CD

" "

ASAT

" "

CBL

" "

AUX

" "

DSAT

" on the mode keys are for 

overview purposes. With the exception of the 

TV

 key, you can assign any key to any 

device (“Flex Mode”). To program in codes see “Programming device codes” on page 10. 

Operation 

3


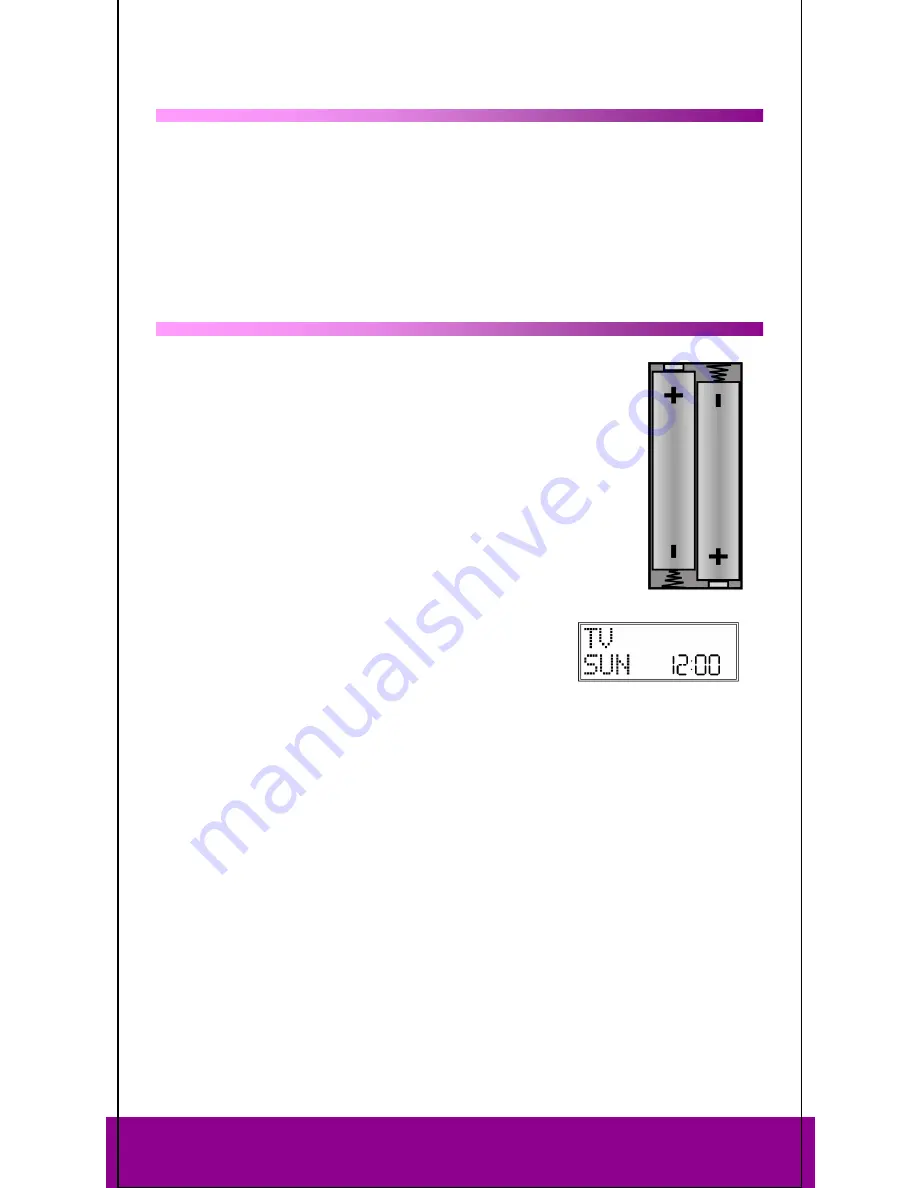
Inserting batteries 

2 LR03 AAA micro batteries are supplied. 

Remove the battery compartment cover by pushing it downwards. 

Insert both batteries into the compartment while observing the +/- 
polarity. 

Replace the cover. 

Settings after battery replacement 

If the batteries have been inserted correctly, the factory setting is 
displayed. It shows the active mode ("TV"), the day of the week and 
the time. 

`


Please read “

Setting time and date

” on page 7 for more 

information on setting the time and date

.


After new batteries have been inserted, the mode, time, 
date and backlight time are reset to the factory settings.  

However, codes that have already been programmed in as well as programmed learn 
functions and macros are retained when batteries are changed.  

Protection against unexpected battery discharging 

If a key remains pressed down by accident (because something is lying on the remote 
control for example), the remote control sends 255 infrared signals (for approximately 30 
seconds) and this ends the transmission. This prevents the batteries from discharging 
accidentally. 

Содержание 83388

Страница 1: ... Cancel function 6 Setting time and date 7 Setting clock time 7 Setting the date 7 Backlight 8 RESET factory settings 9 Programming device codes 10 Device types and code groups 10 Assigment to code groups 11 Programming options 11 Opens programming mode 11 Select device code in the display 11 Entering the device code according to the code list 12 Manual code search 13 Code searching by brand name ...

Страница 2: ...Deleting commands for only one mode key 24 Deleting commands for all mode keys 24 Macros 25 Programming macros 25 Incorporating delays 26 Executing macros 26 Deleting macros 26 Universal functions Punch Through 27 Playback functions 27 Volume mute 27 Programming the VOL MUTE universal functions to another device type 28 Switching off the VOL MUTE universal function for a specific device 29 Restori...

Страница 3: ...lowed Before inserting the batteries check whether the contacts in the device and batteries are clean and if necessary clean them Only use new batteries Never use old and new batteries together Do not use a combination of battery types Please note the polarity when inserting the batteries WARNING There is a risk of explosion if batteries are incorrectly replaced Replace the batteries only with the...

Страница 4: ... it downwards Insert both batteries into the compartment while observing the polarity Replace the cover Settings after battery replacement If the batteries have been inserted correctly the factory setting is displayed It shows the active mode TV the day of the week and the time Please read Setting time and date on page 7 for more information on setting the time and date After new batteries have be...

Страница 5: ...tion1 S in the first column the date in the second column Please read Setting time and date on page 7 for more information on setting the time and date Select mode or device Use a mode key to select the mode or the device that was programmed to this mode key In the display the name of the mode key appears in the first column this device s programmed code appears in the second column Please refer t...

Страница 6: ...play If the display shows CODE SETUP continue to press the Setup key to access the other menus CODE SETUP SYSTEM SETUP TIMER SETUP LEARN SETUP MACRO SETUP EXIT SETUP Press OK to open a menu Press the arrows to switch between sub menus To exit the Setup menu press the EXIT key and confirm the EXIT SETUP display with OK Cancel function If you wish to cancel a process wait approx 30 seconds The Setup...

Страница 7: ...24 HR time format and confirm with OK see the end of the section 6 The hour display flashes Use the arrows to select the hour and confirm by pressing OK 7 The minute display flashes Use the arrows to select the number of minutes and confirm by pressing OK 8 The message SUCCESS appears and the display returns to CODE SETUP If you choose 12 HR format the time is displayed with the AM or PM symbols S...

Страница 8: ... seconds You can switch off the backlight or extend it to 60 seconds Please note that the backlight uses up additional battery life 1 Keep the Setup key pressed down for approx 3 seconds until CODE SETUP appears 2 Press Setup again briefly to open SYSTEM SETUP 3 Confirm with OK The VOL MUTE SETUP is displayed 4 Use the arrows press three times to select the BACKLIGHT SETUP and confirm with OK 5 Th...

Страница 9: ...tions and macros are therefore deleted 1 Keep the Setup key pressed down for approx 3 seconds until CODE SETUP appears 2 Press Setup again briefly to open SYSTEM SETUP 3 Confirm with OK The VOL MUTE SETUP is displayed 4 Use the arrows press four times to select SYSTEM RESET and confirm with OK 5 The message CONFIRM RESET is displayed Confirm with OK to reset the settings 6 While the factory settin...

Страница 10: ...l remote control is pre programmed with proprietary codes from Tevion devices and its most important functions can be used with proprietary Tevion devices without requiring any extra programming Device types and code groups You can choose between the following device types when programming in codes TV TV set projector plasma screen LCD VCR Video recorder LD Laser disc player DVD DVD player DVR Dig...

Страница 11: ...recorder it is often necessary to assign two mode keys with the respective code for each part of the device e g the TV mode key for TV functions and a different mode key for the VCR or DVD functions However there are also combined devices with only one code for both device parts see also Operating combined devices on page 17 Opens programming mode To open the programming mode press and hold the Se...

Страница 12: ...keys POWER 0 9 VOL PROG AV Mute Video text as well as the six playback keys If the device does not respond as expected select a different code 11 When you have found a suitable device code press OK to save the code PLEASE WAIT appears again in the display followed by the confirmation message SUCCESS The remote control returns to normal operation Entering the device code according to the code list ...

Страница 13: ...e SEARCH CODES menu 5 Press OK The MODE KEY display appears 6 Press the required mode key TV VCR DVD CD ASAT CBL AUX DSAT The DEVICE TV display appears 7 Use the arrows to select the device type to be programmed on this mode key If you select TV it is not possible to select a device type because only TV codes can be programmed on the TV mode key Please refer to the list and table above 8 Press OK ...

Страница 14: ...o select the device type to be programmed on this mode key If you select TV it is not possible to select a device type because only TV codes can be programmed on the TV mode key Please refer to the list and table above 8 Press OK The BRAND KEY query appears 9 Press a number key for a required manufacturer according to the following overview Key 1 Medion Tchibo Key 2 Philips Radiola Philco Erres Py...

Страница 15: ...n the device responds accordingly each time a key is pressed press OK to save the code The SUCCESS confirmation message appears The remote control returns to normal operation Code identification If you want to know which code is saved on a particular mode key simply press this key The selected device type and device code appear ...

Страница 16: ...een 10 and 60 seconds to set this duration please read Backlight on page 8 Please note In certain circumstances not every function of your original remote control may be directly available on the universal remote control Especially for newer devices it might be possible that the functions are stored to different keys than expected or may not even be available at all In these cases you can use the ...

Страница 17: ...video recorder require two device codes one for each device part Program the correct TV code on the TV mode key and the video recorder code on the other mode key The combined device is then controlled like two separate devices Combined devices with one device code Other combined devices only require one code In this case you must first select the device part you would like to operate Example The d...

Страница 18: ...This is done as follows 1 Press the ALL OFF key twice in rapid succession and keep it pressed down after the second time for approx 3 seconds 2 When you release the key ALL OFF appears and the devices are switched off Some devices can be switched on and off with the ALL OFF key Devices switched off in such a way will if they were switched off be switched back on when you perform the ALL OFF functi...

Страница 19: ...he TV SLEEP SETUP menu is displayed 4 Press OK The TV SLEEP SET display appears 5 Press OK The number of minutes flash in the display 6 Use the arrows to enter the time after which the TV device should switch itself off automatically 7 Press OK The SUCCESS confirmation message appears along with the TV timer symbol Zzz 8 Lay the universal remote control down so that it is pointing towards the devi...

Страница 20: ...ecorder 1 Keep the Setup key pressed down for approx 3 seconds until CODE SETUP appears 2 Press Setup briefly twice more to open TIMER SETUP 3 Press OK The SLEEPTIMER TV menu is displayed 4 Use the arrows to select the TIMER 1 SETUP menu 3 5 Press OK The TIMER 1 SET display appears 6 Press OK The time when the command will be run appears The hours flash 7 Use the arrows to set the hour and confirm...

Страница 21: ... along with the bell symbol after the third command 14 Lay the universal remote control down so that it is pointing towards the device and is not obstructed You can cancel programming at any time by pressing EXIT Delete command timer If a command timer is set the bell symbol appears in the display TIMER 1 CLEAR appears in the display instead of TIMER 1 SET in the steps described above 1 Perform st...

Страница 22: ...age 24 The LEARN ERROR message is displayed if the memory is full If this happens delete saved commands Programming each key can take approx 3 seconds Do not release the key to be learned before the SUCCESS or LEARN ERROR message appears The following keys cannot be assigned to functions Setup MACRO and all mode keys Some original remote controls for DVD video recorder SAT can themselves be progra...

Страница 23: ...select the mode key on which the device of the original remote control was programmed 7 The LEARN KEY prompt appears Now select the key on the universal remote control that is to be assigned to the original remote control function not Setup or MACRO 8 In the display you now see LEARNING Now select the key on the universal remote control whose function should be assigned to the universal remote con...

Страница 24: ...ressing OK If this message does not appear then the mode key does not have any commands associated with it 8 PLEASE WAIT appears again in the display followed by the confirmation message SUCCESS The remote control returns to normal operation Deleting commands for all mode keys Open the learn mode as described in the section above steps 2 to 4 Proceed as follows 5 Use the arrows press twice to sele...

Страница 25: ...would like to interrupt macro programming prematurely press Setup In this case the macro is not saved Programming macros 1 Keep the Setup key pressed for approx 3 seconds until CODE SETUP appears 2 Press Setup briefly four more times to open the MACRO SETUP menu 3 Press OK to open the MACRO SET mode 4 Confirm once again with OK 5 Now select the number key 1 2 or 3 where the macro is to be saved 6 ...

Страница 26: ...s 1 To execute a macro briefly press the MACRO key once in normal mode The following message appears MACRO KEY 2 Then press the number key where the macro was saved within 20 seconds 1 2 or 3 While the macro is running MACRO 1 or 2 or 3 appears along with the transmission symbol If no macro is saved under the selected numberkey the message MACRO 1 VOID appears Deleting macros Perform steps 1 to 3 ...

Страница 27: ...ected video recorder DVD player or video recorder The DVD or VCR mode keys do not need to be pressed in advance The last selected device is activated This Punch Through control does not work if the programmed TV SAT or cable code has its own video recorder function for example in the case of a combined TV video recorder device Volume mute Image transmitting devices connected to a TV e g TV DVD VCR...

Страница 28: ...rox 3 seconds until CODE SETUP appears 2 Press Setup again briefly to open SYSTEM SETUP 3 Press OK The VOL MUTE SETUP is displayed 4 Press OK again The following menu is displayed ALL VOL SET All VOL MUTE commands are programmed on a device type that you select in the next step 5 Press OK again The ALL VOL MODE query appears 6 Use a mode key to select the device type to which the VOL MUTE control ...

Страница 29: ...for the VOL MUTE universal function you will not be able to switch off the universal function for this mode either 1 Keep the Setup key pressed down for approx 3 seconds until CODE SETUP appears 2 Press Setup again briefly to open SYSTEM SETUP 3 Press OK The VOL MUTE SETUP is displayed 4 Press OK again The ALL VOL SET menu is displayed 5 Use the arrows to select the MODE VOL SET menu Use this menu...

Страница 30: ...nctions to the factory settings 1 Keep the Setup key pressed down for approx 3 seconds until CODE SETUP appears 2 Press Setup again briefly to open SYSTEM SETUP 3 Press OK The VOL MUTE SETUP is displayed 4 Press OK again The VOL MUTE ALL menu is displayed 5 Use the arrows press twice to select the VOL MUTE RESET menu 6 Press OK The CONFIRM RESET message is displayed 7 Confirm with OK to reset the ...

Страница 31: ...n properly connected and are switched on There are several device codes listed under the brand name of my device How do I determine the correct device code To determine the correct device code for your device try each consecutive code until most of the functions of the device function properly The devices only respond to a few remote control commands Continue testing further codes until the device...

Страница 32: ...material and can be reused or added to the recycling system Device At the end of its life the universal remote control should not be disposed of in household rubbish Seek the advice of your local authority on correct environmentally friendly disposal Batteries Do not dispose of used batteries in the household rubbish They should be deposited at a collection point for used batteries Technical data ...

Отзывы: