background image

MediCap

®

 USB170 User Guide – English 


11 of 20 

USB170-UG01-EN-130812-MC 

Creating Patient Folders 

Each time you start a new imaging session, you can create a new folder to 
store the images from that session (this keeps the images captured during 
your new session separate from the ones captured in previous sessions). To 
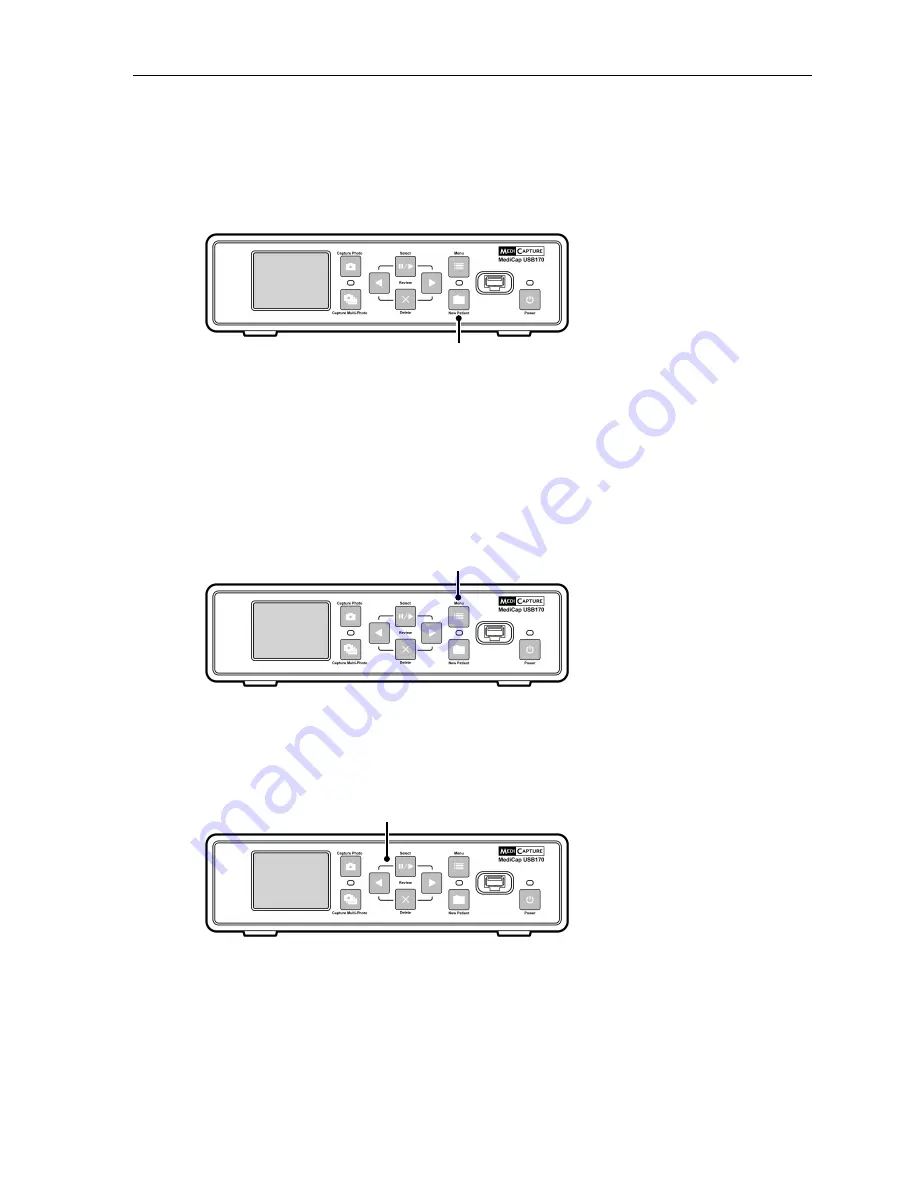
create a new folder, simply press the 

New Patient

 button on the front panel. 


Each time the 

New Patient

 button is pressed, a new folder will be created on 

the USB flash drive.  The folders will be numbered sequentially (CASE.001,  
CASE.002, CASE.003, etc.). 


Using the Menus 


Settings and options for the MediCap USB170 can be accessed via the 
Menus. 


Press the 

Menu

 button to display the Main menu. You can scroll through the 

menu choices using the 

Back

 and 

Next

 buttons on the front panel. Use the


Select

 button to make a choice. 


Select, Back, Next buttons are used 
for navigating through menus 

Menu button 

New Patient button 

Important Note:   
If the USB flash drive 
has no cases on it, a 
new patient folder will 
be created automatically 
the first time you press 
the Capture Photo or 
Capture Multi-Photo 
button.  If there are 
already cases on the 
USB flash drive, you 
need to press the New 
Patient button to create 
a new folder. 
 
Patient Information:  
If the “Patient 
Information” feature is 
turned on, each time a 
new folder is created the 
Patient Information 
screen will be displayed. 
This gives you the 
opportunity to enter the 
patient’s name, etc. See 
page 16 for more 
information. 

Содержание MediCap USB170

Страница 1: ...MediCap USB170 Medical Still Image Recorder User Guide USB170 UG01 EN 130812 MC...

Страница 2: ...CLASS A This equipment has been tested and found to comply with the limits for a Class A digital device pursuant to Part 15 of the FCC Rules These limits are designed to provide reasonable protection...

Страница 3: ...being walked on or pinched especially near plugs outlets and the point where the cord exits from the apparatus 11 Only use attachments accessories specified by the manufacturer 12 Use only with a cart...

Страница 4: ...9 Capturing Images 9 Reviewing Images 10 Creating Patient Folders 11 Using the Menus 11 Main Menu 12 Setup Menu 13 Image Options Menu 14 Advanced Options Menu 14 Transferring Images To Your Computer 1...

Страница 5: ...nect your monitor directly to your video source then connect the USB170 to the secondary output on your video source or use a Y Splitter not included Ordering Information MediCapture recommends MediCa...

Страница 6: ...MediCap USB170 User Guide English 6 of 20 USB170 UG01 EN 130812 MC Front Panel Back Panel...

Страница 7: ...Splitter not included The unit is for exclusive interconnection with IEC60601 certified equipment in the patient environment and IEC 60XXX certified equipment outside of the patient environment A cer...

Страница 8: ...SB170 9 Insert the flash drive in the USB connector of a Windows or Apple computer or laptop 10 On your Windows or Apple computer navigate to the USB drive labeled MediCapture You can then access the...

Страница 9: ...es If your camera or monitor uses RCA connectors you will need to obtain a BNC to RCA adapter Some USB170 models ship with this adapter Inserting a USB Flash Drive Before you begin using your USB170 i...

Страница 10: ...ession Simply press the Back and Next buttons on the front panel This will step you through the images Select Back Next and Delete buttons are used for reviewing images After you review the images you...

Страница 11: ...ed via the Menus Press the Menu button to display the Main menu You can scroll through the menu choices using the Back and Next buttons on the front panel Use the Select button to make a choice Select...

Страница 12: ...o enter patient information at the start of each imaging session Using this feature requires a USB keyboard available as an option Image Options Use this menu to select the format and resolution of im...

Страница 13: ...the front panel Power button Language Use this menu to select your language preference for the menus Input Options Use this menu to select the video input type S Video or Composite BNC and the video...

Страница 14: ...to upgrade the firmware on your system This allows you to add new features and options to your USB170 To use the upgrade option you must insert a special upgrade USB flash drive in the front panel Con...

Страница 15: ...contact In other words if you have other types of switches that operate using a closed contact you can also plug them into the footswitch connection and use them to trigger an image capture For examp...

Страница 16: ...ng saved Therefore it is recommended that you normally set Anti Blur to Off Only set this option to On if it is necessary to eliminate a blurry effect from movement Patient Information Feature This fe...

Страница 17: ...ddition if you are capturing images in the DICOM format as selected in the Image Options menu page 14 you can view the patient information in the DICOM header of each image To view the DICOM header on...

Страница 18: ...l be displayed on your computer just like any other drive You can then drag and drop recorded images from the USB170 drive across the network onto your computer s drive To connect the USB170 to a netw...

Страница 19: ...s available as an option Standard 3 5mm mini jack Mechanical Size 240 x 200 x 63mm 9 5 x 7 9 x 2 5 Weight 1 7kg 3lb 12oz Environmental Storage and transportation 40 to 85 C Operating 20 to 40 C Power...

Страница 20: ...FOREGOING YOU ASSUME ALL RISK AND LIABILITY FOR LOSS DAMAGE OR INJURY TO YOU AND YOUR PROPERTY AND TO OTHERS AND THEIR PROPERTY ARISING OUT OF USE OR MISUSE OR INABILITY TO USE THE ABOVE LISTED PRODUC...

Отзывы: