


PERFORM.
PERFORM.
PERFORM.
HARMONY
The harmony function will automatically add harmony notes to the
notes played in the right-hand section, which gives you a rich and
harmonic expression.
Harmony Switch
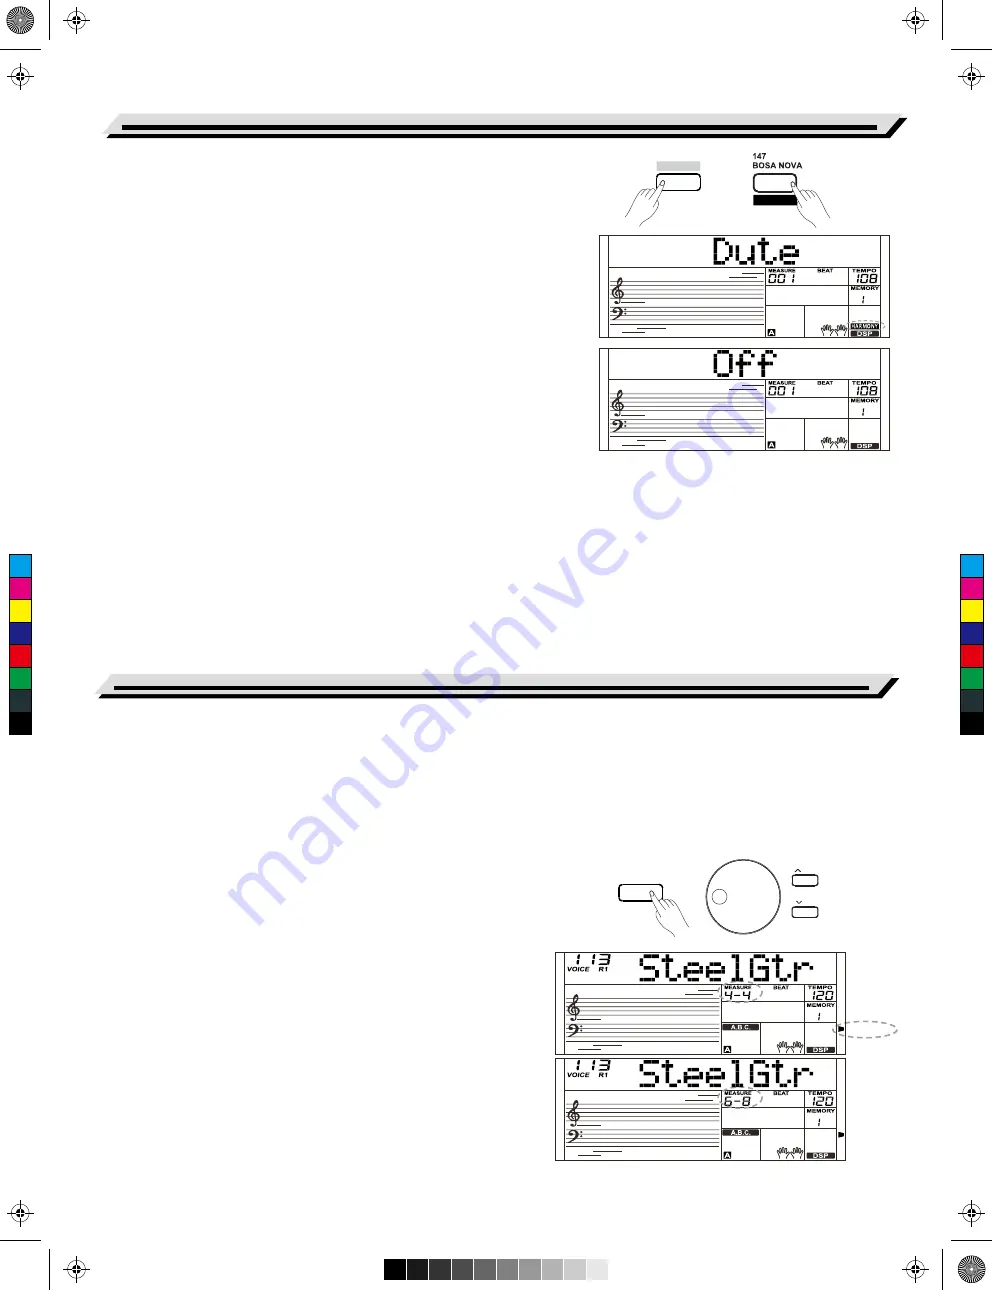
1.
Holding down the [SHIFT] button and press the [HARMONY] button
to enter harmony mode. The “HARMONY” icon lights up and LCD
displays “Duet” which indicates the harmony effect is open, and the
type is Duet.
2.
Holding down the [SHIFT] button and press the [HARMONY] button
again to exit harmony mode. The “HARMONY” icon goes out and
LCD displays “Off” which indicates the harmony effect is off.
3.
This instrument features 26 harmony types. Please refer to the
“Function menu” for details.
Playing with harmony effect
Open the A.B.C. mode, first play a chord in the chord section, and
then the main voice you play in right-hand section will be added with
the harmony effect.
Notes:
1.
The harmony types of 1+5, Octave 1~2, Echo 1~4, Tremolo 1~4
and Trill 1~4 are available whether the A.B.C. is open or not. Other
harmony types are available only when the A.B.C. is open.
2.
The harmony types cannot be recorded in user songs.
There are 2 voices you can select to perform in performance assistant
mode: Guitar, Piano.
What’s the Performance Assistant?
Performance assistant is an easy-to-use function. With this function, you
will find playing to be more interesting. Even if you are not a keyboard
player, the performance assistant will help you to play your familiar
instrument voice on the keyboard. If you are a pianist, you can achieve
many hard perform skills on the keyboard with the help of this function
more easily. Performance assistant will provide many wonderful phrases.
Just use several keys and you will perform your own wonderful music.
Enter the Performance Assistant
1.
Press the [PERFROM] button to enter the performance assistant
mode. The default setting is Guitar Mode. The LCD will display the
name and number of Guitar.
2.
Use the data dial to change the voice you want to perform.
3.
The default time signature “4-4” will be displayed on the LCD. Please
refer to the “Function Menu” for details.
4.
Please refer to performance beat setting in “Function Menu”. You can
choose the beat between 2/4, 3/4, 4/4, and 6/8 with the [+/YES] /
[-/NO] button.
Performance Assistant
20
Harmony
SHIFT
/ YES
/ NO
C
M
Y
CM
MY
CY
CMY
K
AW_SP4200_Manual_G05_150723.ai 20 2015/7/23 11:23:02
AW_SP4200_Manual_G05_150723.ai 20 2015/7/23 11:23:02


