background image

Getting Ready to Play

Setting up the Power Supply

1. 

Connect the power adaptor to the DC IN jack on the rear panel.

2.

 Plug the other end of the power cord to an appropriate AC outlet.

Note:

1.

 Please use the specified power adaptor.

2.

 Even when the module is turned off, electricity is still flowing to the 

    module at minimum level. Please unplug the module when it is not in 

    use for a long time.

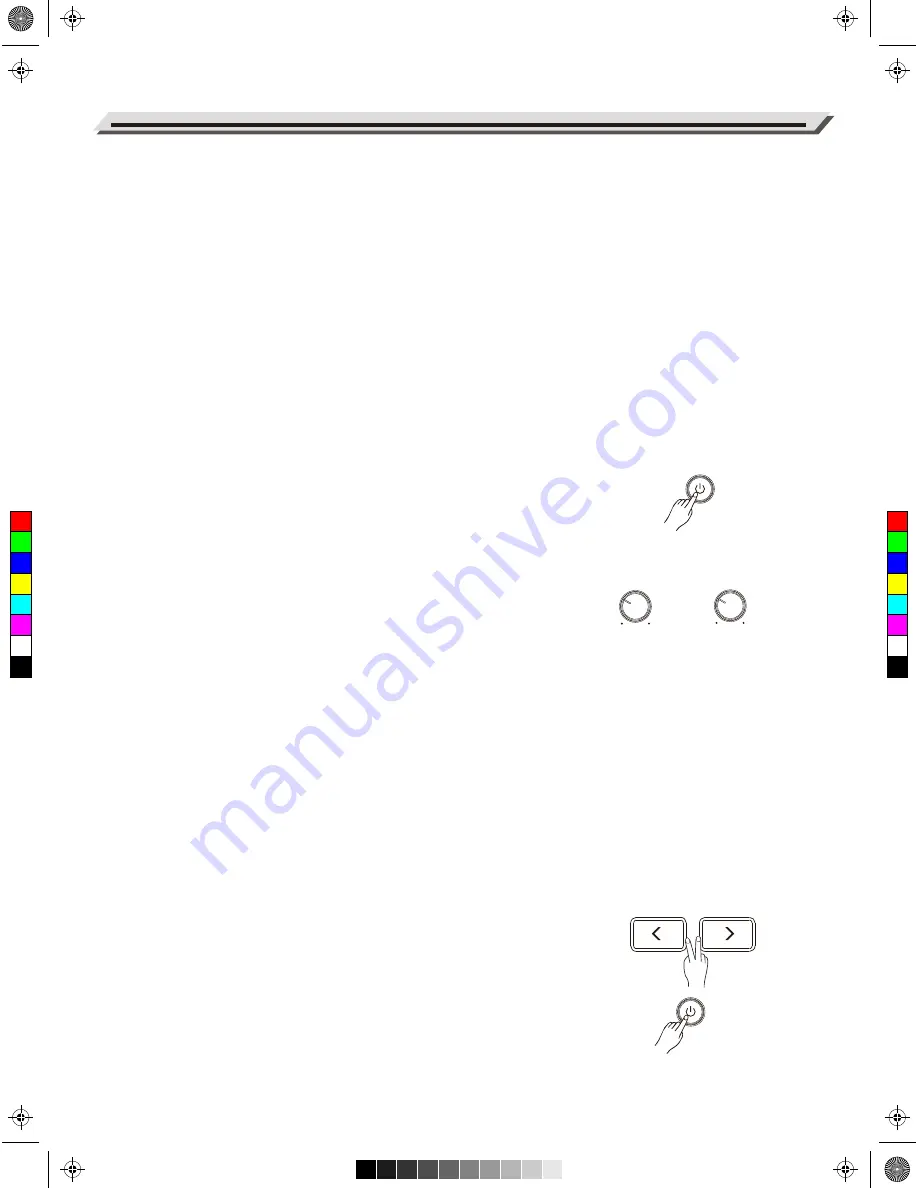
Turning on the Power

Make sure you have completed all necessary connections (triggers, 

audio device and so on). Then turn the volume level of all the devices 

to minimum.

1. 

Turn all the volume knobs to minimum before turning on the power.

2.

 Press the [POWER] button, the display is lit, indicating the module is 

     turned on.

3. 

Turn on the connected amplifier or audio device, or listen with 

     headphones.

4. 

Adjust the [MASTER]/[PHONES] knobs clockwise while striking the 

     pads, until you get an appropriate volume level.

Turning off the power

1. 

Turn the volume level of the module and the connected audio device 

     to minimum.

2. 

Turn off the connected device.

3. 

Press the [POWER] button until the display becomes unlit.

Auto Power Off

In order to save energy, the module will automatically shut down after 

30 minutes if it is not in use (playing, striking, button pressing, etc.) You 

can enable or disable this function as desired. Please refer to 

Option

.

Restore Factory Settings

Follow the operation below to reset the module to factory settings.

1. 

Press and hold [<] and [>] buttons, then press the [POWER] button 

     to turn on the power.

2. 

The LCD will display “Factory Resetting…”. When factory reset is 

     finished, the display will return to KIT menu. 

     The following parameters will restore factory settings: Trigger, MIDI 

     Setup, Option, Master Compress, User Kits and User Songs.

8

MASTER

PHONES

C

M

Y

CM

MY

CY

CMY

K

AW_DD635_manual_G01_180521.pdf   8   18/5/21   10:03

Содержание DD635

Страница 1: ...AUX IN PHONES CLICK UP DOWN F1 F2 F3 EXIT MENU CLICK COACH SONG KIT iKIT HI HAT CRASH 1 CRASH 2 RIDE KIT SONG KICK SNARE TOM 1 TOM 2 TOM 3 TOM 4 C M Y CM MY CY CMY K AW_DD635_manual_G01_180521 pdf 1...

Страница 2: ...e personnel Disconnect all cables before moving the instrument CAUTION The normal function of the product may be disturbed by Strong Electro Magnetic Interference If so simply reset the product to res...

Страница 3: ...Effect 12 REVERB 13 EQ 14 Saving a User Kit 14 Click Turning the Click on or off 16 Editing Click Parameters 16 Song Playing Preset Songs 17 Playing Along with a Song 17 Recording Prepare and Start R...

Страница 4: ...and cymbal surface and unique technology it provides superb sensitivity and authentic touch but low playing noise opening a new era for digital drums by replicating the diverse playing techniques of...

Страница 5: ...ress to return to previous menu 7 MENU Button In kit mode press to enter KIT menu In song mode press to enter SONG menu 8 CLICK Button Press to start stop the click edit the click setting 9 COACH Butt...

Страница 6: ...Snare Rim etc 3 Velocity of Pad Strike Display the velocity force at which the pad is struck 4 Prompt to Move Cursor Up Down Prompt to press the buttons to view more parameters 5 Detailed Parameters...

Страница 7: ...zone trigger with choke HI HAT dual zone trigger PEDAL HI HAT Note 1 Use the cables provided to connect the pads to the trigger input jack on the rear panel of the module make sure each pad is connec...

Страница 8: ...R PHONES knobs clockwise while striking the pads until you get an appropriate volume level Turning off the power 1 Turn the volume level of the module and the connected audio device to minimum 2 Turn...

Страница 9: ...d as desired 1 Press the KIT button to enter KIT menu Then press the F1 VOICE button to enter VOICE menu 2 Strike the pad that you want to edit The LCD will display the pad name 3 Press the buttons to...

Страница 10: ...tely after hitting the crash ride will mute the crash ride sound Hi Hat Hi Hat Pedal Change Press down the pedal to different positions the pad voice will change along when striking the Hi Hat pad Thi...

Страница 11: ...to a user drum kit Please refer to Drum Kit List for details Selecting a Drum Kit 1 Press the KIT button to enter KIT menu The LCD displays the current kit number and kit volume Press the KIT button...

Страница 12: ...a dial or buttons to select a desired voice 4 Adjust the volume Press the buttons to select the volume item then use the data dial or buttons to adjust the volume 5 Parameters and their range Notes 1...

Страница 13: ...then use the data dial or buttons to change the setting 3 Parameters and their range Voice Parameter Pitch Pan Decay Reverb Midi Note Pad Ptn Min Velocity Strainer Description Pitch Pan Decay Reverb l...

Страница 14: ...to enter SAVE menu 4 Press the buttons to select a user kit where the edited data will be saved Note If you press EXIT at this stage it will quit without saving and return to VOICE menu 5 Press F3 EN...

Страница 15: ...m kit or turn off the module 3 After editing if you do not save the edited kit parameters but directly enter record mode it will use the default kit settings for recording 4 As long as you do not swit...

Страница 16: ...ick sound Editing Click Parameters In CLICK menu press the buttons to select a parameter then use the data dial or buttons to change the setting Click parameters and their range Drum off indicator 16...

Страница 17: ...6 In SONG LIST menu press F1 GROUP to toggle between two song groups PTN and USER After selecting a song press the SONG button to return to SONG MODULE menu 7 In SONG MODULE menu or SONG LIST menu pre...

Страница 18: ...RENAME menu Button operation in RENAME menu Prepare and Start Recording To record without song accompaniment In KIT menu press the button to enter record mode To record with song accompaniment In SONG...

Страница 19: ...elect Quiet Count Quiet Count parameters and their range Press the buttons to select a parameter then use the data dial or buttons to change the setting 2 Press the button to start the practice It wil...

Страница 20: ...h changing beats It will play the first two measures of a beat type and then shift to a different beat type Beat indicator on LCD will blink to indicate that it will change to this beat type in the ne...

Страница 21: ...w the accuracy of each hit Prior to beat changing the beat indicator will blink and CHANGE will appear on LCD indicating it will change to this beat type in the next measure During practice you can pr...

Страница 22: ...value gradually while striking the pad 3 Repeat step2 until you get an appropriate level Adjust the disturbance between head and rim shot Only for Snare and Tom When the value is set to 0 it plays on...

Страница 23: ...39 51 59 53 Trigger Crash1 Bow Crash1 Edge Crash2 Bow Crash2 Edge Open Hihat MIDI 49 55 57 52 46 Trigger Close Hihat Open Hihat Edge Close Hihat Edge Pedal Hihat Splash MIDI 42 26 22 44 21 Curve Norma...

Страница 24: ...dited data will be lost after power off Option parameters and their range Settings 24 Parameter Soft Through Local Control GM Mode Prog Change RX Prog Change TX Range ON OFF ON OFF ON OFF ON OFF ON OF...

Страница 25: ...ctory Reset parameters Note Do not turn off the power when factory reset is in progress If power supply is accidentally disconnected execute factory reset again otherwise it may corrupt the internal d...

Страница 26: ...ots graphic LCD with backlit Connectors TRIGGER INPUT DB25 Type TRIGGER IN TOM4 CRASH2 PHONES 1 4 AUX IN 1 8 USB MIDI MIDI IN MIDI OUT OUTPUT R L MONO Control Buttons Power Master Volume Phone Volume...

Страница 27: ...x 1 808 909 HipHop Reggae Jazz Percussion 1 Indian African Room Brush 2 No 1 2 3 4 5 6 7 8 9 10 11 12 13 14 15 16 17 18 19 Kit Name Fusion Vintage Orchestra Marimba Vibraphone Beatbox 2 Power Techno D...

Страница 28: ...Snare Stick 1 Jazz Snare Stick Room Snare Stick Fusion Snare Stick Standard Snare Stick 2 Funk Snare Stick 2 Brush Snare Stick Brush Snare Stick 2 Vintage Snare Stick Live Snare Stick Beatbox Snare St...

Страница 29: ...Noise Ride Bell Techno Ride Techno Ride Edge Techno Ride Bell 16 Standard Crash 1 16 Standard Crash 1 Edge Rock Crash Rock Crash Edge 16 Acoustic Crash 1 16 Acoustic Crash 1 Edge 18 Jazz Crash 1 18 J...

Страница 30: ...Hi hat Dubstep Hi hat Pedal Beatbox Hi hat 1 Beatbox Hi hat Pedal 1 Beatbox Hi hat 2 Beatbox Hi hat Pedal 2 Lo Fi Hi hat Lo Fi Hi hat Edge Lo Fi Hi hat Pedal Lo Fi Hi hat Splash Maracas Sticks Metrono...

Страница 31: ...FX 3 FX 4 FX 5 FX 6 488 489 490 491 492 493 494 495 496 497 498 499 500 501 502 503 504 505 506 507 508 509 510 511 512 513 514 515 516 517 518 519 520 521 522 523 524 525 526 527 528 529 530 531 532...

Страница 32: ...DancePop LCD Name Funk1 R N R1 Dance1 Pop1 Fusion1 R B1 Dubstep1 R B2 Dubstep2 RkBallad Folk FunkShuf ElePop1 Pop2 Bossa1 Samba1 Fusion2 ElePop2 PopShuff Rock1 Latin1 Latin2 Salsa1 Smoove SteveVFk 70...

Страница 33: ...Agogo Cabasa Maracas Short Whistle Long Whistle Short Guiro Long Guiro Claves Hi Wood Block LowWood Block Mute Cuica Open Cuica Mute Triangle Open Triangle Shaker Jingle Bell Bell Tree Castanets Mute...

Страница 34: ...om 3 Acoustic Pedal Hi hat Acoustic Tom 2 Acoustic Open Hi hat Acoustic Tom 1 Acoustic Crash 1 Acoustic Ride Acoustic Ride Bell Acoustic Crash 2 Brush Set BANK40 Brush Kick Brush Snare 1 Brush Snare 2...

Страница 35: ...35 GM Backing Voice List C M Y CM MY CY CMY K AW_DD635_manual_G01_180521 pdf 35 18 5 21 10 03...

Страница 36: ...Entry Volume Pan Expression Sustain Pedal Portamento ON OFF Sostenuto Pedal Soft Pedal Reverb Program Chorus Program Reverb Level Chorus Level All Sound Off Reset All Controllers All Notes Off START...

Страница 37: ...cters exceeds the limit Decrease the number Rename Make sure the 1st character is not a blank space Rename File name already exists Input a different name Saving is successful Saving is failed Factory...

Страница 38: ...DD635_G01 C M Y CM MY CY CMY K AW_DD635_manual_G01_180521 pdf 38 18 5 21 10 03...

Отзывы: