


WLS-TC User's Guide
Installing the WLS-TC
9
Complete the following steps to connect the WLS-TC to your system:
1.
Turn your computer on, and connect the USB cable to a USB port on your computer or to an external USB
hub that is connected to your computer. The USB cable provides power and communication to the WLS-
TC.
Always connect an external hub to its power supply
If you are using a hybrid hub (one that can operate in either self-powered or bus-powered mode), always
connect it to its external power supply.
If you use a hub of this type without connecting to external power, communication errors may occur that could
result in corrupt configuration information on your wireless device. You can restore the factory default
configuration settings with InstaCal.
When you connect the WLS-TC for the first time, a notification message opens as the WLS-TC is detected.
After your system detects new hardware, the
Found New Hardware Wizard
opens and prompts you to
respond to the question "
Can Windows connect to Windows Update to search for software?
"
2.
Click on the
No, not this time
option, and then click on the
Next
button.
The next dialog prompts you for the location of the software required to run the new hardware.
3.
Keep the default selection "
Install the software automatically
" and then click on the
Next
button.
The wizard locates and installs the software on your computer for the WLS-TC. A dialog appears when the
wizard completes the installation.
4.
Click on the
Finish
button to exit the wizard.
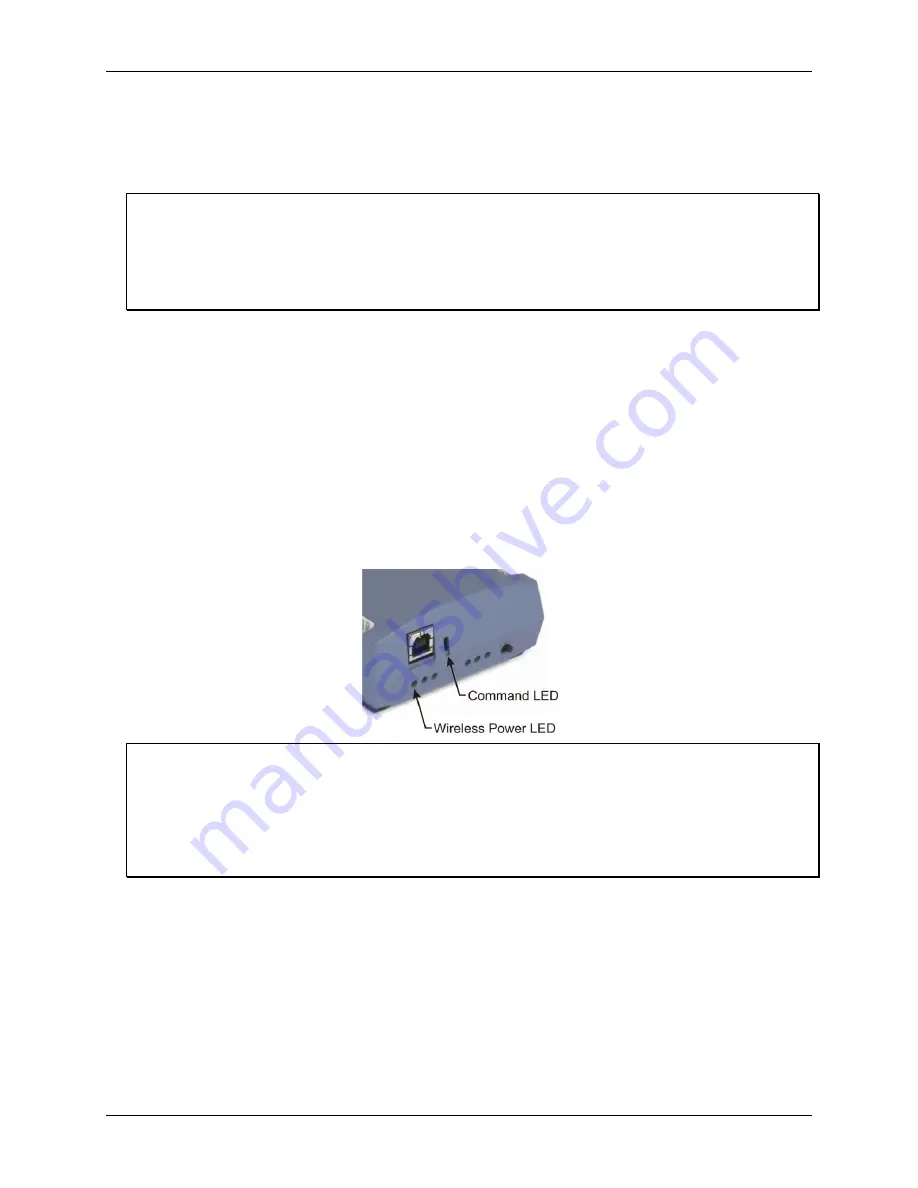
A dialog box opens when the hardware is installed and ready to use. The
Command
LED will blink and then
remain on to indicate that communication is established between the WLS-TC and your computer. The
Wireless
Power
LED turns on to indicate that the internal RF module is receiving power.
If the Command LED turns off
If the Command LED is on but then turns off, the computer has lost communication with the WLS-TC. If the
WLS-TC is connected to the computer USB port, disconnect the USB cable from the computer and then
reconnect it. This should restore communication, and the LED should turn back
on
.
If the Command LED turns off when you are operating the WLS-TC remotely through the wireless interface,
disconnect the USB cable from the USB power adapter, and then reconnect it. This should restore
communication, and the Command LED should turn back
on
.
Configuring the WLS-TC
Before using the WLS-TC, configure the temperature sensors and network parameters for remote wireless
communication. All hardware configuration options on the WLS-TC are programmable with InstaCal.
Configuration options are stored on the WLS-TC in non-volatile memory in EEPROM, and are loaded on
power up.
Thermocouple type
Use
Insta
Cal to set the thermocouple type for each channel. The factory default thermocouple configuration is
Type J
. You can configure thermocouple settings when the WLS-TC is connected locally to the computer
through the USB port, or when the device is operated remotely through the wireless interface.


