background image


to heat or cool based on the desired fixed indoor temperature


Z-Wave Configuration                                                                                                                                               

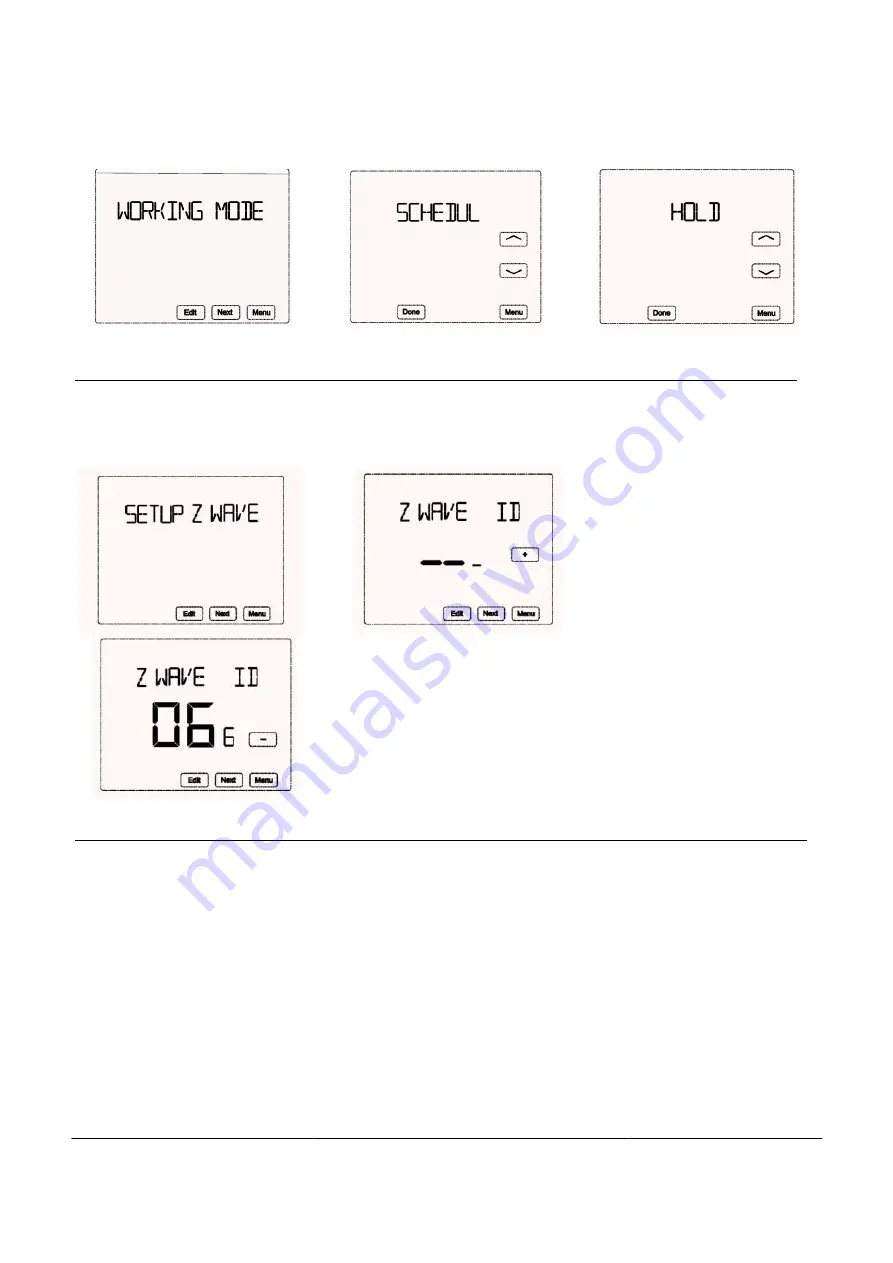
Press “Menu”→“Next”(press twice)→ “SETUP 
ID. If inclusion is succeeded, a node ID will display on the 
A node ID can always inform us whether the device is in the network or not.


Set schedule                                                                                                                                               

The device provides 4 times periods each day/7days for both heating and cooling status.
Press “Menu”→“Next”(press 3 times)→“SCHEDUL SET”→“Edit”→Pre
to set heating or cooling schedules.→Next→MONDAY 06:00
time→“Next”→78℉(Blinking)→”+ or 
period start time→“Next”→62℉(Blinking)→”+ or 
change the 3

rd

 period start time→“Next”→70℉(Blinking)→”+ or 

→”+ or -”to change the 4

th

 period start time→“Next”→70℉(Blinking)→”+ or 

06:00... 
Then follow the same procedure to do the sc
to the main interface. Please check the following figures:


Menu-WORKING MODE 

5

to heat or cool based on the desired fixed indoor temperature

 until the working mode is changed.

Configuration                                                                                                                                               

Press “Menu”→“Next”(press twice)→ “SETUP Zwave”→“Edit”→”+”. Device will enter learning mode to get a 

, a node ID will display on the screen in a few seconds. →Press “Done”

A node ID can always inform us whether the device is in the network or not. 


Set schedule                                                                                                                                               

provides 4 times periods each day/7days for both heating and cooling status. 

times)→“SCHEDUL SET”→“Edit”→Press to select HEAT or COOL under

to set heating or cooling schedules.→Next→MONDAY 06:00

blinking

→”+ or -”to change the 1

time→“Next”→78℉(Blinking)→”+ or -”to set the desired temp.→“Next”→08:00

blinking

period start time→“Next”→62℉(Blinking)→”+ or -”to set the desired temp.→“Next”→18:00

period start time→“Next”→70℉(Blinking)→”+ or -”to set the desired temp..→“Next”→22:00

period start time→“Next”→70℉(Blinking)→”+ or -”to set the desired temp.→ TUESDAY 

to do the schedule setting. Finally, press “Done” to save all the settings and return back 

to the main interface. Please check the following figures: 


SCHEDULE MODE 


until the working mode is changed.


Configuration                                                                                                                                               


Device will enter learning mode to get a node 

screen in a few seconds. →Press “Done”. 

Set schedule                                                                                                                                                                     


ss to select HEAT or COOL under Mode area 

hange the 1

st

 period start 

blinking

→”+ or -”to change the 2

nd


”to set the desired temp.→“Next”→18:00

blinking

→”+ or -”to 

”to set the desired temp..→“Next”→22:00

blinking

”to set the desired temp.→ TUESDAY 

hedule setting. Finally, press “Done” to save all the settings and return back 


HOLD MODE 

Содержание MH-F500

Страница 1: ...c heating water heating heat pump etc 8 types control systems 4 3 LCM display touch screen operation interaction Simpler way to connect wires without screw driver 7days 4 time periods scheduling Set t...

Страница 2: ...reach of children and animals Do not expose the device to moisture water or other liquids Do not place liquids near or on the device Do not attempt to disassemble repair or modify the device yourself...

Страница 3: ...n Instruction REQUIRED 24VAC POWER C WIRE Set system status 3 Wires Connection Instruction WIRE Display Functions Settings Set system status Wires Connection Instruction Display Functions Settings Set...

Страница 4: ...pper level setting interface without storing the changes Please check the following figures Set working mode The device provides two modes for the users Scheduling Hold Press Menu Next until the displ...

Страница 5: ...ress Done A node ID can always inform us whether the device is in the network or not Set schedule provides 4 times periods each day 7days for both heating and cooling status times SCHEDUL SET Edit Pre...

Страница 6: ...0 28 82 HEAT Mode 6 00 25 5 78 8 00 29 5 85 18 00 25 5 78 22 00 28 82 User Setup Press Menu Next press 4times USER SETUP Edit Temperature Scale TEMP SCALE Press to change between and Schedule for HEAT...

Страница 7: ...erence Press deleted the value Range 0 5 2 to set the brightness of the screen 0 Only display current indoor temperature in half brightness 1 Display all contents in half brightness 2 Display all cont...

Страница 8: ...ol O B Change over logic 8 to set the value OFF 5s 15s 30s OFF the fan not delay 5s the fan will delay 5s 15s the fan will delay 15s 30s the fan will delay 30s Setup Press Menu Next press 5times FACTO...

Страница 9: ...the outdoor temperature is extremely low so as to protect the outdoor unit CHANGE OVER When change over is ON the device will start heating or cooling automatically according to the desired temp When...

Страница 10: ...ice supports S2 function 2 Z WAVE supported Command Class COMMAND_CLASS_ZWAVEPLUS_INFO COMMAND_CLASS_VERSION COMMAND_CLASS_MANUFACTURER_SPECIFIC COMMAND_CLASS_POWERLEVEL COMMAND_CLASS_ASSOCIATION COMM...

Страница 11: ...value set by parameter 4 COMMAND_CLASS_THERMOSTAT_MODE_V2 THERMOSTAT_MODE_REPORT Thermostat mode changes COMMAND_CLASS_THERMOSTAT_OPERATING_STATE THERMOSTAT_OPERATING_STATE_REPORT Thermostat status c...

Страница 12: ...LIMITED WARRANTY DOES NOT COVER ANY DAMAGE TO THIS PRODUCT THAT RESULTS FROM IMPROPER INSTALLATION ACCIDENT ABUSE MISUSE NATURAL DISASTER INSUFFICIENT OR EXCESSIVE ELECTRICAL SUPPLY ABNORMAL MECHANIC...

Отзывы: