background image

41

Nettoyant pour acier inoxydable affresh

®

(modèles en acier inoxydable) 

Commander la pièce numéro W10355016
Lingettes nettoyantes pour acier inoxydable affresh

®

(modèles en acier inoxydable) 

Commander la pièce numéro W10355049
Nettoyant pour cuisine et appareils ménagers affresh

®

Commander la pièce numéro W10355010
Ensemble de nettoyage pour four technologique AquaLift

®

Commander la pièce numéro W10423113RP
Nettoyant et poli pour granite
Commander la pièce numéro W10275756

Nettoyant pour grille à gaz et plateau d’égouttement
Commander la pièce numéro 31617
Grille de four en deux pièces
Commander la pièce numéro W10205524
Grille du four à capacité Max
Commander la pièce numéro W10289145
Lèchefrite et grille en porcelaine
Commander la pièce numéro 4396923
Lèchefrite et grille de rôtissage de qualité supérieure
Commander la pièce numéro W10123240  

www.maytag.com/broilerpan

ACCESSOIRES

Pour les accessoires, consulter notre site Web www.maytag.com/cookingaccessories.

Содержание MGR8800HK

Страница 1: ...uct If you should experience a problem not covered in TROUBLESHOOTING please visit our website at www maytag com for additional information If you still need assistance call us at 1 800 688 9900 In Canada visit our website at www maytag ca or call us at 1 800 807 6777 for additional information You will need your model and serial number located on the oven frame behind the top right side of the ov...

Страница 2: ...y UL or CSA For more information contact your gas supplier If a gas leak is detected follow the What to do if you smell gas instructions WARNING If the information in these instructions is not followed exactly a fire or explosion may result causing property damage personal injury or death Do not store or use gasoline or other flammable vapors and liquids in the vicinity of this or any other applia...

Страница 3: ...erheating of the oven WARNING NEVER cover any slots holes or passages in the oven bottom or cover an entire rack with materials such as aluminum foil Doing so blocks air flow through the oven and may cause carbon monoxide poisoning Aluminum foil linings may also trap heat causing a fire hazard CAUTION Do not store items of interest to children in cabinets above a range or on the backguard of a ran...

Страница 4: ...enter 2 3 Press KITCHEN TIMER or START to begin the countdown If enabled end of cycle tones will sound at end of countdown 4 Press KITCHEN TIMER twice to cancel the Kitchen Timer and return to the Time of Day Do not press the Cancel keypad because the oven will turn off 5 If the Kitchen Timer is running but not in the display press KITCHEN TIMER to display the countdown for 5 seconds START Cooking...

Страница 5: ...n finished KEEP WARM Hold warm Food must be at serving temperature before placing it in the warmed oven 1 Press KEEP WARM 2 Set temperature between 145 F 63 C and 190 F 88 C using the number keypads The default temperature is 170 F 75 C 3 Press START 4 Press CANCEL when finished DELAY START Delayed start The DELAY START keypad is used to enter the starting time for an oven function with a delayed ...

Страница 6: ...urface burners will click Only the burner with the control knob turned to LITE will produce a flame 2 Turn knob to anywhere between HIGH and LOW REMEMBER When range is in use the entire cooktop area may become hot Power Failure In case of prolonged power failure the surface burners can be lit manually Hold a lit match near a burner and turn knob counterclockwise to LITE After burner lights turn kn...

Страница 7: ...efore cleaning make sure all controls are off and the oven and cooktop are cool Do not use oven cleaners bleach or rust removers 1 Remove the burner cap from the burner base and clean according to General Cleaning section 2 Clean the gas tube opening with a damp cloth 3 Clean clogged burner ports with a straight pin as shown Do not enlarge or distort the port Do not use a wooden toothpick If the b...

Страница 8: ... the same time For more information contact your local agricultural extension office or refer to published home canning guides Companies that manufacture home canning products can also offer assistance Use the following chart as a guide for cookware material characteristics COOKWARE CHARACTERISTICS Aluminum Heats quickly and evenly Suitable for all types of cooking Medium or heavy thickness is bes...

Страница 9: ...t the oven and Timer are off To Change Time of Day 1 Press SETTINGS once After 3 seconds SET CLOCK PUSH START TO CHANGE will be displayed 2 Press START to display the current setting 3 Press 3 for AM or 6 for PM 4 Press the number keypads to set the time of day 5 Press START 6 Press CANCEL to exit Oven Temperature Offset Control IMPORTANT Do not use a thermometer to measure oven temperature Elemen...

Страница 10: ...e end of cycle tones 1 Press SETTINGS until REMINDER TONE is displayed 2 Press START to display the current setting 3 Press the 3 keypad to adjust the setting 4 Press START to save the setting 5 Press CANCEL to exit Key Press Tones Activates or turns off the tones when a keypad is pressed 1 Press SETTINGS until KEY PRESS TONE is displayed 2 Press START to display the current setting 3 Press the 3 ...

Страница 11: ...Cakes on 2 Racks For best results when baking cakes on 2 racks use racks 2 and 5 For best results when convection baking cakes on 2 racks use racks 2 and 5 Place the cakes on the racks as shown Oven Vent A A Oven vent The oven vent releases hot air and moisture from the oven and should not be blocked or covered Blocking or covering the oven vent will cause poor air circulation affecting cooking an...

Страница 12: ...r 7 for broiling Refer to the Positioning Racks and Bakeware section for more information For best results use a broiler pan and grid It is designed to drain juices and help avoid spatter and smoke If you would like to purchase a broiler pan one may be ordered Please refer to the Accessories section for more information NOTE Odors and smoke are normal the first few times the oven is used or if the...

Страница 13: ... time ends the oven will shut off automatically 8 Press CANCEL to clear the display Warming Drawer on some models WARNING Food Poisoning Hazard Do not let food sit in oven more than one hour before or after cooking Doing so can result in food poisoning or sickness The Warming Drawer is ideal for keeping hot cooked foods at serving temperature It may also be used for warming breads and pastries Dif...

Страница 14: ...c scraper Additional Clean cycles may be run to help remove the stubborn soils IMPORTANT Do not use oven cleaners The use of chemicals including commercial oven cleaners or metal scouring pads may cause permanent damage to the porcelain surface of the oven interior NOTES The range should be level to ensure that the entire surface of the bottom of the oven cavity is covered by water at the beginnin...

Страница 15: ... against each other or hard surfaces such as cast iron cookware Do not reassemble caps on burners while wet Cleaning Method Nonabrasive plastic scrubbing pad and mildly abrasive cleanser Clean as soon as cooktop grates and caps are cool Dishwasher grates only not caps Use the most aggressive cycle Cooked on soils should be soaked or scrubbed before going into a dishwasher Gas Grate and Drip Pan Cl...

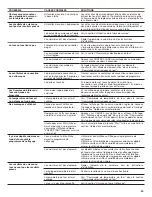
Страница 16: ... to release air from the gas lines Clogged burner ports See Sealed Surface Burners section Surface burner flames are uneven yellow and or noisy Clogged burner ports See Sealed Surface Burners section Burner caps positioned improperly See Sealed Surface Burners section Range converted improperly If propane gas is being used contact a service technician or see cover for contact information Excessive...

Страница 17: ...eft on the oven bottom after the Clean cycle Tap water was used in the Clean cycle Use distilled or filtered water in the Clean cycle To remove deposits use a cloth soaked with vinegar Then use a cloth dampened with water to thoroughly remove any vinegar residue Range is not level Mineral deposits will collect on dry areas of the oven bottom during the Clean cycle Level the range See the Installat...

Страница 18: ...t Number W10123240 www maytag com broilerpan PROBLEM POSSIBLE CAUSES SOLUTIONS Surface burner making popping noises Wet burner Allow it to dry Gas range noises during Bake and Broil operations The following are some normal sounds with the explanations These sounds are normal operational noises that can be heard each time the Bake or Broil burners ignite during the cycle Pop Gas valve is opening or...

Страница 19: ...with published user operator or installation instructions 2 In home Instruction on how to use your product 3 Service to correct improper product maintenance or installation installation not in accordance with electrical or plumbing codes or correction of household electrical or plumbing i e house wiring fuses or water inlet hoses 4 Consumable parts i e light bulbs batteries air or water filters et...

Страница 20: ...he top right side of the oven door For assistance or service in the U S A call 1 800 688 9900 In Canada call 1 800 807 6777 If you need further assistance you can write to Maytag with any questions or concerns at the address below In the U S A Maytag Brand Home Appliances Customer eXperience Center 553 Benson Road Benton Harbor MI 49022 2692 In Canada Maytag Brand Home Appliances Customer eXperien...

Страница 21: ...21 Notes ...

Страница 22: ...es matières SÉCURITÉ DE LA CUISINIÈRE 23 La bride antibasculement 24 GUIDE DES CARACTÉRISTIQUES 26 UTILISATION DE LA TABLE DE CUISSON 28 Brûleurs de surface scellés 28 Taille du brûleur 29 Ustensiles de cuisson 29 Mise en conserve à la maison 30 UTILISATION DU FOUR 31 Commandes électroniques du four 31 Mode Sabbat 32 Papier d aluminium 33 Positionnement des grilles et des ustensiles de cuisson au ...

Страница 23: ...rnisseur de gaz appeler les pompiers L installation et l entretien doivent être effectués par un installateur qualifié une agence de service ou le fournisseur de gaz AVERTISSEMENT L odorat ne permet pas toujours la détection d une fuite de gaz Les distributeurs de gaz recommandent l emploi d un détecteur de gaz homologation UL ou CSA Pour d autre information contacter le fournisseur de gaz local E...

Страница 24: ...ère se trouve dans la fente de la bride antibasculement Réengager la bride antibasculement si la cuisinière a été déplacée Ne pas faire fonctionner la cuisinière si la bride antibasculement n est pas installée et engagée Le non respect de ces instructions peut causer un décès ou des brûlures graves aux enfants et aux adultes Bride antibasculement Pour vérifier que la bride antibasculement est bien...

Страница 25: ...bjets que des enfants pourraient vouloir atteindre Les enfants pourraient se blesser gravement en grimpant sur la cuisinière Installation appropriée La cuisinière lorsqu elle est correctement installée doit être reliée à la terre conformément aux codes électriques locaux ou en l absence de codes locaux selon le Code électrique national US ANSI NFPA 70 ou le Code canadien de l électricité S assurer...

Страница 26: ... cuisson en hr hr min min Les zéros de gauche n ont pas besoin d être insérés Par exemple pour obtenir 2 minutes entrer 2 3 Appuyer sur KITCHEN TIMER minuterie de cuisine ou START mise en marche pour démarrer le compte à rebours Si activés les signaux sonores de fin de programme retentissent à la fin du compte à rebours 4 Appuyer deux fois sur KITCHEN TIMER minuterie de cuisine pour annuler la min...

Страница 27: ... chaud Maintien au chaud Les aliments doivent être à la température de service avant d être placés dans le four chauffé 1 Appuyer sur KEEP WARM maintien au chaud 2 Régler la température entre 145 F 63 C et 190 F 88 C à l aide des touches numériques La température par défaut est de 170 F 75 C 3 Appuyer sur START mise en marche 4 Appuyer sur CANCEL annulation après avoir terminé DELAY START heure de...

Страница 28: ...quantités d aliments Caractéristique de brûleur Flex Choice La caractéristique Flex Choice permet un mijotage et une cuisson à basse température plus précis Il s agit du brûleur arrière droit Panne de courant En cas de panne de courant prolongée les brûleurs de surface peuvent être allumés manuellement Tenir une allumette allumée près d un brûleur et tourner le bouton dans le sens antihoraire pour...

Страница 29: ...lifié B A A 1 à 1 2 2 5 à 3 8 cm B Orifices de brûleur A B A Incorrect B Correct Taille du brûleur Sélectionner un brûleur qui convient le plus aux ustensiles de cuisson utilisés Voir le tableau et l illustration suivants Taille du brûleur Utilisation recommandée Petite taillel Cuisson à basse température Faire fondre le chocolat ou le beurre Taille moyenne Brûleur multifonctionr Grande taille Pou...

Страница 30: ...QUES Acier émaillé en porcelaine ou fonte émaillée Voir acier inoxydable ou fonte Acier inoxydable Chauffe rapidement mais inégalement Un fond ou une base d aluminium ou de cuivre sur l acier inoxydable procure un chauffage uniforme Pour les meilleurs résultats les ustensiles de cuisson doivent être centrés au dessus du brûleur tout en étant posés à l horizontale au fond sur la grille La flamme do...

Страница 31: ...s les modifications de caractéristiques Appuyer sur CANCEL annulation pour sortir du mode de Settings réglages Heure du jour de l horloge Cette horloge peut utiliser un programme de 12 ou 24 heures Pour la régler voir Horloge 12 24 heures dans cette section Vérifier que le four et la minuterie sont éteints Pour changer l heure du jour 1 Appuyer une fois sur SETTINGS réglages Après 3 secondes SET C...

Страница 32: ... annulation pour sortir Mode démo IMPORTANT Ce mode est conçu pour le personnel de vente en rayon avec une alimentation de 120 V et permet de présenter le fonctionnement des caractéristiques du tableau de commande sans pour autant activer les éléments de chauffage Si cette caractéristique est activée le four ne fonctionnera pas 1 Appuyer sur SETTINGS réglages jusqu à ce que DEMO MODE mode de démon...

Страница 33: ...ents au fini en porcelaine ne pas placer d aliments ou d ustensiles de cuisson au four directement sur la porte ou sur le fond du four Ustensiles de cuisson L air chaud doit pouvoir circuler autour de l aliment pour le cuire uniformément Laisser 2 5 cm entre les ustensiles de cuisson et les parois du four S assurer qu aucun ustensile de cuisson ne se trouve directement au dessus d un autre Grilles...

Страница 34: ...tre retirées avant le préchauffage puissant Appuyer sur POWER PREHEAT préchauffage puissant et suivre les instructions de commande du four ou appuyer tout simplement sur POWER PREHEAT préchauffage puissant si le préchauffage a déjà commencé Le programme de préchauffage doit être terminé avant de placer de la nourriture dans le four et doit seulement être utilisé pour une cuisson qui utilise une se...

Страница 35: ...6 Appuyer sur les touches numériques pour entrer le nombre d heures et ou de minutes dont on souhaite différer l heure de mise en marche 7 Appuyer sur START mise en marche Lorsque l heure de mise en marche est atteinte le four s allume automatiquement Les réglages de température et ou de durée peuvent être modifiés en tout temps après avoir appuyé sur Start mise en marche en répétant les étapes 1 ...

Страница 36: ...s IMPORTANT Ne pas utiliser de nettoyants à four L utilisation de produits chimiques y compris les nettoyants à four qu on retrouve sur le marché ou des spatules métalliques pourrait causer des dommages permanents à la surface en porcelaine qui se trouve à l intérieur du four REMARQUES La cuisinière doit être d aplomb de façon à s assurer que la surface du fond de la cavité du four est couverte pa...

Страница 37: ...récurage en plastique non abrasif et nettoyant légèrement abrasif Nettoyer dès que la table de cuisson les grilles et les chapeaux ont refroidi Lave vaisselle les grilles seulement et non les chapeaux Utiliser le programme le plus intensif Les saletés cuites doivent être trempées ou frottées avant d être placées au lavevaisselle Nettoyant pour grille et plateau d égouttement Pièce numéro 31617 Voi...

Страница 38: ...ncteur est ouvert Remplacer le fusible ou réenclencher le disjoncteur Si le problème persiste appeler un électricien Le robinet principal d arrêt ou de réglage du gaz est à la position fermée Voir les instructions d installation La cuisinière est mal raccordée à la canalisation de gaz Contacter un technicien de réparation qualifié ou voir les Instructions d installation Les brûleurs de surface ne ...

Страница 39: ...ntacter un technicien de service ou consulter la page de couverture pour des renseignements de contact La température du four est trop élevée ou trop basse La température du four est mal calibrée Voir Commande de température du four dans la section Commandes électroniques du four Des messages s affichent Panne de courant l afficheur indique une heure clignotante Effacer l affichage Sur certains mo...

Страница 40: ...ition plus élevée dans le four Les croûtes de tarte brunissent trop tôt Utiliser du papier d aluminium pour couvrir le bord de la croûte et ou réduire la température de cuisson du four Bruits PROBLÈME CAUSES POSSIBLES SOLUTIONS Le brûleur de surface émet des bruits d éclatement Le brûleur est mouillé Le laisser sécher Bruits émis par la cuisinière à gaz lors des opérations de cuisson au four et de...

Страница 41: ...ce numéro W10423113RP Nettoyant et poli pour granite Commander la pièce numéro W10275756 Nettoyant pour grille à gaz et plateau d égouttement Commander la pièce numéro 31617 Grille de four en deux pièces Commander la pièce numéro W10205524 Grille du four à capacité Max Commander la pièce numéro W10289145 Lèchefrite et grille en porcelaine Commander la pièce numéro 4396923 Lèchefrite et grille de r...

Страница 42: ... Unis ou au Canada et s applique exclusivement lorsque le gros appareil ménager est utilisé dans le pays où il a été acheté La présente garantie limitée est valable à compter de la date d achat initial par le consommateur Une preuve de la date d achat initial est exigée pour obtenir un dépannage dans le cadre de la présente garantie limitée 1 Usage commercial non résidentiel ou par plusieurs famil...

Страница 43: ...eure 1 14 EXONÉRATION DE RESPONSABILITÉ DANS LES DOMAINES NON COUVERTS PAR LA GARANTIE Maytag décline toute responsabilité au titre de la qualité de la durabilité ou en cas de dépannage ou de réparation nécessaire sur ce gros appareil ménager autre que les responsabilités énoncées dans la présente garantie Si vous souhaitez une garantie plus étendue ou plus complète que la garantie limitée fournie...

Страница 44: ...W11122603A SP PN W11133966A TM 2017 Used under license in Canada All rights reserved TM 2017 Utilisé sous licence au Canada Tous droits réservés 07 17 Printed in U S A ...

Отзывы: