background image

Содержание 3395316

Страница 1: ...NT ead and save lhese instructions Important Read these instructions before you start to install the dryer Save Installation Instructions for local electrical inspector s use Keep Installation Instructions for future reference J Part No 3395316 Rev C ...

Страница 2: ...ion should be obtained from your local gas supplier Protectlon from weather Proper operation requires temperatures above 45 F 7 2 The wiring diagram is located on inside of the access panel Check utllltles Proper f Important Observe all governing codes and ordinances Failure to meet codes and ordinances could lead to fire or electrical shock the w supply connections must be available Ill 1i8 l G N...

Страница 3: ...empt shall be made to convert the appliance from the gas specified on the rating plate for use with a different gas without consulting the serving gas supplier Converslon must be done by a quallfled servlce technlclan Gas converslon klt part numbers are llsted on the gas valve burner base EI Provide a rlgld gas supply line of l 2 inch IPS pipe to the dryer location If the total length of the suppl...

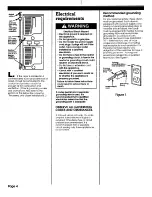
Страница 4: ...low these lnstructlons could result In serious ln ury or death It codes permit and a separate groundlng wire Is used It Is recommended that a qualltled electrlclan determlne that the groundlng path Is adequate OBSERVEALL GOVERNING CODES AND ORDINANCES A 120 volt XI Hz AC only 15 or 20 ampere fused electrical supply is required Time delay fuse or circuit breaker is recommended It is recommended tha...

Страница 5: ...quired Plan installation to use the fewest number of elbows and turns Use duct tape to seal all joints Metal flexible duct must be fully extended and supported when the dryer is in final position DO NOT KINK OR CRUSH THE DUCT The metal flexible duct must be completely open to allow adequate exhaust air to flow Allow as much room as possible when using elbows or making turns Bend duct gradually to ...

Страница 6: ...the other ducts The maxlmum angle of each duct entering the main duct should be no more than 30 Product Damage Keep alr openlngs free of dry cleaning fluld rumes Fumes create acids which when drawn through the dryer heating units can damage dryers and loads being dried A clean out cover should be located on the main exhaust duct for periodically cleaning the exhaust system An exhaust hood should c...

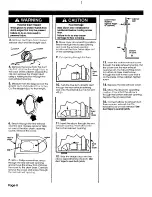
Страница 7: ...lbow 6 Insert elbow end of duct pieces through the side opening Reach through the access panel opening and attach elbow to the internal exhaust duct Check the length of straight duct extending out the side of the cabinet If duct extends too far to make the exhaust duct connection mark a line around the straight duct one inch out from the cabinet Remove the duct and elbow and cut the straight pipe ...

Страница 8: ... 8 Move dryer into operating position Reach through the access opening and mark the exhaust opening location on the floor Move dryer out of the operating position 9 Cut opening through the floor T zB i I I h 10 Push the four inch straight duct through the rear exhaust opening and onto the internal duct as far as it will go 11 Insert the elbow through the rear exhaust opening Insert elbow into the ...

Страница 9: ...vered doors with equivalent air openings are acceptable Do Not block airflow at the bottom front of the dryer with laundry or rug Airflow from the bottom of the dryer is needed for operating efficiency AddItIonal clearances maybe required for wall door and floor mokiln If T extema exhousf elbow Is Used o B P O D Recessed front view Closet view Side view 0 D Additional clearances may be rx f door a...

Страница 10: ...stand dryer up 4 n Wipe the interior of the drum thoroughly with a damp cloth Page 10 T Numbers correspond to steps 5 6 9 1 12 5 n Remove the red cap from the gas pipe 6 n Connect gas s pply to each dryer Use pipe joint co ll pound made for use with L P gas for gas connections All connectlons must be wrench tightened 7 n Open the shutoff valve in the gas supply line Fire Hazard Do Not use an open ...

Страница 11: ... in Repeat the five minute test 11 W Check levelness of drver by placing a carpenter s level on top of the dryer first side to side then front to back If dryer is not level adjust the front legs up or down Make the final check with the level 12 w To exhaust the dryer see Exhaust requirements and F xhaust duct connection pages 5 to 7 Personal Injury fiazard To prevent tlpplng tetlher bracket must b...

Страница 12: ...s pipe l Tape the drum to the front panel l Tape door closed l Adjust leveling legs all the way in Before installing dryer In a new location check with your gas supplier or dealer to see that your dryer is equipped with the correct burner for the particular type of gars in your new building Burner information may be found on the rating plate in the door well of the dryer If you need as stance Chec...

Отзывы: