STEP 1
MAXXFAN
requires a 14” x 14” roof opening, if
you are replacing another type already installed,
remove the old existing roof vent. Remove all old
roof sealant for a minimum of 2” entirely around
the roof opening.
Place the
MAXXFAN
into the roof opening
and trace a pencil line around it to verify the
clean seal area that will be required. Note that
the
MAXXFAN
must be centered in the roof
opening with the hinge of the lid facing the front
of the vehicle.
CAUTION:
When installing your
MAXXFAN
, only
use a caulking/sealant compatible with the flange
(plastic product) and the roof surface. DO NOT
use materials containing solvents such as or similar
to Xylene, Toluene, Methyl Ethyl Ketone, Acetate
or Acetone as they can damage the flange. Also,
Polysulfide (Thiokol) type sealants must be avoided.
If in doubt, please contact the manufacturer of your
RV for further information.
STEP 2
Prior to installing the
MAXXFAN
into the roof
opening, apply a continuous strip of BUTYL
tape or equivalent to the underside of the flange,
making sure to cover the screw holes.
CAUTION:
Disconnect main vehicle power before
connecting 12 volt DC power to the
MAXXFAN
!
STEP 3
Using the insulated 16 gauge electrical connectors
provided, connect the vehicle’s 12 volt power to
the two
MAXXFAN
power wires located on the
driver side of the
MAXXFAN
.
NOTE: The
MAXXFAN
black wire identified with a tag showing
(+) must be connected to the vehicle 12 volt (+) positive supply.
STEP 4
Insert the
MAXXFAN
into the opening with the lid
hinge facing the front of the vehicle and centering
the
MAXXFAN
in the opening. Make sure the
power wires slide to the interior and do not become
entangled. Using the sixteen (16) screws provided,
screw the flange to the roof at each raised ring
dimple location along the flange. Screw into the
dimple to pierce the flange, making sure not to
overtighten the screws to avoid cracking the flange.
STEP 5
After the
MAXXFAN
has been installed, remove
the excess BUTYL caulk that may have squeezed
out. Using a sealer such as Dicor self-leveling lap
sealant or similar caulking, apply a daub over every
exposed screw head. In addition, apply a bead
(approximately 3/16”) along the outside edge of the
flange all the way around the vent.
THIS COMPLETES THE ROOF TOP PORTION OF THE INSTALLATION
NOTE:
Re-apply 12 volt vehicle power. The
MAXXFAN
, excluding the 4301K and 4401K models, will
emit a beeping sound to indicate power is properly connected. In addition, the Remote Control model
will automatically close the vent cover. If the
MAXXFAN
does not beep when power is connected, go
back to step #3. Confirm that proper connections were made and 12 volt power is on and available. This
MAXXFAN
incorporates a self-resetting fuse on the circuit board located in the ceiling assembly. It can
be reset by removing and re-applying power. If your fan fails to operate or needs reset, contact Customer
Service at 316.832.4357 for assistance or solicit the aid of an electrical technician.
FOR REMOTE CONTROL MODELS:
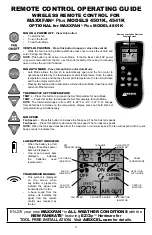
Please refer to the REMOTE CONTROL OPERATING GUIDE
in this manual for use and testing of your remote control. Install two AAA batteries, follow instructions,
aim remote at the ceiling unit and test your fan. The Remote Control comes with a cradle for wall mount
storage of the Handheld Remote Control. Mount the cradle to your wall using the screws provided.
INSTALLATION INSTRUCTIONS - ALL MODELS
2
5
4


